

Original text by Marina Belova
I found an old sweater and decided to practice digitizing and embroidery on thick and textured knits. It's out of season now, of course, but you use your old garments to explore new techniques.
Basically, one look at this fabric makes clear what you'll have to face:
- A textured, very uneven embroidery surface.
- Puckering.
- Difficulty in matching the outlines and objects to each other.
- Sinking of the stitches and small elements.
The pliability of the fabric should not be damaged. This "bullet-proof vest" is the result of my first attempt:
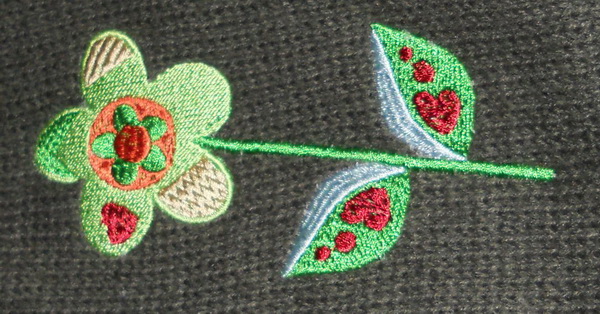
To make up for the extra density, nothing was displaced.
When you've defined your goal, it becomes apparent exactly what you'll need to do during digitizing and embroidery.
Here's the embroidery technique:
- Everyone I read recommends to hoop thick knits instead of gluing them. But the hooping process should be slightly different from the usual, and you need to be very careful so as not to screw the hoop too tight, otherwise the hoop marks will appear.
- Knits should be hooped only slightly, the rings of the hoop should not fit tight, they should not be fixed.
- Hoop the knitwear together with the stabilizer. As the custom goes, a heavy-weight tear-away stabilizer or a spunbond (non-show mesh) is suggested for knits. But you can use an organza of a matching color if the knitwear has many openings and there is a possibility that the stabilizer will show through. You can additionally sprinkle it with a temporary spray adhesive.
- In order to prevent hoop burn, you should either wrap the hoop as I showed here or use cigarette paper/soft thin cloth between the fabric and the outer ring of the hoop.
- Only after that, you can tighten the screw.
- Put a water-soluble on top and, preferably, hoop it.
- Embroider the design.
- Loosen the hoop screw and take your item out.
- Whether you need to stretch the knitwear, depends on the circumstances. If it will be stretched in wear, you need to stretch it in the hoop as well, and if not, leave it as it is.
- The choice of a point type is defined by the thickness of the knitwear but in any case, a point should be rounded, ranging from the light ball point to the heavy ball point type. Use #70/10 – 75/11 needle (for #40 threads).
- Soft threads (rayon, cotton) are preferable.
Digitizing a design from scratch or modifying an existing one is very similar to digitizing for loop fabrics and is based on the following principles:
- For thick knitwear, choose designs of the openwork variety that don't contain big objects, and on a more loosely knit one, heavier designs may come out good.
- Sequence your embroidery from the center outwards.
- The objects should not contain the elements that are too thin. Satins should not be wider than 7–8 mm and narrower than 1.8 mm. Simple, bold letters without hair-strokes are preferable.
- When the stitches are over 8 mm it is necessary to compulsorily split them or apply short filling stitches to this object.
- Consider increasing pull compensation up to 20–30% of the stitch length.
- Better to manually digitize your underlays and not use the automatic option:
- Put an edge run under the satins.
- Put an edge run + double zig-zags under thick satin columns.
- Put an edge run + a full grid at a different stitch angle from the one in the main layer under the fills.
- Density should be set at 0.35–0.45 mm.
- To prevent the stitches in the small letters from sinking into the fabric, you may put a low-dense fill under them (analogous to a full grid).
- You should increase the amount of overlap between the segments to 2 or 3 rows at least in order to avoid gaps between the stitches. You also need to make certain that the fills are embroidered in one direction. Read more about it here.
In my opinion, one should not cut down on color changes, for it is better to finish one object before embarking on another instead of embroidering all the objects of the first color, then all the objects of the second color, and so on, like I did and got my dark green outlines displaced as a result:
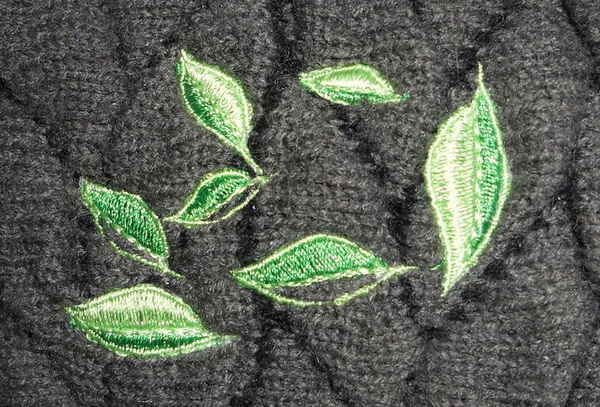
But for the first time, the embroidery looks quite decent.
I came to a conclusion that you can do anything after a few test pieces, and all of the mistakes I made could be corrected without difficulty.
Edited by Irina
-
 1
1
There are no reviews to display.