The Little Bag That Holds Everything That Matters

By diver361 in Master classes and instructions
· 160 views
The Little Bag That Holds
Everything That Matters
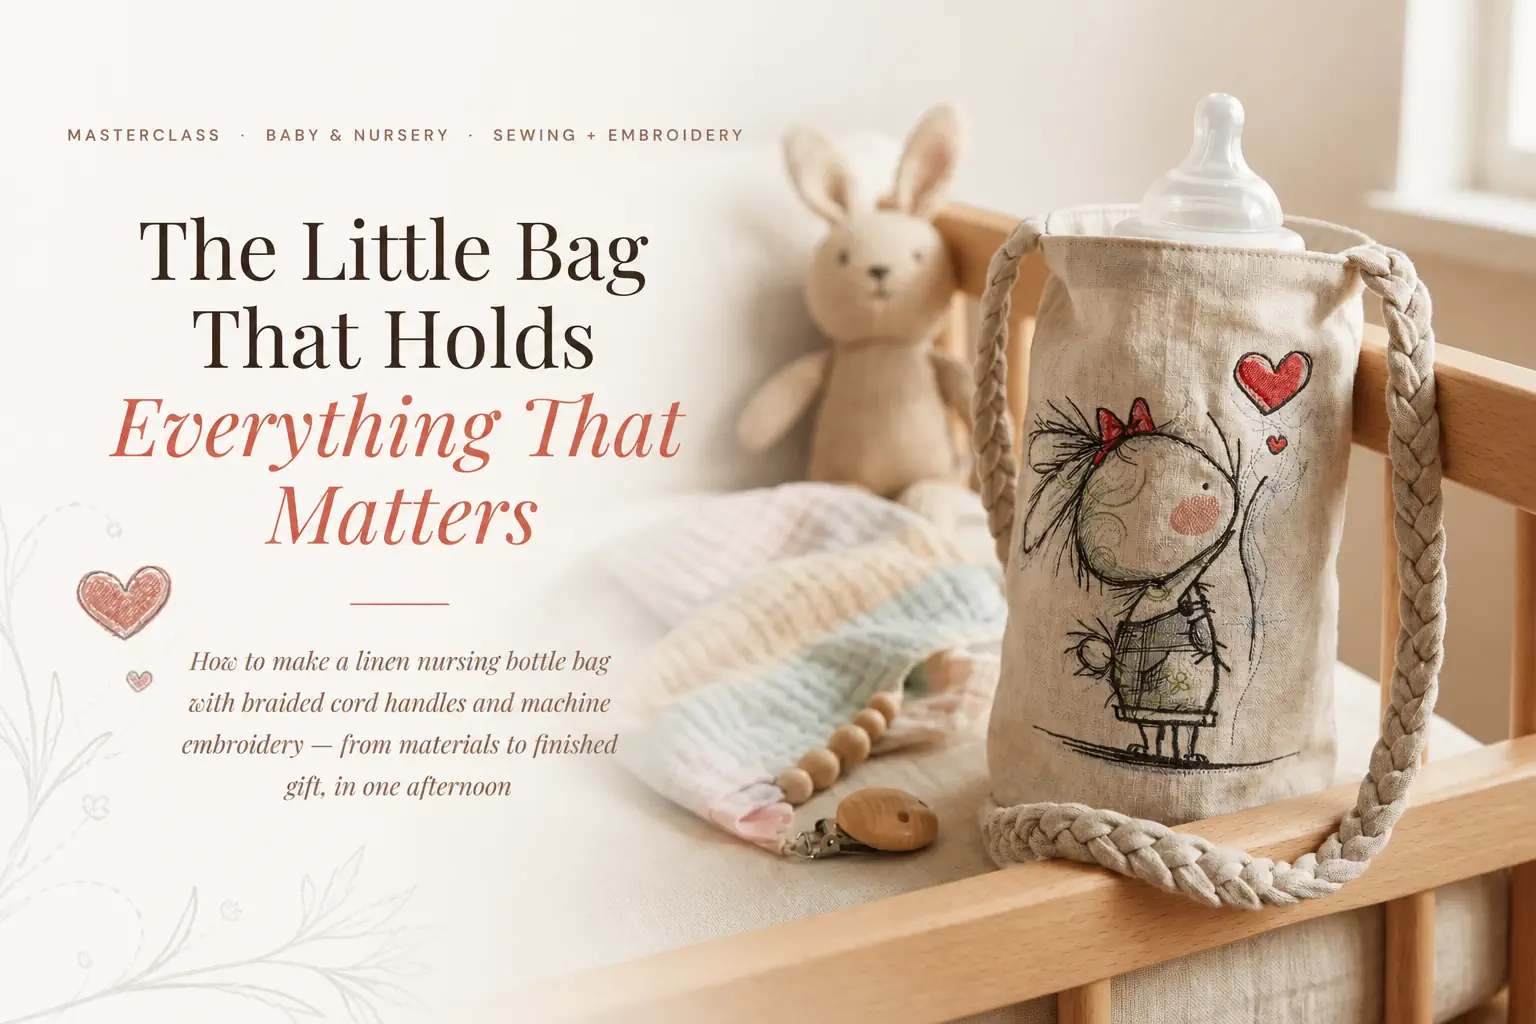
How to make a linen nursing bottle bag with braided cord handles and machine embroidery — from materials to finished gift, in one afternoon
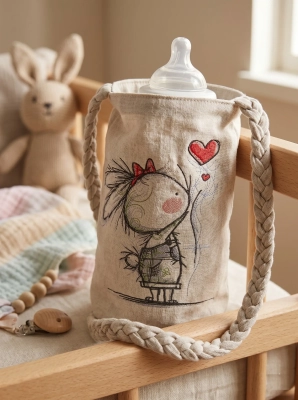
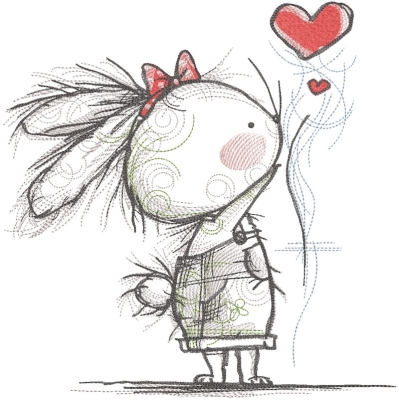
A nursing bottle that disappears into a bag. A bag that disappears into the nursery. A little embroidered bunny on natural linen, holding a heart-shaped balloon up toward the sky — as though offering it to whoever reaches for it.
This is one of those projects where the making is an afternoon and the result is something the family keeps for years. The bag itself takes two hours to sew — a simple tube of linen with braided cord handles, lined, finished with a casing at the top. The embroidery takes another hour. Total material cost: under $15. Perceived value as a baby shower gift: considerably more.
This guide gives you everything: the exact materials with where to buy them in the US, the cutting dimensions, the embroidery placement, the sewing sequence, and the details that make the difference between a functional bag and a beautiful one.
What you need — and exactly where to get it
Medium-weight natural linen, 150–200 g/m²
You need approximately 0.5 yard (46cm) for both the outer bag and lining. Natural undyed linen in this weight is stable enough for the bag structure, takes embroidery beautifully, and has that relaxed texture that looks entirely at home in a nursery. Pre-wash before cutting — linen shrinks 5–7% on first wash.
Fabrics-store.com — OEKO-TEX certified European linen, natural and ecru tones, $8–14/yard depending on weight. One of the largest linen inventories online, ships from US warehouse. Highly recommended by the embroidery community.
fabrics-store.com
Etsy — LinenDreamShop — Pre-washed OEKO-TEX natural linen from Latvia, 140–240 g/m² options, from ~$9/yard with free samples available.
linendreamshop.com on Etsy
8–10mm braided natural cotton cord, ~1.5 yards total
The thick braided handle is one of the key visual elements of this bag — it should be soft, substantial and natural-coloured to match the linen. You need about 1.5 yards (135cm) total: two handles of approximately 65cm each. 8mm diameter gives the chunky, textured look shown in the photo without being too stiff to carry comfortably.
Amazon — Natural Cotton Macrame Cord — 4mm–10mm braided and twisted natural cotton cord available in multiple lengths. Search "8mm natural braided cotton cord" — multiple sellers, typically $8–12 for a roll with more than enough for several bags.
Search on Amazon
Etsy — CraftandBeadsUSA — Made in USA, 100% cotton, hollow braided, 8mm and 10mm, natural undyed colour. Free of chemical dyes, biodegradable. Approximately $4–7 for a coil with more than enough cord for this project.
etsy.com/listing/572014194
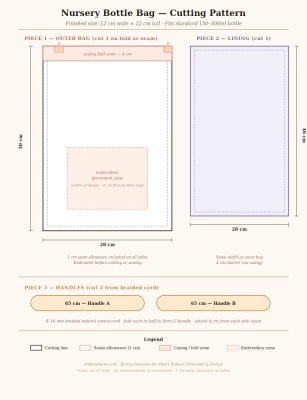
Cutting guide
Finished bag size: 12cm wide × 22cm tall. Fits a standard 150–300ml nursing bottle.
| Outer bag (linen) | Cut 1 piece: 28cm wide × 50cm tall (includes 1cm seam allowance + 4cm casing at top) |
| Lining (same linen) | Cut 1 piece: 28cm wide × 46cm tall |
| Cord handles | Cut 2 pieces: 65cm each (adjust for shorter/longer shoulder carry) |
Note: These dimensions make a snug bottle holder. For a looser fit or larger bottles (up to 500ml), increase width to 32cm.
Step-by-step construction
Pre-wash and press the linen
Wash the linen on a cool cycle, tumble dry on low, press flat. This removes sizing and completes shrinkage. Cut your pieces after pressing — never before.
Embroider BEFORE cutting or sewing
Work on the full outer piece while it is still flat and uncut. Position the design centred horizontally, with the bottom of the bunny approximately 6cm from the bottom edge of the fabric (this places it in the lower half of the finished bag, clear of the casing). Hoop tear-away stabilizer, spray-baste the linen flat, stitch at 80% speed. Trim stabilizer after stitching, press from the reverse.
Sew the outer bag
Fold the outer piece right sides together to form a tube. Stitch both side seams with 1cm seam allowance. Press seams open. Stitch across the bottom. Clip the bottom corners diagonally to reduce bulk. Turn right side out.
Sew the lining
Same as the outer bag: fold right sides together, stitch side seams and bottom, clip corners. Leave the lining wrong side out. Do not turn.
Attach the handles
Fold each cord piece in half to form a U-shape handle. Pin both ends of each handle to the top edge of the outer bag (right side facing up) — one handle on each side, ends aligned with the sides of the bag, approximately 4cm from each side seam. Baste in place. The handle loops hang down inside the bag at this stage.
Join outer bag and lining
Place the outer bag (right side out, handles tucked inside) into the lining bag (wrong side out). Right sides face each other. Align the top edges and side seams. Pin carefully. Stitch around the top edge with 1cm seam allowance, leaving a 6–8cm gap on one side for turning. Turn through the gap. Poke out the corners. Press.
Finish and topstitch
Slip-stitch the turning gap closed. Push the lining down into the outer bag. Press the top edge so the seam sits right at the folded line. Topstitch around the top edge 2–3mm from the edge using a slightly longer stitch length (3.5mm) — linen looks cleanest with a confident, visible topstitch in matching thread.
Expert notes — the details that make the difference
The design used in this project
Made this bag? Share it in the gallery!
Recommended Comments