
Search the Community
Showing results for tags 'craft techniques'.
Found 4 results
-
Version Any popular format
204 downloads
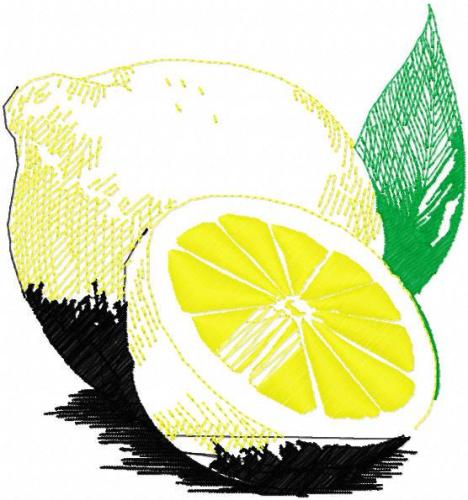
size: 5.07 x 5.43' Author: Natalia Fomina Brighten Your World with Lemon Embroidery Sunshine in Every Stitch: Discover the vibrant charm of our Lemon Free Machine Embroidery Design, a delightful addition to any fabric. Each stitch is a ray of sunshine, bringing a fresh zest to your home decor or wardrobe. Imbue your linens, garments, and accessories with the joyful essence of sun-kissed lemons, transforming ordinary items into extraordinary treasures.- 2 comments
-
- 8
-

-

-
- embroidery for all
- fabric decoration.
- (and 20 more)
-

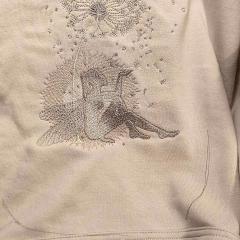 Enchanting Fairy Embroidery Elegance: A Magical Stitch Discover the wonder of delicate stitches with Fairy sitting under a dandelion embroidery design. This design brings the magic of fairy tales right into your hands, perfect for those who cherish the whimsy and elegance of nature intertwined with folklore. The intricate details capture the serene moment of a fairy in repose under the ethereal beauty of a dandelion, turning any fabric into a canvas of enchantment. Craft Your Own Fairytale Embark on a creative journey with this enchanting embroidery design. Whether you're adorning a child's blanket, personalizing a tote, or adding a touch of magic to your home decor, this design promises to transform the ordinary into the extraordinary. It's not just an embroidery; it's a gateway to a world where your creativity breathes life into fairy tales. A Gift That Speaks Volumes Looking for a heartfelt gift that goes beyond the conventional? This fairy and dandelion embroidery design is a thoughtful and unique choice. It's an ideal present for those special people in your life who appreciate the beauty of handmade crafts. Stitched with love, it conveys a message of care, creativity, and the warmth of personal touch.
-
- 1
-
-
- thread art
- needlework
- (and 23 more)
-
View File Lemon free embroidery design size: 5.07 x 5.43' Author: Natalia Fomina Brighten Your World with Lemon Embroidery Sunshine in Every Stitch: Discover the vibrant charm of our Lemon Free Machine Embroidery Design, a delightful addition to any fabric. Each stitch is a ray of sunshine, bringing a fresh zest to your home decor or wardrobe. Imbue your linens, garments, and accessories with the joyful essence of sun-kissed lemons, transforming ordinary items into extraordinary treasures. Submitter Berez Submitted 03/28/2024 Category Fruits and Vegetables
-
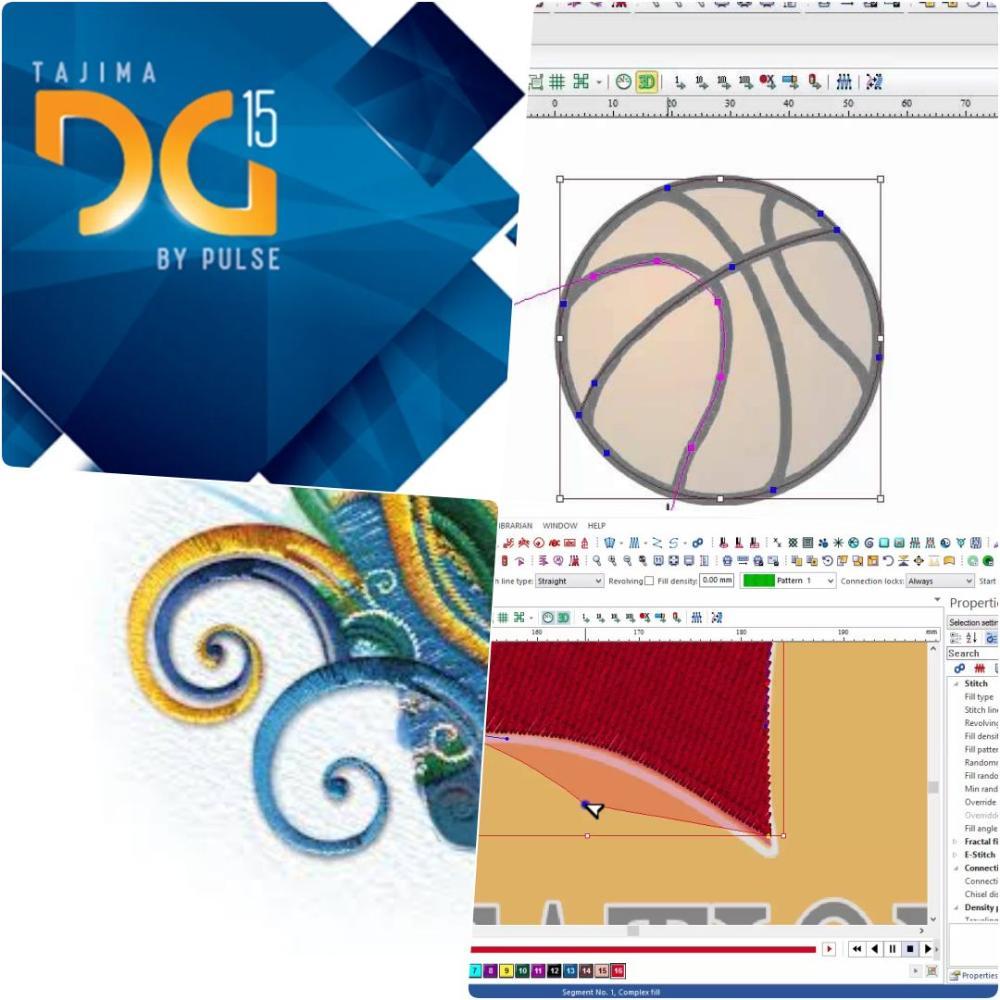 Embroidery Digitizing Borders This week we will look at digitizing borders for your designs, there are some methods and tools you can use to make the borders with, compensation and underlay types you should be using Embroidery digitizing methods There are two types of borders that you will need to make, the uniform border, which is the same thickness around the design, and the variable border which changes thickness. Uniform Border. This type of border tends to go around patches or similar designs, this border can be made with a steil stitch or a satin stitch Variable Border: You will need to use the satin stitch to make the border Some lower versions may not have the (STEIL) border tool, it looks like so in your software, I have also shown the satin tool. There are (2) main methods for making either of the stitches.. (1) the freehand mode drawing the shape manually. and (2) is converting it from artwork. For shapes like circles and very uniform objects, I use vector tools to make the shape and then convert it to stitches, but it will depend on the shape. Background To better understand the different thicknesses, I recommend you sew out a sample of the different stitches on the fabric you digitize to get an understanding of how thick the result will be. When sewing your samples out make sure you have some compensation and underlay for the stitches as it will affect the size and clarity of the stitch. Embroidery underlay & compensation When sewing out border stitches or any column stitch it's recommended that you use an underlay that is opposite to the direction of the stitches. This will make the column push out evenly, if you use a zig-zag stitch the column will often become tighter and shrink when embroidering. It's also important to add enough compensation for the shrinkage of the stitch. Underlay types Below is an example of the different underlays that you will have available in your software. Border layers Depending on the design you may want to put your border onto or on the bottom of the design, I often use it to smooth out uneven stitches like in the example below. Fills often leave an unfinished edge and a satin or a steil can clean that up to look smooth. When using the border underneath the thickness can be wider and have 3/4 of the border under the design and only 1/4 sticking out to blend with the design. When using it on top of the design you will need to make sure it hides the design when embroidered often there will gap between the border and a fill as the push and pull effect, especially in corners. Make sure your artwork is clear enough that you can see the borders on the design as it will often dictate whether you put it on top or underneath the logo, some borders are decorative and others are functional. You often will need to sew out the design to gauge the thickness of the border. TRICK I often will add a manual underlay to the fill and the border, this helps prevent the fill from detaching from the border on some sew-outs. See Below. This can be made with the run toll or a complex fill with very low density, I would make this underlay opposite the fill stitches. This causes the underlays to overlap building a better foundation for the top stitches. This wraps up this blog on adding borders, sewn out the different steil stitches, and keeping it on hand when you digitizing for your logos it will be a great guide.
-
- 1
-
-
- thread work
- tajima pulse software
- (and 8 more)
