
Original text by Marina Belova
Compensation (or Comp) is a stitch object property around which a great number of myths, mysteries, and puzzles have emerged. Let's try and figure out what it is.
Compensation: generalities
Compensation is a deliberate distortion of the shape of the objects in an embroidery design at a digitizing stage. This distortion serves to prevent the appearance of various defects during the embroidery: gaps between the object outlines and shape deformation (circles becoming ovals and squares turning rectangular).
There are 2 main types of shape deformation:
- Pull — decrease of the object thickness in the stitch direction.
- Push — object elongation in the stitch direction.
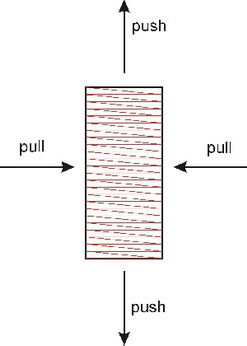
Outline distortion is a result of the upper and the lower threads interacting with the fabric when changing the stitch direction during the embroidery.
In this article, we'll cover pull compensation only.
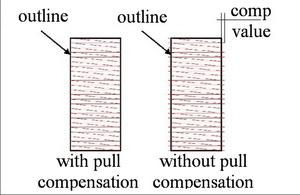
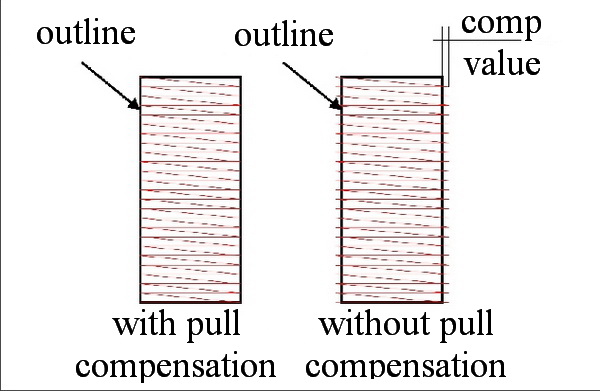
Pull compensation
There are 3 ways of adding compensation to the object:
- distort the shape manually by digitizing an object wider than it is in the original design
- adjust the respective parameter in the embroidery software
- combine the previous two options
I want to point out that to do the first one you need to have a vast experience and a trained eye.
Many western sources state that the option #3 is the most effective. They think that compensation should mostly correct shape distortion during digitizing. Adding some automatic compensation will allow adapting the design for various kinds of fabric.
A second way where compensation is added automatically is much easier and much more obvious.
There are 2 methods of adjusting the automatic compensation value:
- absolute (fixed) value in millimeters
- on a percentage-of-stitch length basis
Some embroidery editors have additional options for compensation:
- you can choose to compensate only one side of the design
- you can compensate in one direction only (X or Y — Tajima DGML by Pulse has such an option)
What determines the compensation value and how can it be adjusted?
- type of fabric: the thinner and softer is the fabric, the more compensation it requires compared to the thick, densely-woven fabric
- upper and lower threads tension regulation on your machine
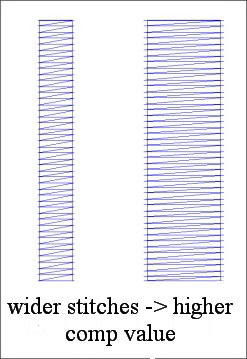
- the size of the embroidery area. The thicker is the element, the more compensation it needs the density of the embroidery. The higher is the density, the higher is the compensation value
And the last thing that everybody is interested in: what are the benchmark pull compensation values?
Ways of adding pull compensation:
- set it at the value of 0.1—0.4 mm. I've heard that 0.4 mm value is good for standard situations.
- adjust compensation on a percentage basis for sharp and straight corners to make them more clearly defined
- when joining two objects make them overlap no less than 1 mm by hand or with the help of the compensation adjustment option.
- too much compensation may damage the outer look of your embroidery and even lead to distortions
Of course, these parameters are only nominal and can be used as a starting point for design creation. Compensation is not a science, therefore, you cannot tell which value is the most optimal. You can always find the right value by doing test samples. You can read here why you should test every design.
In the following article, I will continue on the subject and will describe push compensation.
-
 1
1
There are no reviews to display.