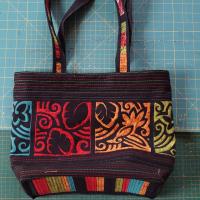
The “Hawaiian” bag
It’s spring, at last, the sun comes out more and more frequently and twinkles between the tree branches. Soon, the emerald-green verdure will appear and nature will dress in the rainbow colors. Time has come to sew a new vibrant-colored bag for the spring-summer season. Read this step-by-step tutorial to know how.

For this job, you’ll need:
- ScanNCut – an electronic cutting machine
- Iron-on contact sheet for the appliqué
- A piece of black fabric 82 x 50 cm
- Two brightly colored zippers, each 18°cm long
- Hot melt glue voluminous adhesive for making the bag harder
- 4 pieces of bright sole-colored fabrics 15 x 15 cm each
- 4 appliqué printouts, 13 x 13 cm
- You can download them on the Web
- Black and colored sewing threads
The “Hawaiian” bag: cutting out the panels
Cut the panels of the future bag out of the black fabric:
- 4 pieces,15 x 15 cm each, for the appliqué
- 2 pieces, 62 x8 cm each, for the bag's top and bottom
- 1 piece, 23 x11 cm, 1 piece, 23 x 8 cm, 1 piece, 23 x12 cm, for the insert on the back side
- 4 pieces, 23 x 12 cm each, for the pockets
- 1 piece, 82 x5 cm, for the top of the bag
- 2 pieces, 70 x 10 cm each, for the handles
The “Hawaiian” bag: preparing the fabric for ScanNCut
Take an iron and press the hot melt glue backing to the wrong side of the 15 x 15 cm piece of fabric; the sticker with a picture of an iron should be facing up.


After the fabric has cooled, peel off the protective paper from the wrong side of the fabric. Secure the fabric on the cutting mat and do the test cut (blade length 5, pressure 3). If the test cut was successful (the fabric was cut and the mat wasn’t), proceed to the next step.


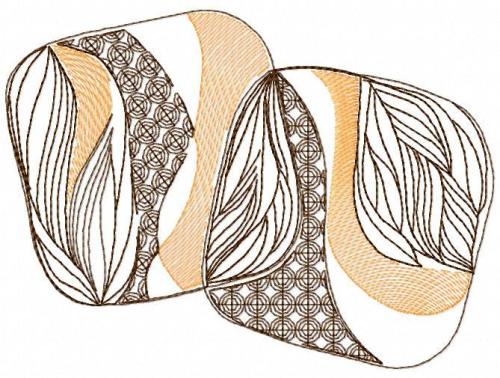
Stick the printout onto your mat. Select Direct Cut. The machine will scan the surface of the mat and the image will appear on the screen. Select the image No 3 and save it.


Now go to the Saved Objects and open the saved file on your screen. Check if the image was scanned correctly. Sometimes the machine adds extra dashes and lines while scanning. Select them and press Del.
Secure the fabric and scan the surface of the mat. Place the image so that it doesn't cross the edges of the fabric. Cut.


Using a spatula, designed specifically for this purpose, detach the fabric from the mat. You can make two appliqué pieces from this cutout. I used the outer side for my bag. Put the appliqué piece on top of the bright sole-colored fabric and iron it. In the same fashion, cut the rest of the appliqué pieces and press them with the iron to the fabric.


Position all four pieces edge-to-edge. This will get you a rectangle 60 x 15 cm in size. Cover the edges with a black strip of fabric 1 cm wide. Iron the strip.

The “Hawaiian” bag: appliqué
Select the quilting mode on your machine. Choose the buttonhole stitch or something similar. Stitch the appliqué with black threads perimeter-wise.


Press it with the iron and trim the edges.

The “Hawaiian” bag: sewing the bag
Prepare the back panel. Sew the patches and zippers to it. On the wrong side, sew the pockets to the zippers.


Sew two strips of black fabric, 62x8 cm each, to the top and bottom of the appliqué. Attach the inset with the pockets to the bag and draw the lines for stitching 1 cm apart.

Stitch with colored threads as marked. Fold the panel so that it makes a circle and stitch.


Pin the handles to the top edge. Sew the border, stitching along the edge on the right side of the bag.


Prepare the bottom of the bag. You can sew it from the appliqué leftovers. Sew the bottom to the bag.


Add the lining and the bag is ready.

Original text by Olga Milovanova
Edited by Irina
-
 2
2