
Original text by Marina Belova
Before now, I've never thought about reducing the stitch count in order to cut production costs. But now it's time to begin. In addition to the economic reasons that may be expressed through the formula: lower stitch count = embroidery process acceleration, reducing the stitch count makes the design look better. And it reduces the distortion of the fabric, too.
There are many ways of lowering stitch count in the design without sacrificing the quality of the embroidery; for example:
- Increasing the lengths of the underlay and connector stitches
- Increasing the stitch length in the objects that contain split stitches (satin stitches with patterns, fills)
- Lowering the density of the satin stitches and fill stitches
- Replacing the standard monolithic fill patterns with motif stitches
- Making the design simpler: replacing the satin stitch outlines around the Tatami fills and with the running stitch outlines and removing the unnecessary details.
- Placing an appliqué in the large surface areas, outlined with zigzag stitches
- Using a thicker thread, which allows to substantially decrease the density
- Deliberately changing the design so that a part of it will not be embroidered. For example, deleting the background fill so that the fabric will work as a backing.
- Reducing the number of trims and color changes
- Replacing some pre-digitized fills for the ones digitized manually
All of these methods are based on changing the design manually and not with the help of various options in the software like Outline Processor or Process.
Let's look at some of these recommendations more closely:
1. Underlay stitches and connector stitches lengths
By default the running stitch even in different editors is 2—3 mm long. This is the perfect length for the outlines, but it is too short for the understitching. Without any hesitation, you can make the underlay stitches 4—5 mm long, and that will lower the underlay stitch count by 40—50%. This will not work well with the narrow stitch columns less than 2 mm wide. But in other cases, you should not lose the opportunity to increase stitch length.
2. Density
It's better not to use the dynamically varying stitch density in order to save up on stitch count, but set the right density value manually, in accordance with the size, color and type of the fabric. But to do that you'll have to work hard, using both your hands and brains because every object containing stitches of varying size needs to be split into several pieces. Each one of these parts will have its individual embroidery parameters.
If you have more that one layer of stitches, you'd better not forget to lower the density of every new layer by no less 10%.
It's also advisable to increase the fill stitch length by at least 25% as compared to the default value. But you'll need to do a test run after a change like that.
3. Trimming and color change
One should reduce the number of trims and color changes. All of these operations require time that equals to embroidering 130 and 65 stitches, respectfully. Why so many? Because the machine lowers its speed before every trim, and then has to accelerate again.
Besides, every trim calls for the tie-off at the beginning and the end of the objects. And even taking into consideration that a tie-off contains only a few stitches, but, if you have lots of them, it means additional stitches.
4. Making the design simpler
The easiest you can do is remove the satin stitch outlines or replace them with the running stitch ones. You should be careful doing this: running stitch outlines are considered the most complex of all. It is extremely difficult for them to hit the right spot, without gapping and overlapping. Difficult, but not impossible.
The machine embroidery design of your choice may contain a large number of details. You should define the size of these details when assessing the image. For example, it is recommended to embroider details that are less than 1 mm in size with running stitches or remove them altogether.
5. Replacing the pre-digitized fills with the ones digitized manually
Not so long ago I had a vital necessity of saving the stitches, for we outsourced the embroiderers for a huge project. And the embroiderer, as you know, is paid per thousand stitches. Therefore, we needed to reduce the stitch count to fit the budget.
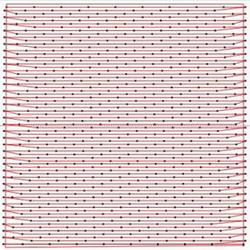
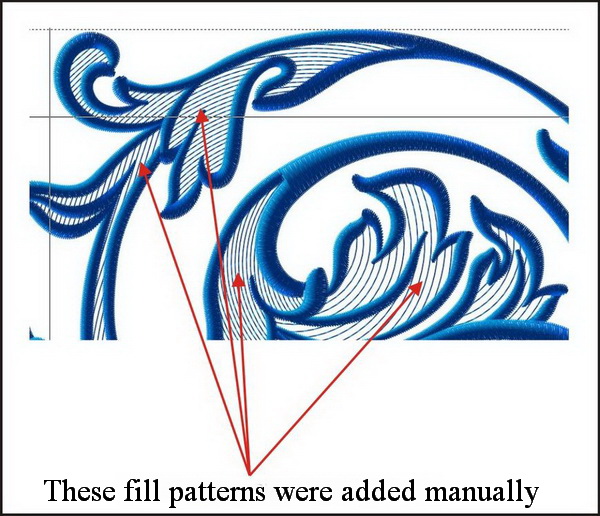
My design had 83000 stitches. So I had to select the elements manually, throwing away everything I could spare. I managed to save the largest number of stitches by manually changing the motif patterns. The pattern was ultimately simple: one layer of running stitch curves.
So, I decided to get rid of the already existing pattern, add a new one manually, and digitize it with the running stitch. The resulting cut in the stitch number was about 20-25% for every object. What was especially good was that when you drew the stitches manually on the already existing pattern, you could see in what places you could do without it at all, and lower the stitch count even more. Thanks to these easy manipulations I managed to save about 12000 stitches.
So much for you stitch count algorithms. Often your own two hands are better that any automatic device. The only disadvantage of this method is that it takes a bit more of your time.
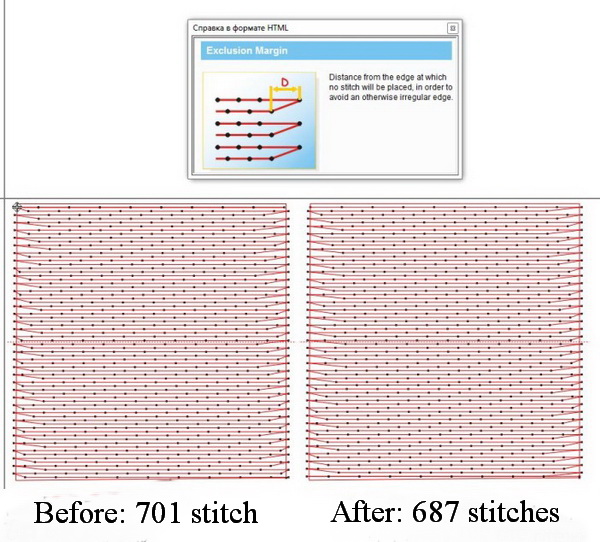
P.S.: I just remembered another method of saving the stitches, which I use. I slightly move the edges of the fills. This option has a different name in different editors. For example, in Stitch Era, there is Exclusion Margin, and in Tajima the similar option is called Critical Zone. With it help you may eliminate about 3% of stitches by simply moving the fill pattern 1 mm from the edge, the alteration being almost invisible to the eye.
Together with the aforementioned methods, it will help you to make the design much simpler and lower the production costs.
-
 1
1
There are no reviews to display.