Search the Community
Showing results for tags 'software'.
-
 Demo version of Brother professional machine embroidery software for digitizing.. Direct download Warning: You can create embroidery design and print, however, also you cannot save the design and send to embroidery machine. When installing, please use the following number for the Hardware key. Key Number: 1111-1111-1111-1111 Version 2.21 BE100V221ENU.zip
 -
Version ECF
419 downloads
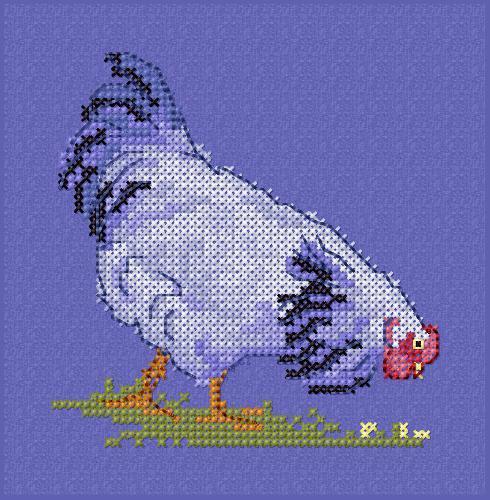
Cross stitch editable file for Embird cross stitch software. Original machine embroidery deisgn available here- 1 comment
-
- 2
-

-

-
- chicken
- cross stitch
- (and 4 more)
-

Version 1.0.0
26 downloads
The attached files will allow you to use the Fil-Tec Glide 40 Polyester colors of embroidery thread with Brother PE-Design 11 software, and likely other versions of Brother PE-Design. There are over 370 colors available, and included in this list.The last 11 colors in the list have “odd” color numbers and DO import into Brother's PE-Design, but the actual colors numbers (containing letters) do not. The colors CAN be used in digitizing along with all of the other Fil-Tec Glide 40 Polyester colors, following the directions that I put together and have attached. I really enjoy using the Glide threads, and have taken the time to put this list together for myself, and figured other people might as well have access to it as well. I am not affiliated with Fil-Tec in any way, and get nothing out of this, other than being happy to contribute something to the embroidery community. If you ever have questions about using these threads I’d contact Fil-Tec.They have gone out of their way to answer questions I have had.- 1 comment
-
- 1
-
-
- how to
- documentation
- (and 3 more)
-
Version EMB support
666 downloads
Embroidery software allows the user to view many different types of design files while also allowing the user to resize the designs and a preview function for potential customers etc. Features: Reading and converting popular formats Resizing and rotating designs Opening and saving .EMB files View multiple colorways In fact, this is an ordinary converter with rather limited functionality and capabilities. There is no way to combine multiple designs together. Also, stitches in machine files are not recalculated when scaling. At the same time, it works quickly and does not slow down. There are enough formats available for work. Therefore, for converting files and rotating designs, this is a very good program and will be useful for many embroiderers.- 2 comments
-
- 3
-
-

-
- wilcom
- true sizer
- (and 4 more)
-
Design machine embroidery is a technique that transforms plain fabrics into vibrant and unique pieces of art. The intricate designs that adorn these fabrics are achieved through the use of embroidery machines and software that provide limitless possibilities for creativity. One popular design category for embroidery enthusiasts is animals, and with the availability of a vast selection of animals embroidery designs, choosing the right design can be a challenging task. Fox and dreamcatcher embroidery design 4 In this article, we will explore the world of animals machine embroidery designs, highlighting the key factors that every consumer needs to consider when selecting the perfect design for their project. From the type of fabric to the complexity of the design, we will provide useful insights that will help you make an informed decision. So, let's dive in and explore the exciting world of animals designs machine embroidery. Types of Animals Machine Embroidery Designs There are many different types of animals designs machine embroidery to choose from, ranging from simple outlines to intricate and detailed designs. Some of the most popular designs include: Pua and Heihei embroidery design Cartoon Animals Cartoon animal embroidery designs are perfect for children's clothing, accessories, and home decor. These designs are typically bright and fun, featuring characters from popular animated movies and TV shows. Lion cub with green eyes embroidery design Realistic Animals Realistic animal embroidery designs are more detailed and accurate in their depiction of animals. These designs are perfect for creating realistic images of pets, wildlife, and farm animals. Sphynx cat geometric pattern embroidery design Abstract Animals Abstract animal embroidery designs are perfect for adding a touch of creativity and uniqueness to your projects. These designs feature stylized or simplified versions of animals, often with bold colors and patterns. Factors to Consider When Choosing an Animals Machine Embroidery Design Choosing the right animals embroidery can be a daunting task, but there are some key factors to consider that will make the decision easier. Unreal lion embroidery design Type of Fabric The type of fabric you plan to embroider on will determine the type of design that is suitable for your project. Thinner fabrics such as silk and satin require less dense designs, while thicker fabrics such as denim and canvas can handle more intricate and detailed designs. Design Complexity The complexity of the design will determine the amount of time and effort required to complete the embroidery. Simple designs are perfect for beginners, while more complex designs are best suited for experienced embroiderers who are looking for a challenge. Lion's look embroidery design Color Scheme The color scheme of the design should match the color of the fabric and the intended use of the finished product. Bright colors are perfect for children's clothing and accessories, while more muted tones are suitable for home decor items. Bunny the ballerina embroidery design Size of the designs machine embroidery The size of the design should be appropriate for the intended use of the finished product. Large designs are perfect for home decor items such as wall hangings, while smaller designs are better suited for clothing and accessories. Colored deer embroidery design Top Animals Embroidery Designs for Different Projects Animals Embroidery Designs for Children's Clothing For children's clothing, cartoon animal designs are perfect. Designs featuring popular characters such as Mickey Mouse, Winnie the Pooh, and Dora the Explorer are always a hit with kids. These designs are typically bright, colorful, and easy to stitch. Animals Machine Embroidery Designs for Home Decor For home decor items such as cushions, wall hangings, and table runners, realistic animal designs are perfect. Designs featuring birds, butterflies, and wild animals such as lions and tigers are popular choices.
-
 Machine Embroidery is a timeless art that has evolved from hand stitching to modern machine embroidery. Digitizing embroidery designs, the process of converting an image or artwork into a digital embroidery design, is an important step in producing high-quality embroidered items. However, with so many options available, it can be overwhelming to choose the right digitizing software. In this guide, we'll share some essential considerations to help you make an informed decision. Choosing the Right Digitizing Software When selecting digitizing software, you need to determine the features that meet your needs. Here are some important factors to consider: File Formats: Check whether the program creates and saves the file formats that your embroidery machine can read. It is critical to ensure compatibility between your software and machine. Pricing: Digitizing software prices can vary significantly, from a few hundred dollars to more than $15,000 for professional-grade software. Consider your budget and requirements before investing in a program. Add-ons and Ad-vanced Versions: Most machiine embroidery digitizing software comes with basic features and add-ons or advanced versions that provide additional capabilities. Decide whether you need these extras or not. Support and Training: Look for programs that provide adequate support, training, and updates. User-friendly software with excellent customer support can save you time, money, and frustration. Auto Digitizing Function: Some software comes with an "auto digitize" function that automatically converts artwork to embroidery design. However, this feature may not work well for complex designs, and you may need to tweak the settings manually. Conversion to Multiple Formats: If you plan to sell your embroidery designs, it's important to convert them to multiple file formats. Not all programs can meet this requirement, so verify before investing. Density and Other Adjustments: A good digitizing program should provide easy-to-use density, pull compensation, underlay, and other adjustment tools to help you produce high-quality designs. Undo Steps: Digitizing requires attention to detail, and sometimes, you may need to undo a few steps. Consider a program that provides a sufficient number of "undo" steps or allows you to save designs at different stages. Fonts: Determine the number and types of fonts available in the software. Check whether you can use TrueType fonts and whether they can be digitized automatically. Brick and Mortar Sales: Finally, if you plan to purchase software from a physical store, be aware that salespeople may pressure you into buying a product that may not suit your needs. Do your research, and go in prepared. In Conclusion Digitizing embroidery is an essential process that can help you produce beautiful embroidered items. When selecting software, make sure to consider the factors we've discussed in this article. The right software can help you create stunning embroidery designs that stand out from the crowd.
-
- 2
-
-
-
- auto digitizing function:
- file format
- (and 6 more)
-

Image processing in Pattern Maker
Irina posted an article in Machine embroidery materials and technology
 The process of creating Cross Stitch designs in the Pattern Maker software can be based on the image that you've created or found on the Web. Learning how to load an image into the editor will be your first step towards creation of the design. Working with images is a pretty complex subject, so during this lesson, probably, some additional questions will arise that we don't cover here. We'll try to answer them in our next articles. 1. Open your editor, move the cursor over the File — Import Images and select one of the suggested options in the drop down list: Import Into New Pattern — import the image into the new document. Import Into Current Pattern — import the image into the current document. If you have an open document with an unsaved project, it's better to choose the first option. Otherwise, when importing the image, your previous work will be lost. 2. At the next stage, the Image Improrting Wizard will suggest choosing a way of importing the image. To choose one of the options check the box to the left of the name. Use an existing image — you can use the image stored on your hard drive or some other device. Click Browse and select the image in the window that opens. Scan a photo — when choosing this option the Scan button will become active, and you will be able to launch an image scanning program. Use the image on the clipboard — use the image from the clipboard. Having figured out how to load images, click on Next and move to the next step. A footnote: The format — Pattern Maker recognized bitmap and vector image formats. The main bitmap formats you are going to encounter are *.bmp, *.jpg, *.gif, and vector ones are *.emf, *.wmf, *.eps. What do the words "bitmap" and "vector" mean we'll explain in our next articles. Meanwhile, you should remember that the file name consists of two parts: the name of the file and its format. The format is a sequence of characters added to the name and intended for recognition. The software recognizes the following formats: *.bmp, *.jpg, *.tif, *.gif, *.pcx, *.wmf, *.emf*.eps, *.tga, *.png, *.ras, *.pct, *.pcd Clipboard — the part of RAM memory where data in various formats can be temporarily stored for further copying or moving them to the other applications or to another part of the same application. To send an image to the clipboard just open it with any image viewer and press PrtScn. As a result, everything that you just saw on the screen, will go to the clipboard. HOTKEYS To make a snapshot of the screen: PrtScn. To copy selected objects to the clipboard: Ctrl+C, Ctrl+Ins. To cut selected objects and move them to the clipboard: Ctrl+X, Shift+Del. To paste from the clipboard: Ctrl+V, Shift+Ins. 3. At this stage, you'll define how the software will process your image. Convert the image into full cross stitches — the whole image will be converted into full cross stitches. Include image as an underlay for tracing — to use this image as a background for the further manual image conversion. The choice between the two options suggests that after completing the import the cross stitch version will appear on your desktop as well as the original image. Make your choice and on Next, to proceed to the following step. 4. Tone and color corrections. They are necessary for correcting the minor image flaws. At this stage the Image Importing Wizard will suggest process the graphics image, to change its saturation, brightness, change colors, crop the image, cutting off all the unnecessary bits. Before we go into details I want you to notice that the adjustment sliders are now at level 0. Dragging any one of them to the left, you will be decreasing the parameter value, and moving it to the right — increasing it. Brightness Contrast Saturation Hue Cropping — trimming the unnecessary bits around the edges. This tool is essentially scissors that cut along the perimeter. Choose the Crop tool, hover your cursor over one of the image corners, left-click and hold, then drag it to the opposite corner. Having selected a rectangular area, release the hold and click on Crop. After having completed the cropping, click on Next. 5. This step will be useful to you only if your image is covered with a grid. For convenience, the cross stitch chart is covered with 10x10 grid. To specify the size of this grid click on Grid Tool. In the Mark Spacing field specify the number of crosses between the points 1, 2 and 3. Move your cursor over the upper left corner of the 10x10 square of the loaded picture (1) and left-click. Repeat the operation with the upper right (2) and the lower right (3) corners. Click Align Grid for confirmation. Show Grid — show the grid. Mark Spacing — the distance between the corners of the grid. It defines the number of crosses between points 1, 2 and 3. The default number of crosses between these two points is 10. The maximum number is 1000. Click on Align Grid to apply. Undo Alignment — reverse all the changes. Usually, the grid is used for processing designs in hand cross stitch embroidery. If you want to alter your image without using the grid, skip this step by clicking on Next. 6. At this stage, you can select those areas of the image that don't need to be converted into cross stitch. Before choosing the are you can adjust the Magic Wand sensitivity. Select the Magic Wand tool, left-click on the colored area of the imported image, which you want to exclude: To select several areas at once press and hold Shift on the keyboard. Tool Sensitivity instrument is used to change the Magic Wand color sensitivity. Having selected all the areas, click on Next. A footnote: This part is not entirely covered in the English version of the user guide, as is everything concerning colors. Therefore, you'll find some explanations and recommendations on the Magic Wand adjustment below. To explain how this tool works we'll use the color wheel. Remember system of coordinates you've learned at school. You can define the location of any point in space if you know its projections onto the X, Y, and Z axes. Now imagine that our space is the color space and that any point in this space can be defined if we know its RGB values. Thus, knowing the locations of any two points in space, we can calculate the distance between them. The distance in color space is the similarity between these two points, and the shorter is the distance, the more alike they are. Excluding points of any color depends on two things: on the color of the point selected with MW tool and Tool Sensitivity options. The options determine how similar is the point we're going to exclude, to the one that is selected in each of the color channels or in all of them at the same time. Having adjusted the tool and clicked on one of the points in your image you'll define what color will be excluded from image processing. When doing the adjustments we recommend not to do one component at a time — it's too complicated — but use the All slider instead: it will measure the similarity between the points that will be excluded and the one selected without any deviations from that particular color. 7. This step in image processing will allow you to select the least significant area of your image and specify how many percents of your palette you'll allot to it. If you are processing a portrait, where the colors of the face and clothing are the most important, and the background is a unified dark area, you can mark the face and the clothing as the significant color areas. Choose the Foreground tool, move your cursor over it and, holding the left button, outline the perimeter of the selected area. If there is more than one significant image area, press and hold Shift, and continue selecting. Having finished, specify how many percents of the color palette you'll allot to this area. Click on Next and proceed to the next step. 8. A new window — and we're close to completion. Now we need to figure out the size of our image. Select the size for the new design — define the width (W) and height (H) of the design. There are three ways of doing that. To choose one of the options listed below, check the box to the left of the name. Size specified in — select which measurement units will be used: inches or millimeters. Select the desirable size in the W by H field. Setting just the width value will be sufficient, after that the software will automatically rescale the image. If you want to enter the arbitrary values of width and height, deselect the Preserve aspect ratio parameter. You should bear in mind that entering the arbitrary values of width and height you may distort the image. Size specified in stitches — determine the size of the design in stitches. Like the first time, it is sufficient to set the width value. Size corresponding to the selection region — measuring the size of a randomly selected area. The next group of options: Preserve aspect ratio — keep the existing aspect ratio when changing the image size. Square Stitch — the stitches that have a square shape. Untick to determine the size of the cross stitch in the Stitch Size window on the left. By default the cross is square-shaped and its size is determined by the #14 canvas (which means 14 crossed per inch). Pay attention to the fact that changing the size of the design in stitches you automatically change its size in inches or cm. Having set all the necessary parameters, click on Next. 9. Defining the color scheme. It's impossible to picture the embroidery without threads. Besides, it is advisable to select the color scheme in advance. There are lots of manufacturers that produce the threads for both the hand and the machine embroidery. Originally the Pattern Maker was aimed at hand Cross Stitch embroidery — perhaps that is the reason for mouline threads predominance in the selection. Color Palette to Use — all the colors available. There are three ways of choosing a palette. To choose an appropriate one tick the box to the left of the name. Use the color of this floss/thread type — use a palette from the given list of manufacturers/according to the thread type. Use the colors in this palette file — use a palette stored on your computer. Use only the colors already in the palette — use the color palette loaded previously. Having figured out how to choose your color schemes, let's proceed to the next option. Maximum Number of Colors to Use — allows determining the number of colors desirable for image processing. Press Advanced to adjust the color sensitivity. Keep all colors already in the palette — use all the colors from the loaded palette. If you have already used some color palette before processing the image and choose this option, only the colors from it will be used. Having decided which palette you're going to use, click on Next and proceed to the next step. 10. This is all, in a nutshell. The process of loading the image into the editor with the help of the Wizard is now complete. The editor makes you aware of it and suggests clicking on Import for completion to see the result of the work you have just done, which will be displayed on the screen. If you are not satisfied with the result, click on Back and correct the mistakes. The Back button will allow you to return to any of the image processing stages listed above. If you're satisfied with what you can see on the screen, you can easily finish the process of importing the image by hitting the Close button. Now it's time for us to say goodbye. See you in our next articles! Original text by Lisa Prass
- 4 comments
-
- 3
-
-
-
- pattern maker
- software
- (and 3 more)
-
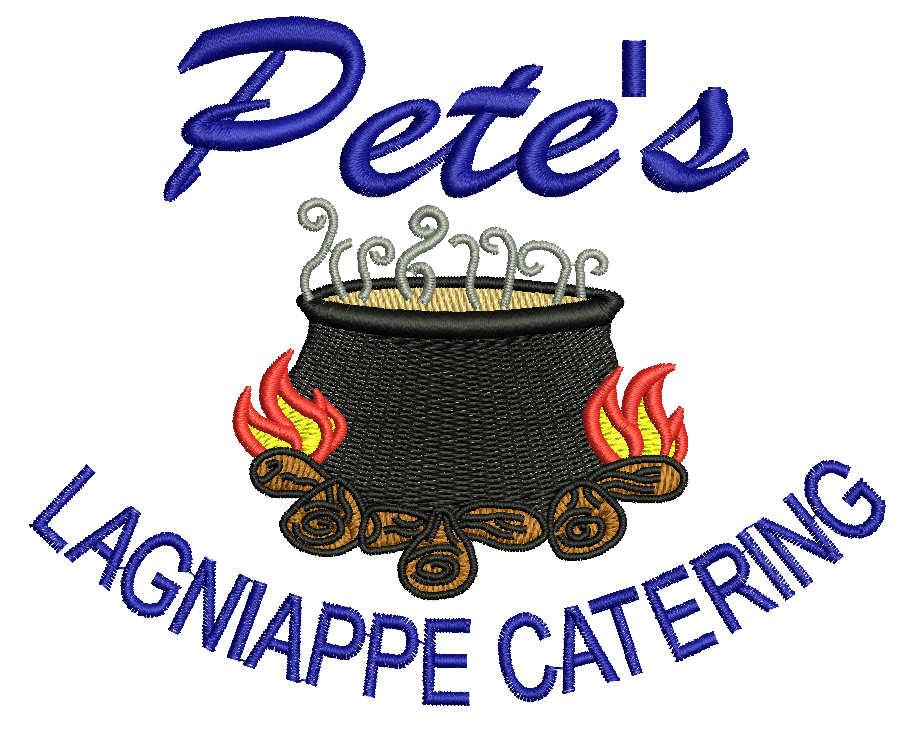
Company logo is custom made. The project was completed in the Wilcom software. The user has been sent several sizes. Find more projects with a Cooking and kitchen embroidery designs. theme.

-
 Hello everybody, In 2007 i made some shirts and the sotre where i bought them left my the .dsg file , i would like today to see the file but don't find any software to convert it in other formats like .jpg o .pst, and buying the Sierra Embroidery Office only to convert the file it's to expensive. So could anyone help me to convert this file (that i attach) in any format that can be use with normal graphics editors? Thanks to everyone Ale tiger 6.dsg
 -
I had problems with my software/computer and had to reinstall Tajima Pulse. Now the spooler does not get rid of the file you sent to the machine after the machine accepts it. I have to go into the design que and delete the file before I can send another file. I can not find the place for the setting that changes that. It used to be different before I uninstalled so I know I had changed the setting once and can not find it to do it this time. Help please, it's so annoying!
-
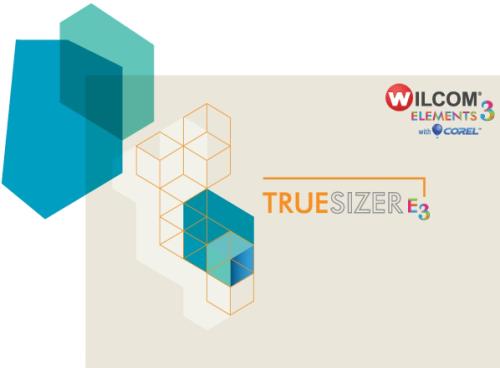
 View File Wilcom true sizer e3 free embroidery converter Embroidery software allows the user to view many different types of design files while also allowing the user to resize the designs and a preview function for potential customers etc. Features: Reading and converting popular formats Resizing and rotating designs Opening and saving .EMB files View multiple colorways In fact, this is an ordinary converter with rather limited functionality and capabilities. There is no way to combine multiple designs together. Also, stitches in machine files are not recalculated when scaling. At the same time, it works quickly and does not slow down. There are enough formats available for work. Therefore, for converting files and rotating designs, this is a very good program and will be useful for many embroiderers. Submitter Berez Submitted 07/21/2022 Category Free embroidery software
 -
Version 1.0.6.68
3,604 downloads
This is a free converter for embroidery machines of the company EverSewn. It allows you to open files of the following formats: Tajima *.DST, Brother *.PEC, *.PES, Janome *.JEF, *.SEW, Bernina *.EXP, PFAFF *. VP3, *.PCS, Singer *.XXX, Husqvarna *.HUS, VIP. Save only in format: *.ZHS Function: Flip, mirror, rotate, change thread and fabric colors. Print documentation. -
Hi there, I am trying out a embroidery digitizing programs called SEW ART and I was wondering if anyone else is using that software? Does anyone else know who to layer colors but not overlap the whole embroidery design and do lighter stitching? thanks
- 6 replies
-
- 1
-
-
- digitizing
- software
- (and 1 more)
-
 I am new to My editor. I cannot see the tool button on bottom of the screen so I can resize. How do I get it. My embroidery design is bigger than the space to work on. How do I also change this.
 -
View File EZ converter free embroidery software This is a free converter for embroidery machines of the company EverSewn. It allows you to open files of the following formats: Tajima *.DST, Brother *.PEC, *.PES, Janome *.JEF, *.SEW, Bernina *.EXP, PFAFF *. VP3, *.PCS, Singer *.XXX, Husqvarna *.HUS, VIP. Save only in format: *.ZHS Function: Flip, mirror, rotate, change thread and fabric colors. Print documentation. Submitter diver361 Submitted 07/24/2019 Category Free embroidery software
-

Version 5.0.8517
982 downloads
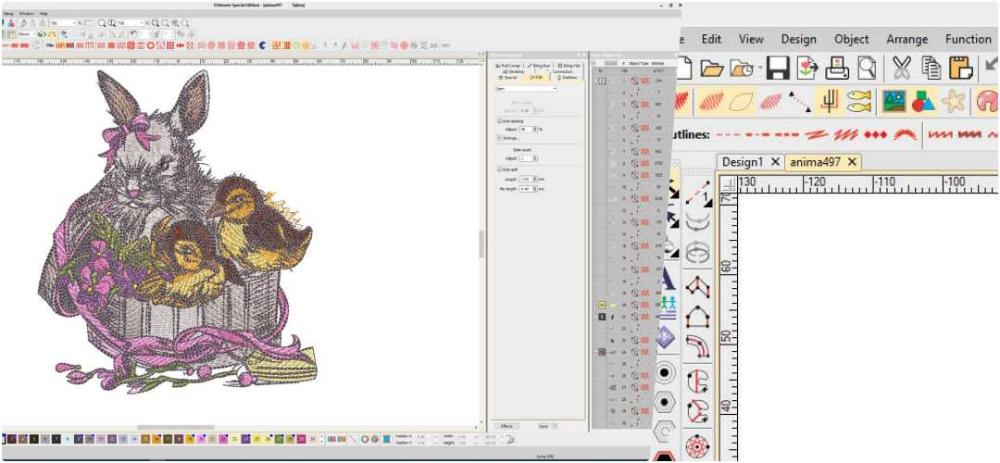
My Editor from WingsXP is even more than a machine embroidery format converter. And all because, apart from the standard features for reading and re-saving the file, the developers provided users with a little extra convenience. I believe that it is for these small bonuses that the converter is called My Editor. With standard features (from left to right): 1) Opening, recording, inserting, etc .; 2) Scaling; 3) Tools for selecting and inverting selection; 4) Tools for manipulating the visibility of objects; 5) Navigating the project on objects and stitches; 6) Tools for manipulating the display of puncture points, stitches, contours (for native files); 7) The player to simulate the embroidery process; 8) Project information panel; Toolbar 2 Toolbar with special features (listed from left to right): 1) A tool that opens the color manager (thread and background); 2) Color palette with the ability to control the visibility of each color; 3) Special machine functions for deletion or insertion; Vertically on the left there is a toolbar for design manipulation (selection, scaling, rotation, stitch editing, etc.): Toolbar 3 Each toolbar can be customized in appearance by hiding or opening tools. The File menu is standard. Print settings, send design by e-mail standard. The list of file formats that the program opens: List of file formats to save: It is possible to manage the beginning and end of the project at its discretion (last line). The View menu gives users several options: Preview3D - shows the design in a realistic form. Realistic look my editor Toggle grid - enable or disable grid display. Grid options - setting grid parameters. Guidelines - opens a window for guide manipulations. In My Editor, it is possible to set guides both in the traditional way through a ruler, and through this window. But at the same time put in it the exact coordinates of the guides and close them from random editing. Types of guides in this application: horizontal, vertical, inclined, circles. You can also set the guides by right-clicking on the top ruler. And then you can get something like this: Types of guides in my editor Crosshair - includes a large crosshair at the tip of the mouse pointer. Toolbar - controls the visibility of toolbars. Rollups - allows you to display 1) ImageMap palette satellite window for easy navigation throughout the design satellite window for viewing and navigating the entire design my editor 2) Sequence manager - a window with a display of a sequence of embroidery on objects. Reorder panel of my editor objects The Layout menu allows you to duplicate the embroidery design by specifying the number of copies and the distance between the designs: Design duplication in my editor The Stitches menu looks like this: It gives users the ability to remove all short stitches smaller than a given length in the design through the window.: removing short stitches in design And make a recalculation of the density of the embroidery design (even stitch) when resizing it with the AutoDensity Apply tool. This application adjusts the density to the new size on its own, according to its internal algorithms and it is impossible to control the quality. You can also download software in official website: My editor free embroidery software System Requirements Minimum CPU: 1,5 GHz Intel or AMD 32-bit x86) processor RAM: 2GB of RAM Hard disk: 300 MB of free uncompressed space Graphics card: 3D PCI-X accelerator with DirectX 9.0c, 32-bit color, and at least 256MB of RAM Monitor Resolution: 1024x768 32bpp O/S: Windows XP (with Service Pack 3 or later) or Vista™ or 7, or 8.1 or 10 Recommended CPU: 2+ GHz Intel or AMD 32-bit (x86) processor RAM: 3GB of RAM Hard disk: 300 MB of free uncompressed space Graphics card: 3D PCI-X accelerator with DirectX 9.0c compatible drivers and at least 1GB of RAM Monitor Resolution: 1920x1080 monitor resolution O/S: Windows XP (with Service Pack 3 or later) or Vista™ or 7, or 8.1 or 10 Printer: Windows-compatible Laser-inkjet printer. The following tutorials are available for this program. This will help you understand how to use this software. -
View File Pattern Maker Viewer cross stitch free software The Pattern Maker Viewer program allows you to open, view and print any Pattern Maker pattern file (XSD). All versions of Pattern Maker are supported by this viewer. This program is available at no charge via download. Registered users of Pattern Maker may distribute this program with their patterns and/or link to this page to allow their customers to download this program. Submitter diver361 Submitted 11/10/2021 Category Free embroidery software
-
Version 4.04
245 downloads
The Pattern Maker Viewer program allows you to open, view and print any Pattern Maker pattern file (XSD). All versions of Pattern Maker are supported by this viewer. This program is available at no charge via download. Registered users of Pattern Maker may distribute this program with their patterns and/or link to this page to allow their customers to download this program. -
View File My Editor free embroidery software My Editor from WingsXP is even more than a machine embroidery format converter. And all because, apart from the standard features for reading and re-saving the file, the developers provided users with a little extra convenience. I believe that it is for these small bonuses that the converter is called My Editor. With standard features (from left to right): 1) Opening, recording, inserting, etc .; 2) Scaling; 3) Tools for selecting and inverting selection; 4) Tools for manipulating the visibility of objects; 5) Navigating the project on objects and stitches; 6) Tools for manipulating the display of puncture points, stitches, contours (for native files); 7) The player to simulate the embroidery process; 8) Project information panel; Toolbar 2 Toolbar with special features (listed from left to right): 1) A tool that opens the color manager (thread and background); 2) Color palette with the ability to control the visibility of each color; 3) Special machine functions for deletion or insertion; Vertically on the left there is a toolbar for design manipulation (selection, scaling, rotation, stitch editing, etc.): Toolbar 3 Each toolbar can be customized in appearance by hiding or opening tools. The File menu is standard. Print settings, send design by e-mail standard. The list of file formats that the program opens: List of file formats to save: It is possible to manage the beginning and end of the project at its discretion (last line). The View menu gives users several options: Preview3D - shows the design in a realistic form. Realistic look my editor Toggle grid - enable or disable grid display. Grid options - setting grid parameters. Guidelines - opens a window for guide manipulations. In My Editor, it is possible to set guides both in the traditional way through a ruler, and through this window. But at the same time put in it the exact coordinates of the guides and close them from random editing. Types of guides in this application: horizontal, vertical, inclined, circles. You can also set the guides by right-clicking on the top ruler. And then you can get something like this: Types of guides in my editor Crosshair - includes a large crosshair at the tip of the mouse pointer. Toolbar - controls the visibility of toolbars. Rollups - allows you to display 1) ImageMap palette satellite window for easy navigation throughout the design satellite window for viewing and navigating the entire design my editor 2) Sequence manager - a window with a display of a sequence of embroidery on objects. Reorder panel of my editor objects The Layout menu allows you to duplicate the embroidery design by specifying the number of copies and the distance between the designs: Design duplication in my editor The Stitches menu looks like this: It gives users the ability to remove all short stitches smaller than a given length in the design through the window.: removing short stitches in design And make a recalculation of the density of the embroidery design (even stitch) when resizing it with the AutoDensity Apply tool. This application adjusts the density to the new size on its own, according to its internal algorithms and it is impossible to control the quality. You can also download software in official website: My editor free embroidery software System Requirements Minimum CPU: 1,5 GHz Intel or AMD 32-bit x86) processor RAM: 2GB of RAM Hard disk: 300 MB of free uncompressed space Graphics card: 3D PCI-X accelerator with DirectX 9.0c, 32-bit color, and at least 256MB of RAM Monitor Resolution: 1024x768 32bpp O/S: Windows XP (with Service Pack 3 or later) or Vista™ or 7, or 8.1 or 10 Recommended CPU: 2+ GHz Intel or AMD 32-bit (x86) processor RAM: 3GB of RAM Hard disk: 300 MB of free uncompressed space Graphics card: 3D PCI-X accelerator with DirectX 9.0c compatible drivers and at least 1GB of RAM Monitor Resolution: 1920x1080 monitor resolution O/S: Windows XP (with Service Pack 3 or later) or Vista™ or 7, or 8.1 or 10 Printer: Windows-compatible Laser-inkjet printer. The following tutorials are available for this program. This will help you understand how to use this software. Submitter diver361 Submitted 07/15/2019 Category Free embroidery software
-
I am new here, and new to machine embroidery. I was just given a pfaff embroidery machine. I am interested in getting software to digitize my own designs but I am not sure which one to get. I have software that can resize designs, but it won't let me import my own designs to digitize them. Can anyone give me some recommendations. I really don't want to spend thousands. Thanks!
-
Ricoma Chroma Digitizing Software Does anybody have any experience with this embroidery editing software? If so how do you like it? Pros and Cons?
- 1 reply
-
- 1
-
-
- ricoma
- digitizing
- (and 1 more)
-
Version 3V
547 downloads
View embroidery files, convert file formats, resize designs, read/write/format machine disks and more. Features: Opening or Importing (stitch) Files Convert Design Info Card Design Management View in Real Stitches -
 I recently acquired Meco stellar 1 embroidery machine with floppy drives. Do I need to download any software? If so does anyone have this software. Please help. Regards Anu
 -
 Hi I’m a newbie with my brother machine which has designs built into the machine, I was wondering how you make your own designs, font ect and then download them into the sewing machine could anybody help me please.
 -
Version 1.0.0
204 downloads
Coats EDV gives realistic previews including an enhanced 3-D photo, which can be forwarded by mail to customers, suppliers or even internally to help in obtaining design approvals. This software helps colour your designs using the Coats global shade cards, as well as creating and calculating the amount of thread you need to complete your designs. The software can read, view and communicate all the major types of machine embroidery files, it has a host of innovative features. The software is aimed at anyone who has an interest in the embroidery supply chain and would like to view and exchange embroidery machine digitising files, specifically brand owners who need to read, comment on and approve designs that may be produced in different countries across the world. As well as embroidery professionals who need to regularly handle and store design files and wish to communicate and gain approval for their designs from their customers.