Search the Community
Showing results for tags 'image'.
Found 13 results
-

Enhance Your Artistry with Cat in Love Free Embroidery Design
ekatreina posted a gallery image in Embroidered bag
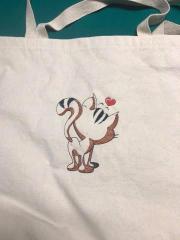 Cat in Love Free Embroidery Design: A Threaded Tale of Affection Transform your next embroidery project into an extraordinary tale of romance with the Cat in Love Free Embroidery Design. This design, showcasing an endearing feline filled with affection, captures the heart in every meticulously placed stitch. Immerse in the world of embroidery, where each thread weaves a tale as enchanting as a love-struck cat's purr. Create with Love and Personality The Cat in Love Free Embroidery Design presents a delightful way to infuse your creations with personality and love. Whether it's a bag, a jacket, or a decorative pillow, this charming design adds a personal touch that is sure to attract admiration. Imagine the joy of gifting a specially crafted item, bearing this adorable cat, to a fellow cat lover – it's a token of affection they won't easily forget! A Design for All Skill Levels Embrace the allure of the Cat in Love Free Embroidery Design, regardless of your embroidery expertise. The design's fine details offer a stimulating challenge for seasoned embroiderers, while its straightforward outline is perfect for beginners testing their skills. This design is more than just an embroidery pattern; it's a journey into the craft that all can enjoy. Dive into a Love-filled Embroidery Adventure The embroidery craft offers an exciting outlet to channel your love for design and storytelling. By using the Cat in Love Free Embroidery Design, you can express these passions through a captivating image that speaks volumes. Stitch by stitch, let your embroidery machine weave a tale of feline affection, engaging the onlooker's imagination while showcasing your artistry. Embark on a creative journey with the Cat in Love Free Embroidery Design. By incorporating this delightful pattern into your projects, you can convey a tale of romance and charm that transcends the ordinary, plunging the viewer into a captivating narrative spun in thread.
 -

Image processing in Pattern Maker
Irina posted an article in Machine embroidery materials and technology
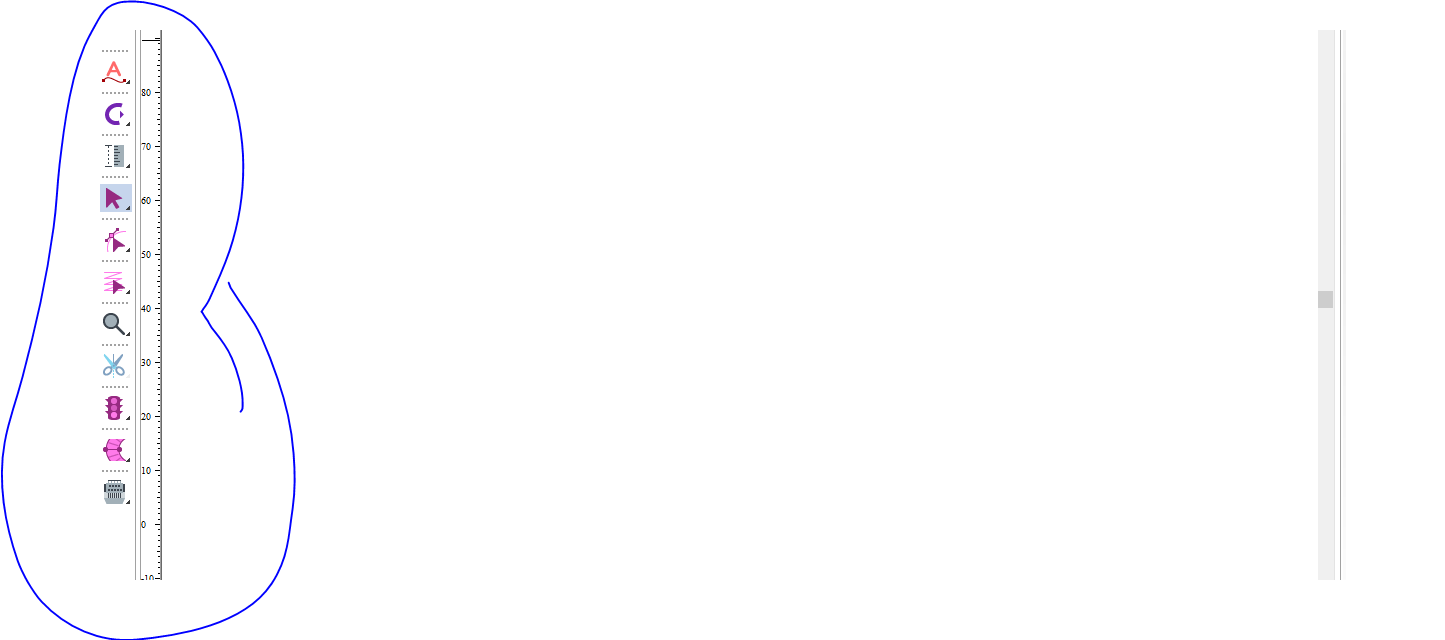
 The process of creating Cross Stitch designs in the Pattern Maker software can be based on the image that you've created or found on the Web. Learning how to load an image into the editor will be your first step towards creation of the design. Working with images is a pretty complex subject, so during this lesson, probably, some additional questions will arise that we don't cover here. We'll try to answer them in our next articles. 1. Open your editor, move the cursor over the File — Import Images and select one of the suggested options in the drop down list: Import Into New Pattern — import the image into the new document. Import Into Current Pattern — import the image into the current document. If you have an open document with an unsaved project, it's better to choose the first option. Otherwise, when importing the image, your previous work will be lost. 2. At the next stage, the Image Improrting Wizard will suggest choosing a way of importing the image. To choose one of the options check the box to the left of the name. Use an existing image — you can use the image stored on your hard drive or some other device. Click Browse and select the image in the window that opens. Scan a photo — when choosing this option the Scan button will become active, and you will be able to launch an image scanning program. Use the image on the clipboard — use the image from the clipboard. Having figured out how to load images, click on Next and move to the next step. A footnote: The format — Pattern Maker recognized bitmap and vector image formats. The main bitmap formats you are going to encounter are *.bmp, *.jpg, *.gif, and vector ones are *.emf, *.wmf, *.eps. What do the words "bitmap" and "vector" mean we'll explain in our next articles. Meanwhile, you should remember that the file name consists of two parts: the name of the file and its format. The format is a sequence of characters added to the name and intended for recognition. The software recognizes the following formats: *.bmp, *.jpg, *.tif, *.gif, *.pcx, *.wmf, *.emf*.eps, *.tga, *.png, *.ras, *.pct, *.pcd Clipboard — the part of RAM memory where data in various formats can be temporarily stored for further copying or moving them to the other applications or to another part of the same application. To send an image to the clipboard just open it with any image viewer and press PrtScn. As a result, everything that you just saw on the screen, will go to the clipboard. HOTKEYS To make a snapshot of the screen: PrtScn. To copy selected objects to the clipboard: Ctrl+C, Ctrl+Ins. To cut selected objects and move them to the clipboard: Ctrl+X, Shift+Del. To paste from the clipboard: Ctrl+V, Shift+Ins. 3. At this stage, you'll define how the software will process your image. Convert the image into full cross stitches — the whole image will be converted into full cross stitches. Include image as an underlay for tracing — to use this image as a background for the further manual image conversion. The choice between the two options suggests that after completing the import the cross stitch version will appear on your desktop as well as the original image. Make your choice and on Next, to proceed to the following step. 4. Tone and color corrections. They are necessary for correcting the minor image flaws. At this stage the Image Importing Wizard will suggest process the graphics image, to change its saturation, brightness, change colors, crop the image, cutting off all the unnecessary bits. Before we go into details I want you to notice that the adjustment sliders are now at level 0. Dragging any one of them to the left, you will be decreasing the parameter value, and moving it to the right — increasing it. Brightness Contrast Saturation Hue Cropping — trimming the unnecessary bits around the edges. This tool is essentially scissors that cut along the perimeter. Choose the Crop tool, hover your cursor over one of the image corners, left-click and hold, then drag it to the opposite corner. Having selected a rectangular area, release the hold and click on Crop. After having completed the cropping, click on Next. 5. This step will be useful to you only if your image is covered with a grid. For convenience, the cross stitch chart is covered with 10x10 grid. To specify the size of this grid click on Grid Tool. In the Mark Spacing field specify the number of crosses between the points 1, 2 and 3. Move your cursor over the upper left corner of the 10x10 square of the loaded picture (1) and left-click. Repeat the operation with the upper right (2) and the lower right (3) corners. Click Align Grid for confirmation. Show Grid — show the grid. Mark Spacing — the distance between the corners of the grid. It defines the number of crosses between points 1, 2 and 3. The default number of crosses between these two points is 10. The maximum number is 1000. Click on Align Grid to apply. Undo Alignment — reverse all the changes. Usually, the grid is used for processing designs in hand cross stitch embroidery. If you want to alter your image without using the grid, skip this step by clicking on Next. 6. At this stage, you can select those areas of the image that don't need to be converted into cross stitch. Before choosing the are you can adjust the Magic Wand sensitivity. Select the Magic Wand tool, left-click on the colored area of the imported image, which you want to exclude: To select several areas at once press and hold Shift on the keyboard. Tool Sensitivity instrument is used to change the Magic Wand color sensitivity. Having selected all the areas, click on Next. A footnote: This part is not entirely covered in the English version of the user guide, as is everything concerning colors. Therefore, you'll find some explanations and recommendations on the Magic Wand adjustment below. To explain how this tool works we'll use the color wheel. Remember system of coordinates you've learned at school. You can define the location of any point in space if you know its projections onto the X, Y, and Z axes. Now imagine that our space is the color space and that any point in this space can be defined if we know its RGB values. Thus, knowing the locations of any two points in space, we can calculate the distance between them. The distance in color space is the similarity between these two points, and the shorter is the distance, the more alike they are. Excluding points of any color depends on two things: on the color of the point selected with MW tool and Tool Sensitivity options. The options determine how similar is the point we're going to exclude, to the one that is selected in each of the color channels or in all of them at the same time. Having adjusted the tool and clicked on one of the points in your image you'll define what color will be excluded from image processing. When doing the adjustments we recommend not to do one component at a time — it's too complicated — but use the All slider instead: it will measure the similarity between the points that will be excluded and the one selected without any deviations from that particular color. 7. This step in image processing will allow you to select the least significant area of your image and specify how many percents of your palette you'll allot to it. If you are processing a portrait, where the colors of the face and clothing are the most important, and the background is a unified dark area, you can mark the face and the clothing as the significant color areas. Choose the Foreground tool, move your cursor over it and, holding the left button, outline the perimeter of the selected area. If there is more than one significant image area, press and hold Shift, and continue selecting. Having finished, specify how many percents of the color palette you'll allot to this area. Click on Next and proceed to the next step. 8. A new window — and we're close to completion. Now we need to figure out the size of our image. Select the size for the new design — define the width (W) and height (H) of the design. There are three ways of doing that. To choose one of the options listed below, check the box to the left of the name. Size specified in — select which measurement units will be used: inches or millimeters. Select the desirable size in the W by H field. Setting just the width value will be sufficient, after that the software will automatically rescale the image. If you want to enter the arbitrary values of width and height, deselect the Preserve aspect ratio parameter. You should bear in mind that entering the arbitrary values of width and height you may distort the image. Size specified in stitches — determine the size of the design in stitches. Like the first time, it is sufficient to set the width value. Size corresponding to the selection region — measuring the size of a randomly selected area. The next group of options: Preserve aspect ratio — keep the existing aspect ratio when changing the image size. Square Stitch — the stitches that have a square shape. Untick to determine the size of the cross stitch in the Stitch Size window on the left. By default the cross is square-shaped and its size is determined by the #14 canvas (which means 14 crossed per inch). Pay attention to the fact that changing the size of the design in stitches you automatically change its size in inches or cm. Having set all the necessary parameters, click on Next. 9. Defining the color scheme. It's impossible to picture the embroidery without threads. Besides, it is advisable to select the color scheme in advance. There are lots of manufacturers that produce the threads for both the hand and the machine embroidery. Originally the Pattern Maker was aimed at hand Cross Stitch embroidery — perhaps that is the reason for mouline threads predominance in the selection. Color Palette to Use — all the colors available. There are three ways of choosing a palette. To choose an appropriate one tick the box to the left of the name. Use the color of this floss/thread type — use a palette from the given list of manufacturers/according to the thread type. Use the colors in this palette file — use a palette stored on your computer. Use only the colors already in the palette — use the color palette loaded previously. Having figured out how to choose your color schemes, let's proceed to the next option. Maximum Number of Colors to Use — allows determining the number of colors desirable for image processing. Press Advanced to adjust the color sensitivity. Keep all colors already in the palette — use all the colors from the loaded palette. If you have already used some color palette before processing the image and choose this option, only the colors from it will be used. Having decided which palette you're going to use, click on Next and proceed to the next step. 10. This is all, in a nutshell. The process of loading the image into the editor with the help of the Wizard is now complete. The editor makes you aware of it and suggests clicking on Import for completion to see the result of the work you have just done, which will be displayed on the screen. If you are not satisfied with the result, click on Back and correct the mistakes. The Back button will allow you to return to any of the image processing stages listed above. If you're satisfied with what you can see on the screen, you can easily finish the process of importing the image by hitting the Close button. Now it's time for us to say goodbye. See you in our next articles! Original text by Lisa Prass
- 4 comments
-
- 3
-

-

-
- pattern maker
- software
- (and 3 more)
-
Hello all, New to embroidery. I'm trying to open an image file (PNG) to use in DG Pulse 16 embroidery digitizing software but there is no open image option. How can I add it back to the embroidery program?

-
Embroidered t-shirt with buttefly and motto
ekatreina posted a gallery image in Clothes with embroidery designs
 Sometimes right words are able to give you the right direction in your own life. To enlarge this effect try to see them more often. The good way to achieve it is embroider it on your favorite clothing as this girl did. Now she wear this pretty cotton t-shirt decorated by Grow through what you go through embroidery design and seems to be happy of her life.
 -
Embroidered t-shirt with Spying cat design
ekatreina posted a gallery image in Clothes with embroidery designs
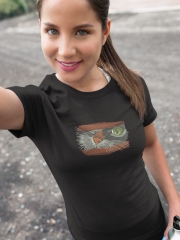 Sometimes simple black cotton t-shirt may say much about its owner. For example if it is decorated by Cat spying embroidery design. It seems that this girl like to be a little mysterious, she loves cats and can create pretty things by her own hands. Furthermore she can do nice selfies that underlines all her advantages and shows her in a favorable light.
 -
Embroidered t-shirt with Elephant design
ekatreina posted a gallery image in Look how right using Cartoon Embroidery designs
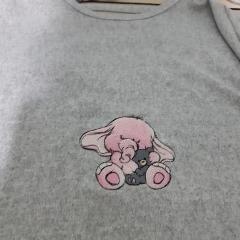 This picture is close up plan of embroidered clothing for everyday wearing. It has very calm background that let to use it with almost any trousers or skirt. At the same time it doesn’t look boring at all. It is because of using Elephant with teddy bear embroidery design for its decoration. Funny picture in cartoon style will definitely makes you smiling.
 -

Masks collection embroidery designs
diver361 posted a gallery image in Textile art with FSL and Lace embroidery designs
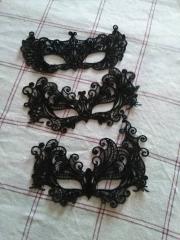 Are you ready to magic carnival? Yes, if you already downloaded our wonderful masks samples. You can buy this design here: Mask embroidery design and Lace mask embroidery design. All of them are one color samples so you can choose any color of thread for it. For example it can be suitable for you dress or creating contrast with it. Author: Maria Domenica Galante
© Denisov Embroidery Studio
-
Embroidered case with girl in polka dot dress
ekatreina posted a gallery image in Embroidered Decoration real art for clothes and interior
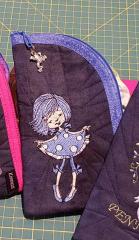 This is nice textile case which is suitable for keeping glasses, pens or something like this. It has contrast zip and quilted ornament on its body. Central part of this work piece is decorated with Look at my polka dot dress embroidery design. It shows figure of pretty girl who is happy to demonstrate her new dress with beautiful ornament.
 -

Lady photographer embroidery design
pollyflinders posted a gallery image in Woman's embroidery showcase
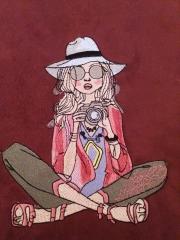 This is fragment of clothing decorated by Lady photographer embroidery design. This cool sample can be highlight of young girl’s look because it is very modern and interesting. It is portrait of creative girl in sunglasses and hat in full growth. You definitely will have much attention if you choose this picture to decorate your t-shirt, sweater or bag.
 -
I have to make a patch from this. I have pe 10 design. If i make the patch it is rounded, my image is rectangular, how can i fit it together please. Sorry for my English is not my native language. Thank you very much
-
I understand that Pulse does not support compound paths. Any way I can import an image so that the hollow areas don't show up filled?
-
I need to understand how to load artwork into this embroidery software. For some reason when I try to import artwork, it tells me there is an error and won't let me. I have to copy and paste whatever image I want to work off of.
-
I?ve tried using Auto digitizing mode on a simple design with 2 colors, and it always tells me i have thousands of colors. With the sample images, it says there are only a few colors, maybe 4 or 5 depending on the design. When I use a custom design it gives me thousands of colors, and says there are too many colors to use any mode except the photo stitching mode. What?s the deal?