Jump to content
  • Articles

    Our website articles

    Embroidering on ribbon

    By Irina, in Machine embroidery materials and technology, , 0 comments, 2,462 views
    Original text by Marina Belova 
    I think everyone knows that you can supplement your embroidery machine with additional devices. I don't mean the standard options that everybody knows, like cap frames, cording device, sequining device or similar staff. I mean the devices designed for more specific tasks. For example, the ones meant for embroidery on socks or on ribbons and belts. 
    I myself have seen such devices on the on the exhibition stands. Now I realize that you only need devices like that if you specialize in embroidery and have a consumer flow. In any other case, you can always make do with some simple techniques that will allow you to embroider a small lot of specific garments without having to invest money into a costly piece of equipment you may only need once or twice a year. 
    Today I will dissect an utterly non-secret method of embroidering on a ribbon or a strap, which was described by Jimmy Lamb almost 10 years ago and can be found on the Web for free. 
    Everything is very simple, as always. Though I tweaked Jimmy's method a bit for my own convenience. The gist it as follows: 
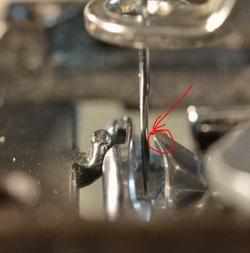
    We hoop the stabilizer. 
    Measure the width of the item to be embroidered. 
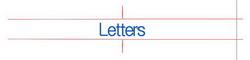
    In the editor, we digitize two parallel lines with simple runs, the distance between them equal to the width of the item. 

    Make two vertical marks in the middle of each line, facing each other. These marks will allow us to properly position the item on the stabilizer — they will indicate the center of the design. 
    We insert the stop command after that. How the machine will do it, depends on its type. 
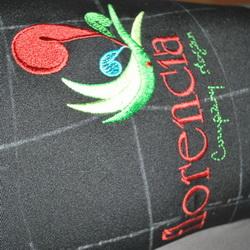
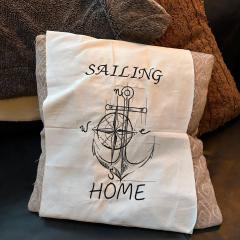
    Digitize the design of your choosing. An inscription, for example: 

    Now it's time to embroider. We stitch the lines right on the stabilizer. 
    Then we stick the item to be embroidered onto a temporary spray adhesive or a double-sided adhesive tape or something else like that, aligning the center of the item with the marks on the lines. 
    Now we switch the machine on and do the embroidery. 
    Generally speaking, it is possible to embroider on a more expensive stabilizer instead of a usual one — with the Filmoplast sticky paper, which I once used to show how to embroider the corners of the handkerchief. Or you can use the "embroidery on the hole" method, which I've also described. 

    Testing stabilizers for chevron

    By Irina, in Machine embroidery materials and technology, , 0 comments, 2,819 views
    Original text by Marina Belova 
    Sometimes the striving to save on machine embroidery consumables becomes utterly absurd. You read what people use, with what and on what they embroider, and cannot help but wonder. But occasionally someone's bright idea makes you eager to try it yourself. 
    Once I have read that you can embroider lace using gardening spunbond as a stabilizer. Though it cannot be torn out or solved with water, ironing was recommended as an effective measure, if you didn't mind the extra hardness of the material. The cost is much lower than that of the professional consumables. And so I saved this idea for the future times when I would be able to spare an hour or two to give the method a try so that to decide whether it could be used, and if yes, where one could use it. 
    Once, quite a long time ago, I came across a not so new product on Youtube — an automatic frame system, AFS. Judging by the video clip, it is something taken our of your dreams because it allows you to make chevrons of intricate shapes without having to trim them afterward, sweating all over, and sew them directly onto the garments: 
    There are such systems available on our markets, too, but they are not advertised or explained in any way. 
    I think, they cost a substantial amount of money because of the automatics and everything. Such a device is well above my means. But I'm occupied not just with automation, but more with the material itself, the film on which they embroider. What an utterly wonderful thing it is. I want to use it even without the device itself; I agree to hoop this film so that to take the ready garment out of it afterward. 
    I remember Madeira having a puffy stabilizing MadeiraAS Film that came in rolls; this film was dissolved with an iron after the embroidery, and you could embroider chevrons on it like you do in the AFS. I tried it, and if I tweaked the design a little, it did all right. But now the money problem is especially acute, so I definitely won't buy this film — after all, Madeira consumables have never been cheap. 
    Therefore, I found time at last and decided to test the alternative stabilizing materials in order to embroider full-scale chevrons on one of them in future: 
    The gardening spunbond I mentioned above.  I added the building spunbond (vapor-proof).  And, aiming to go the limit, I bought one meter of thick greenhouse plastic sheet (perhaps one can embroider on it, you never know!) for cheap.  You can, of course, use a classical coarse stabilizer as I did here. But my task is to manage any intricate shape, even the one with the openings. 
    So I created a very simple chevron design with a carved edge. It won't be a very easy and pleasant job to cut a chevron shaped like that out of the fabric: 

    I hooped the film first: 

    The embroidery went well: 

    And the unhooping was even better. But after you unhoop the design, it shrinks across the direction of the stitching, which is only natural.
    Besides, my design has flaws that need correction — I haven't set the pull compensation right: 

    So I made some alterations, taking the distortion into consideration: 

    It turned out almost splendid — the result satisfied me, though further corrections could me made still. 

    At the second stage I hooped 2 layers of the building spunbond: 

    The stitch ran splendidly smooth, even and looked beautiful: 

    Of course, you cannot remove all of the spunbond — it won't tear away. 

    I place the embroidery between the two sheets of paper and iron it at the maximum temperature, hoping that the leftover pieces of non-woven material along the perimeter will be singed. Ironing takes a long time, and I begin to envy the owners of the Heat Press Machines Spunbond begins to singe, after all, leaving a transparent layer of solid plastic along the perimeter (it will keep the layer from disintegrating): 

    But the temperature makes the spunbond shrivel, so the chevron shrinks about 3 or 4 mm across the direction of the filling stitches, and assumes an oval shape. And I don't like this at all. 
    Then I pick up the covering material used in gardening, a spunbond, too, but a thinner one, and hoop two layers of it: 

    The embroidery goes smoothly: 

    I trim it along the perimeter: 

    Iron it between the sheets of paper, and get a result similar to the one in the previous case — singed plastic edges along the perimeter and a chevron shaped like an oval: 

    Here are all three chevrons for comparison: 

    Summary: the filling and the edges of the designs are of a higher quality on spunbond, but the chevrons get distorted, and it instantly catches the eye. Besides, you need to iron them. As for the film, I will keep it in mind, for the sheer simplicity of its use. You can even try to make chevrons with a woven background. But you'll have quite a job creating the design and setting the right parameters. 

    Trying to embroider on biflex fabric (Spandex)

    By Irina, in Machine embroidery materials and technology, , 0 comments, 5,373 views
    Original text by Marina Belova 
    About a year ago, one of the first visitors to my blog, Tatiana, asked me about embroidery on biflex fabric (also called Spandex). Back then I frankly said that I'd never encountered such a thing and didn't know anything about it. So, I am finally ready to try embroidering on this knitted fabric that has interesting characteristics. 
    Who does not know and use Spandex? Everybody knows it: swimsuits and trunks, sporting shorts and other sportswear are made from this material, it being able to assume any shape. Spandex is well-known for its ability to stretch up to 500% in any direction! And, no matter how many times you stretch it and then let go, it never fails to return to its original shape, always retaining its characteristics. One can thank the Du Pont company that more than half a century ago bestowed upon us a possibility of using this distortion-resistant material. 
    But, owing to the very same ability to stretch in all directions, Spandex is thought to be one of the most difficult fabrics for machine embroidery, and rightly so. It seems to me that even knitwear's famous proneness to be a tricky embroidery material fades in comparison with this fabric.
    Meanwhile, almost everyone uses it — here and there you can see logos and designs, I even saw sequins once. This means that any embroiderer, whether having sufficient experience or not, will be able to embroider a design upon this fabric. I have a strong belief in that. 
    Technically, but only at the first glance, the embroidery process and preparations are rather simple. 
    The criteria for the high-quality embroidery on Spandex are exactly the opposite to the ones for all the other kinds of fabrics — here we pay attention to how good the design looks on a stretched fabric. In its relaxed state the fabric can even pucker around the embroidery and between the objects, but in the wear these problems go away and everything looks just right. 
    On the assumption that every garment made out of this material is worn in a stretched state, we arrive at the conclusion that even Spandex should be hooped together with the stabilizer and stretched — you can use a medium-weight cutaway stabilizer or an invisible spunbond, agreeable to the touch (if you manage to buy one). 
    Use knitwear needles (ball point, SES or SUK), #75. 
    And the ordinary threads (#40) or threads of any other kind. 
    So, how one creates a design for the ordinary threads or the threads chosen from the ones intended for Spandex? 
    The most important thing is to avoid filling patterns. Those that cover small areas can be used, but the big-sized ones are not recommended.
    They won't allow for the fabric to stretch in a natural way when in wear, and the design will look distorted. The best designs are inscriptions, embroidered with satin stitches and images, formed by satin stitch columns, not connected to each other. The ones that allow for the maximum free space between the elements. Stitch lengths should be between 5 and 6 mm. Small elements and details are better to be avoided. 
    The stitch density for the ordinary threads (#40) is 0.3—0.4 mm. Here you are bound to some experimenting in accordance with the way of stitch count algorithms in your particular embroidery editor. 
    Pull compensation is set to the standard value. In my case, it's pretty always 0.2 mm. 
    I follow the example of John Deer who wrote that a design for Spandex/Lycra/elastane should be created in the same way as for pique. I.e. you should secure the outer layer of stitches with the underlay. 
    For satin stitches under 3 mm use edge run.  For satin stitches over 3 mm use edge run + double zig-zag.  For filling patterns use a grid at 90° in respect to the finishing layer of stitches or a full grid at 45° and 135° + edge run. This layer has a low density — about 2—2.5 mm.  All of this is obvious and understandable, so I created this logo: 

    The design contains all stitch types, including both recommended and not recommended ones: And also satin stitch columns and filling patterns of varying density, and even letters stitched with a running stitch. I tried to embroider it the familiar way: 
    with the same kind of stabilizer that I use for everything (which was sold to me like a tear-away, but turned out to be more a cut-away one)  employing the same hooping method where it is also important for the fabric not to be slack.  And of course, hooping became my first problem. The fabric is potentially extremely elastic, and no matter how much I try, it will always be slack in the hoop; and what's more, it could be easily lifted off the stabilizer: 

    My second problem was that I, while realizing that I should stretch the fabric in the hoop, didn't make any markings, not even the little cross to show the center, and the result was that I couldn't grasp in what direction and to what extent I should stretch. But I embroidered the design anyway and saw that the edges of satin stitches, especially long ones, became jagged, and that 4—4.5 stitch length and 0.4 mm density were not enough (the stitches became slack and the fabric showed through), even if there was an underlay formed with double zigzags under it. 

    This is how the embroidery looks when out of the hoop: 

    Not so bad for the first time. Low-density filling patterns easily arrange in folds and even stretch, but I'd rather not overburden the design with the high-density ones. The embroidered rows of letters look pretty normal — I haven't noticed anything peculiar, so they can be used. 
    But I immediately began to wonder: just how much the fabric should be stretched in the hoop so that it looks good in wear? How does one keep it under control? I looked it on the Web, and found these wonderful tips from Pat Williams — she tells that when hooping such fabrics it is sufficient to stretch them 10—40%. 
    The reason for the jaggedness of the satin stitches is obvious — the understitching settings were wrong. I placed long zig-zag stitches under the satin stitch columns, but had I split each of the long stitches into several shorter ones, the problem would be solved. 
    For my second embroidery sample not only did I mark the Spandex with a cross signifying the center, but also inserted a 10x10 square so that I could control the quality of the hooping and the degree to which the fabric would be stretched. I managed to stretch the fabric for 15% (a square about 11.5x11.5 cm) when hooping. And it was not a very easing hooping process for me: 

    I now embroider the edited design; it looks somewhat better, but a higher density for the thick satin stitches wouldn't be unwelcome. 

    This is the fabric out of the hoop that puckers all around the design: 

    And this is the same fabric, but stretched along the leg, so the embroidery looks splendid: 

    You can embroider on such a material, and therefore, you should test the results and change your design in accordance with them. Besides, you'll need to explain to your clients, why the embroidery on these kinds of fabrics looks like that in its relaxed state. 
    P.S. Gunold USA has published the video on how properly stabilize such tricky fabrics as Spandex and knits containing a lot of elastic fibers.

    Cap types in machine embroidery

    By Irina, in Machine embroidery materials and technology, , 0 comments, 4,611 views
    Original text by Marina Belova 
    If one examines closely all the information on the subject of machine embroidery on the Web, one could notice that nearly half of it concerns creating and embroidering the designs on baseball caps. You can read so many things about them that one can but marvel how open people are about their work, how they just go ahead and share their experience with others. Therefore, I abandoned embroidery with sequins for a while. After all, a not very successful experiment must work itself out in my head. So I decided to turn my attention to caps instead. All the moreso, I've already begun to take steps in that direction. 
    There are more that a few places for embroidery on baseball caps. Traditionally they are as follows: 
    front panel  back panel under strap  side  peak  on the strap that serves to regulate the cap size  From all appearances, one should approach embroidery on baseball caps from afar. First, you need to find out what types of caps are in existence, and what are the key differences between them. 
    Surprisingly, it turned out that there is a huge variety of caps in the world. It is because I myself don't wear them, I've remained in the dark until now. But when you start working with them, this kind of knowledge will be of great importance not only for hooping, but for choosing the right kinds of needles and stabilizers, and creating the designs as well. 
    Caps differ in the number of panels of which they consist. The most popular is the 6-panel cap with a seam at the front. But at the same time it is the hardest to embroider because of that seam. 
    This is how it looks from the side: 

    This is how it looks from the front: 

    Some 6-panels are easier to embroider. They differ from the traditional cap in that the panels on it are twisted, and there are 2 seams at the front — to the right and to the left from the center: 


    This type of 6-panel is preferable because most of the designs are embroidered in the center so that if its size is not big, nothing will prevent it from being embroidered correctly. 
    But the easiest to embroider is a 5-panel cap with 2 front panels joined into one so that there is no seam, so inconvenient for embroidery. 

    All of the caps have a sweatband on the underside, which helps to join the panels together, and that is usually being folded back and out of the way during the embroidery so that it does not get stitched. 


    Some caps are also reinforced from at the front with the help of special materials (you can see that on the photo above). Such a material can be hard or soft. Some models don't have any reinforcement and don't have anything on the underside except for the band tying the panels together. 
    One should also pay attention to the thickness of the seams between the panels. Some of them are so thick that you don't know how to embroider on them at all. 
    Additionally, the caps differ from each other by the look of their back side, where the adjustment strap is located. Some models don't have any strap at all. 
    An embroiderer should pay close attention to the cap height. There are the following types: 
    High-profile caps are the easiest to hooping. The gray cap on the very first photo is an example.  Mid-profile caps — see the second beige cap in this article.  Low-profile caps can be seen in the photo below: 
    I've even read that the low-profile caps call for the special hooping devices that are of a lesser height than the ordinary ones. But I haven't seen any of such frames — the ones that come with the machine are almost of the same in height. 
    Besides the cap appearance, you should also look at the fabric of which the cap is made. A variety of materials can be used, from the hard and coarse ones to the soft and stretchy. There are caps made of woven fabrics (cotton, linen, polyester, wool and so on), including knitwear, and even fabrics with the padding, and the ones made of non-woven fabrics (leather and its substitutes). The surface can be smooth or piled (velvets, velours). 
    All of these parameters will determine how to work with baseball caps. After all, not everyone has the possibility of embroidering on the cap parts prior to sewing them up, there are occurrences when you have to embroidery on the ready item. 

    Troubles with the embroidery machine when doing Photo Stitch

    By Irina, in Machine embroidery materials and technology, , 0 comments, 2,003 views
    Original text by Marina Belova 
    Sometimes I embroider portraits. I usually do that on the Velles 15 because I have this little flat frame from the Tajima machine that cannot be inserted into Velles 19. Therefore, I do not have a choice which one of the machines to use. During the embroidery process 3 problems always occur: 
    Trimming (the machine does not trim the threads, and there are so many trims that I sometimes don't know what to do). 
    After the trimming, the thread comes out of the needle. Taking into account the number of trims, it is a disaster.  About 50 or 60 thousand stitches (the machines stops correctly with the main shaft at 100°) the presser foot does not raise anymore. On the photo below I encircled the control panel together with the main shaft indicator and thread take-up lever (I believe that's the proper word for it) in the same position, and the foot is at the bottom, only slightly raised above the fabric surface:  The funniest thing is that when I take the portrait out and embroider something ordinary, nothing like that ever happens, even if there is a lot of trims. 
    I don't try to solve neither first nor second problem. The first because I haven't yet got to the trimming knives and the information on how to adjust them. About the second I tried to tell in my previous article. Just now I was meddling with the options on the control panel, and things seem to have improved, but I'll just observe for some time before rushing into battle with the picker. In order not to be preoccupied, I just switch off the automatic trim and remove all the jump stitches manually. It's dreary but quicker than having to deal with trimming troubles (some of them are rather nasty — one day I'll tell about them) and keep inserting the thread into the needle. 
    The third problem is easily solved (I discovered it by trial and error): I lubricate this part of the machine two or three times during the embroidery — with the ordinary oil, not one or two drops but much more: 

    Though the 2 paragraph the user guide says that it should be lubricated once in three months, I pour oil into this opening at least once a week, even when there is no photo stitching. As the result not only the needle bar raises all the way, but there is much less noise, too. So, this brings up the question: is there something with the oil that it takes much more to lubricate the machine, or am I doing something wrong? 
    I am now looking at my Velles 19 and beginning to think that if there is no such opening there, problems like that surely won't occur? 

    If somebody has embroidered the designs with a huge number of trims on it, could you please share your opinion with us? 
    Actually, the information on lubricating the machine in both user guides is so scarce, and the pictures are so small, that this makes me uneasy.
    Especially when it comes to lubrication the machine with thick grease. 

    Reasons for the upper thread coming out of the needle

    By Irina, in Machine embroidery materials and technology, , 0 comments, 4,079 views
    Original text by Marina Belova 
    And again I will bore you with technical details  
    I'm gradually drawn to the conclusion that no two machines are alike: each has a unique aspect. 
    For example, my Velles 15 is known for two troubles: 
    The upper thread comes out of the needle after trimming. This does not happen every time, but often, especially when I embroider with polyester threads, which is very unpleasant because you have to stop whatever you're doing and run to the machine. 
    The upper thread is not always trimmed. The lower thread is trimmed all right, but not the upper. My machine has had this problem from the very beginning: sometimes it's not so bad and sometimes it can reduce me to tears. 
    I like a lot about Velles 19, but it's supply-failure detector is not working properly: it signals when the bobbin thread is long gone. So the design may go many stitches ahead before the upper thread won't get twisted and break as the result, and the detector signals at last. I will still have to see about that, all the more so because I've peeked into the books and understood that you don't have to call a serviceman for the preliminary diagnostic operation and troubleshooting. We can do some things by ourselves. As always, the most important thing is to know what you're doing. When I figure out what causes the trouble, I'll by all means write about it. 
    But back to performing the diagnostics on the Velles 15. There are more problems here, therefore, they are of greater importance. 
    So, according to the whole bunch of materials I've studied on the subject, it comes down to this: 
    First, we have to check the following possible reasons for the thread coming out of the needle, for they are the most obvious: 
    a. The upper thread tension being too tight. Check and adjust in case that this is it. I've written about it here at much greater length. But I dare the following: adjusting the upper thread tension on the Velles 15 is some fun. I even think of buying a new set of knobs so as not to wonder anymore why some are winding and some aren't, and why I can adjust this but not that. 
    b. Compensation spring is out of place. Not every machine has this tricky thing, I've written about it here. There are still no clear instructions on how to use it, to my profound regret. 
    c. Too short a thread tail after the trimming. I won't give instructions on that, but the length of the tail must be adjusted somehow. 
    If this didn't help, you need to check and adjust more complex units and mechanisms: 
    1. Picker
    In case somebody does not know, a picker is this thing marked by an arrow on the photo: 

    This is how it looks from the side: 

    Judging by the ancient Toyota machines guides, which, as rumor goes, were the first Velles progenitors, you need to check three parameters — that is if you find out that it works at all: 
    a. The clearance between the picker and the bobbin case should be about 0,5—1 mm in a stop position: 

    The "funniest" thing is that there is no such clearance in my Velles 15. The picker bumps up against the bobbin because there is nothing there to stop it. I delved into it. Basically, there is nothing so complex about this unit. In this case, a platform was provided for setting the gap correctly, which is held in place with these screws (circled in red): 

    Supposedly, when the machine makes a stop and trims the thread, the picker should bump up against this metal groove (circled in red) with its tip (a blue arrow) — correct me if I'm wrong: 
    I believe that this platform should be adjusted in some way (raise of fall) so that the user could set the gap correctly. BUT! As my husband said, those hands that made all this should be torn away. Broadly speaking, the problem is that the picker in the machine cannot be adjusted at all, there are no means of doing it. We have screwed the detail loose and tried even to turn it upside down, but it didn't work. Thus, in the way the machine is assembled now, the clearance between the platform and the tip is 1—1.5 mm! The tip doesn't bump up against anything, the bobbin itself restrains the picker: 

    The metal plate that was botched by the "professionals" cannot be neither turned nor shifted — in fact, you are not able to do anything with it. A replacement is needed. 
    This is how the things are: You solve one problem… and encounter a new one in the process. 
    Out of curiosity, I went to see how this thing was handled in Velles 19. It turned that everything was in order: there was a clearance between the picker and the bobbin, which could be adjusted, and everything was done neatly: 


    b. Then, by reference to the various sources, the picker position against the main shaft is usually checked — to see whether it hasn't shifted right or left. Or whether the shift didn't exceed 1 mm (my picker is off the center, you can see that with the naked eye without checking): 

    c. Then you should check the picker height in relation to the center of the bobbin at the same time. The height between the center and the upper point should be 7—9 mm. 

    But the servicemen persuaded not to check the last two things, but to confine myself to the clearance. This is easier, and more so because I can't even imagine with what to check this last parameter. But it seems clear how it can be adjusted. All you need is to loosen up the screws shown on the photo and set the necessary height — there are grooves for moving up and down: 

    There you have it, an important unit in the machine may cause problems with the thread coming out of needle. 
    2. The next unit to check is the thread take-up lever. Here it is in case somebody is not familiar with it: 

    Here you should make sure that: 
    a. The lever has not been damaged. 
    b. The lever puts the thread into the thread holder (the throat behind the needles, marked with an ordinary sticker). 
    These two options, too, were advised to me by the service engineers. Having read the materials from various sources (naturally!), I found out that I can adjust the hook myself, too. But this I haven't tried yet because it seems to be working properly. 
    Summary: I didn't solve the problem. But we have already thought what could be done in order to repair the picker and see where it would take us. 
    The more I embroider, the more I think that everybody should know their machine inside out. But who could teach us? 

    Machine embroidery techniques

    By Irina, in Machine embroidery materials and technology, , 1 comment, 3,391 views
    Original text by Marina Belova 
    Have you ever considered what exactly can you do on the embroidery machine? What can one do, which techniques and devices are known to us? After you begin to systematize your knowledge, you find out that machine embroidery has manifold possibilities. One cannot overlook that. 
    So, here is the classification of machine embroidery (the one that can be digitized), how I see it: 
    1. Ordinary machine embroidery — the embroidery without using any special devices or techniques: 
    Sole-colored embroidery — it has lots of varieties, from the cross stitch and to the redwork.  Multi-colored embroidery — from the simplest one to the cross stitch and color blends. 2. Employing a variety of embroidery techniques and with the help of our consumable materials: 
    Applique — no less than 10 varieties (raw-edge, free-standing, reverse, etc.)  Openwork embroidery (cutwork, pulled thread embroidery, and so on).  Free-standing embroidery — the one can function as an independent item — there are several types of it. Everyone's favorite FSL is also here.  Three-dimensional embroidery — no less that 5 variations, with and without the additional consumables (3D Puff, fillings and so on).  Quilt and trapunto  3. The kind of embroidery that requires extra machine embroidery devices or even the embroidery machines of special variety: 
    Boring — punching holes  Cording  Embroidery with ribbons  Chenille on special machines  Sequining — sewing on the sequins  I would also add the possibility of embroidering on caps, socks, pockets, ribbons and other ready garments with the help of additional devices. 
    Embroidery with beads — requires a special machine  Not so little as one might think. And that not to speak of the possibility of applying all the techniques on various fabrics. So there's a lot that could be done in terms of digitizing and technique. You can see the machine embroidered garments, kindly donated by our visitors, executed in various techniques in our Gallery and shop. 

    Dealing with sequins

    By Irina, in Machine embroidery materials and technology, , 1 comment, 5,164 views
    Original text by Marina Belova 
    Dealing with sequins is one of the blank spaces on my map of machine embroidery. And as I have to deal with them more and more often these days, I'm pushed into learning many new things. All of this because this topic is of the less researched. Nevertheless, our colleagues from China are ahead of the curve — as indeed is their custom — in using sequins in their designs. They of all people know how to digitize them properly.
    And I look on them with admiring envy for I haven't yet mastered this particular skill. 
    But as it is time for me to learn how to do this, I'll proceed to the theory. 
    It turned out that round sequins with a hole exactly in the center — you can see an ordinary Chinese-manufactured reel with such sequins on the photo below — are not the only ones: there are other varieties. 

    Sequins come in all shapes and sizes, from square to star-shaped ones. Besides, there are also sequins where the hole isn't centered. Just think about it, how much creative freedom this allows you! The main question is where to buy them. 
    Wilcom 2.0 sequin collection proves that they indeed come in a variety of shapes: 

    Later I'll photograph and show you how sequins of various shapes and sizes look in reality. 
    In theory, sequining is not at all difficult. You'll need a special device for it. What is extremely important — you should know how to adjust this device. Standard #40 threads are used for sewing sequins onto the fabric in most cases, and if you don't want to accentuate the sequins, select a monofilament yarn. 
    Machine embroidery design with sequins is easy to make — you'll only need to adjust several parameters, the most important of which are as follows: 
    The main parameter is sequin size. 
    The first adjustable parameter is the fix type. I.e. the way in which sequins will be attached to the fabric. The classic method is using the Y-stitch, which firmly holds the sequins and the fabric together: 

    Other ways of attaching sequins: 

    Which type to use depends on your embroidery software. In the Stitch Era editor there are the following types: 

    Which one of them to choose depends on the goal you want to achieve: you can create one design and change the fix type only, but not the thread and get different color when embroidering. The more threads cross the sequin, the more it abandons its own color, adopting the color of the thread instead. 
    The second adjustable parameter defines how far the next stitch will be from the sequin: 

    It is generally thought that if the distance will be excessive, the sequin won't sit tight. But I haven't found out what value is considered appropriate. Looks like I'll have to experiment a little. But if the next stitch begins right at the edge of the sequin, the resulting embroidery will be too stiff because such a short stitch will hold the sequin and the fabric together sure as death. 
    The third parameter determines the sequence of the sequins overlapping each other in the neighboring rows. 

    For example, Bonnie Nielsen considers the upper way incorrect and bad-looking. For me, it is a matter of opinions. 
    The fourth and the fifth parameters determine how far the sequins will be from one another in a single row and between different rows. 
    As for the sixth parameter, it determines which side of the sequin will be stitched down. When using the ordinary embroidery machine, the sequins should be stitched down on the north side, in order for preventing it from being shifted by the thread. Meaning, if you look at the sequining device from the top, you'll see that a sequin is situated below (south), the needle on top of it (north), and you sew it down from the other side, towards the feed. Wilcom even allows the users to adjust the angle at which the sequins will be attached (Set maximum allowable angle): 

    You can use the sequins in the following ways: 
    Set them along the line: 

    Fill the space with them (I can do in my Stitch Era along a straight or a curved line or in spirals): 

    Usually, you have almost no influence on the way the software transfers the contours onto the fabric. It will be as luck will have it. 
    You can add the sequined border to give the embroidery a nice finishing touch: 

    But some embroidery editors allow setting the standalone sequins in the places you need them. 
    This is all for now. But I have plans for the future: I'll show you how I did adjust the sequining device on my Chinese-manufactured machine, and the problems I encountered on the way. 

    What if the underthread keeps breaking?

    By Irina, in Machine embroidery materials and technology, , 1 comment, 2,930 views
    Original text by Marina Belova 
    This is another one of the educational articles on the subject of embroidery machine maintenance and solving minor problems without the help of a service engineer. 
    Does your underthread break often? I've only had some isolated cases. Consequently, I didn't gather any data on the subject and I never knew the reason for a situation like that. 
    But it turns out that if this happens you should do some checking. According to the official recommendations of the tech service you need to do as follows: 
    Apparently, you should check whether:  The bobbin thread is not old  The bobbin thread is of poor quality  And if so, then, of course, you need to replace them. How do you personally rank bobbin threads? Which ones do you use? I've tried many different kinds, and now it's clear to me which ones are good (bad) and which ones are cost-efficient or not. 
    You should also check if any of the units that touch the underthread does not work properly.  Whether the thread has been inserted into the bobbin case in the right way. In case any of you is unfamiliar with the subject, you can read about it here.  Whether the bobbin case tension is too high. I touched the subject slightly it in my article on the thread tension adjustment. But it appears that some information about the Drop test there was not entirely true because I've just seen another, slightly different version of that same test.  Whether the thread had been properly wound: not too loose or lopsided etc. For example, if you wind up too much thread as it often happens on my Velles 15, the bobbin gets stuck inside the case and loses the ability to spin.  There may also be less obvious things that should be checked as well: 
    Scratches in the throat plate opening.  Scratches on the bobbin case tension spring.  Whether the bobbin case is round in shape at all. Click to read how the case being not round can influence the embroidery what are the ways of checking it.  I'll also add — not from my own experience, but out of the variety of sources which I've studied thoroughly when delving on the topic: 
    Check the point of a hook for scratches and polish it, if that's the case: 
    Also check the retainer (also called hook support, finger) — whether it is not scratched. I'll write about the retainer some time: 
    I hope that there will be people that will find this article of any help. 

    Tatami fill on 3D Puff

    By Irina, in Machine embroidery materials and technology, , 3 comments, 11,174 views
    Original text by Marina Belova 
    About two weeks ago I saw a cap with a 3D embroidery of a very high quality at my work. The distinctive feature of that embroidery was that it hadn't been done in the usual way 3D embroidery design again — covering the 3D Puff with satin stitches. Instead, the 3D Puff was covered with the ordinary Tatami stitches because the design didn't allow doing it any other way — the shape of the embroidered object was too intricate. Nonetheless, the embroidery looked puffy enough. 
    Of course, I've been familiar with this method for some time now, yet I haven't seen any examples. Moreover, I haven't even seen a single photo of an item embroidered in this way. For this reason, I used to think that Tatami fill with its abundant needle perforations would break the 3D Puff and the embroidery would be flat. I couldn't be more wrong. 
    Of course, seeing a real-life example of an embroidery of that kind, understanding that someone managed to do it, one cannot help to become eager to do something like that, too. Having considered it for a while, I chose a design and digitized it:

    It turned out that there was not the slightest difficulty in making a machine embroidery design that would work. All of the rules for digitizing a design with satin stitches over 3D Puff could be applied here: increase the density and secure the open ends (provided that they are present). I didn't use any understitching, except for the edge run. You can read here why I did so. I used the standard flat Tatami pattern that can be found in any editor, with needle penetration offset at 33 and 66%. 
    The embroidery process goes as follows:
    First, we mark the place on the fabric where the 3D Puff will be located with a guide stitch. I do it only because 3D Puff is quite expensive, and I'd better not squander it:

    Place a piece of the 3D Puff onto it, having previously sprayed it with an adhesive: I used Gunold solid 3D Puff because it was the only one I had:

    Embroider:

    Give the embroidery design the finishing touches:

    Tear off the Puff. Everything looks very, very good.

    3D Puff under Tatami pattern was nearly as high as under the satin columns: 

    All I have left is to remove the 3D Puff leftovers that stick out.
    And this is how the boundaries are destroyed. 

  • Top Downloads

  • Recently Browsing   0 members

    • No registered users viewing this page.
×
×
  • Create New...