Jump to content

Articles

Our website articles

My embroidery machine doesn’t recognize a design. What am I to do?
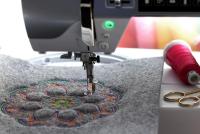
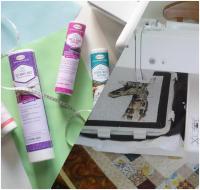
Olga approached the embroidery machine. In her hand, there was a brand new 32 Gb USB flash drive that she had bought online specifically for the purpose. Olga drew her breath. She was about to initiate her very first contact with the embroidery machine. Olga stretched her arm in the direction of the USB port on a side panel. The data transfer was about to commence!
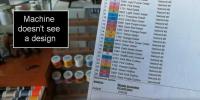
Her swift stylus was flying over the screen, guiding her to the location, which, according to the manual, contained her embroidery designs. These operations were familiar to Olga: after all, she didn’t play Solitaire on her phone during the long winter evenings for nothing. In the end, she was in for a disappointment: the machine found no designs on the USB flash drive. Olga was quite puzzled: what happened to her files and why the machine did not see them?

The embroidery machine doesn’t recognize a design
This article deals with the problems almost every machine embroidery novice encounters sooner or later. Gradually, old problems are solved and give way to the new ones; therefore, the information accumulated here will be updated.
Before loading the designs into your embroidery machine, carefully read the manual to learn how this can be done. Presently, the most popular way of doing that is using a USB flash drive. For this very reason, it is the USB Flash drive that is most troublesome for novice embroiderers.
In this article, I’ll describe the main reasons for the design load failure, together with the possible solutions.
The stitch file format is unfamiliar for your embroidery machine
The embroidery machine manual always lists all compatible file formats/types. The format/extension is identified by the three letters after the dot in the name of the file.
Every manufacturer has its own format to add to the embroiderer’s troubles.
Brother — PES Janome — JEF Bernina — ART Pfaff — VIP And so on.
If you saved your design in the PES format, and your machine can only read JEF and DST, do not expect miracles. Your machine won’t be able to see the design.
Today, DST is considered a universal stitch format. A lot of manufacturers are aware of the fact, their equipment supporting both DST and the format that is its “native”.
If your machine can read DST — use it!
USB flash drive is full
You have crammed too much information into your USB flash drive. This problem does not occur frequently, but it might, especially if you own a machine of one of the previous generations. Try to format the USB flash drive and then load the designs. If the solution has worked, congratulations! If not, read on.
You’re using a file format of the newer version 
I've mentioned the file formats/types just above. You already know that your machine supports PES files, but the machine still fails to recognize them. One possible explanation is that you’re using a newer version of PES than the ones supported by your machine (there are approximately 10 versions of it in total). This trouble usually bothers the owners of the machines that support PES format. What can be done in this case?
Open the file in any converter software and save it in the older version of the format. Embird automatically saves the files in the latest version of the format, it being compatible with the majority of Brother embroidery machines.
Machine embroidery design was saved to a wrong folder
Again, I suggest perusing your embroidery machine manual. It describes the correct sequence, in which the designs should be saved to the USB flash drive, and how to prepare it for the task. Before starting to load any designs, you should format it. Switch on your embroidery machine and insert your USB flash drive into the port. The machine will find and format it, if necessary, creating the system folders. It is in one of these folders that the files should be loaded.
In case your machine was made after 2014, you’ll most probably never have to face this problem, as the loading process has since been simplified. On the other hand, anything can happen.
The design is too big
Any embroidery machine has a maximum embroidery area. It determines the largest size of the design that can be loaded into this particular piece of equipment. If you try to load a 141x139 mm design into the machine that only handles the ones up to 140x140 mm, it won’t be recognized. Open the design in any converter/embroidery editor and check the size. If the design is too large, resize it without stitch recount so as to preserve the decorative fills.
P.S. Do not mistake the Giga hoop size with the maximum embroidery area!
Embroidery design is not centered
Some embroidery formats contain information about the positioning of the design along the X and Y axes. They convey this information to the embroidery machine, and, in case the design is off-center, the machine will fail to recognize it. This problem can be solved by using more complex converters or software specifically designed for the loading of the designs into the embroidery machine. As a rule, they center the designs automatically.
P.S. This trouble is common for Janome embroidery machines, with their native JEF format. The ultimate fix is provided by Customizer or Embird. Convert the design, ticking the Center in the Hoop box.
You forgot to load the design to the USB Flash drive
Yep, it happens. Insert your USB flash drive in the port on your laptop or PC and check.
Stitch count is too large
This problem usually occurs on the old machines with small hoops, when one is trying to embroider PhotoStitch designs on them. It means the embroidery file contains more stitches that the machine can process. Solution: divide the file by color into two parts.
USB flash drive is not compatible with the machine
A home embroidery machine is a whimsical lady: sometimes the size is all wrong, sometimes it is the face (or, rather, the manufacturer) she takes an immediate dislike to. If nothing of the above has helped, get a new USB flash drive. Which one to choose? I won’t recommend any particular brands. In my experience, two machines of the same manufacturer and of the identical version treated the same USB flash drive differently: one easily recognized all files, the other refused to do it until they were saved in the special design loading software. Furthermore, the machine behaved in a strange way, stitching like there’s no tomorrow, once the USB flash drive was inserted. So, seek your own USB Flash drive, and ye shall find.
Choose the smaller one. The smaller, the better. 
If you have any questions or suggestions, please feel free to write us a commentary or start a topic in the community. May only the easy-to-read formats and universally accepted USB flash drives come your way!
Original text by Lisa Prass
How to use a Ruffler foot
Today, we’ll be working with a presser foot designed for the creation of the pleats, frills and ruffles. A little while ago I promised to show you what the Ruffler foot is capable of. At the first glance, the contraption seems a bit complicated. Several adjusters and guides allow you to gather fabric and simultaneously attach ruffles to the garment. Let’s see how it works.

The Ruffler foot structure:
A bifurcated arm (4) serves to synchronize the attachment with the needle bar. The clamp (5) is for quick attachment of the foot to the machine. Two screws and the adapter at the rear enable the foot to move up and down, and to the left and to the right of the needle bar. Adjusters:
The depth screw (1) determines the amount of fabric pushed into the foot every time it tucks: from 1 to 8 mm. With the ruffle regulator (2), you determine how often a ruffle will appear: every 1, 6 or 12 stitches. Once set it to *, the attachment will create no ruffles at all. Fabric guide lines:
Green line — for the main fabric, no ruffles. Red line — the ruffling blade. Lilac line — the fabric feed plate (also for braids, ribbons).

You may place your fabric along any of the three guide lines, but only using the red one will give you ruffles.
Stitch at a low or medium speed!
Types of ruffles and pleats:
Single or double pleat. To create one or the other, place one (or two, in the latter case) pieces of fabric to be ruffled, along the red guide line. Set the depth screw at 4 or higher. Set the Ruffle regulator to 6 or 12.

How to ruffle fabric and attach it to the main fabric simultaneously
Set the regulators to make single or double pleats. Insert the main fabric into the guide along the green guide line.

You can create a twisted pleat, using a capronic or a satin band, or a specially prepared piece of fabric up to 7 cm wide. Set the stitch length at 2.5 mm. Set the depth screw at 1–3, and the ruffle regulator at 1.

It’s also possible to ruffle fabric and simultaneously attach it to two flat fabrics, on the top and bottom. In order to do this, insert the main fabric with its right side facing up, into the foot along the green guide line, and the fabric to be pleated along the red line, with its right side also facing up. Along the lilac line, place the second piece of fabric, with its wrong side facing up.
Use the prongs on the foot for the width of the seam allowance to be consistent.


How to attach a pleat, folded in half, to the hem of the garment
Finish your seam allowance with an overlocker.
Mark the width of the seam allowance on the right side with a fabric marker. Place the main fabric along the green guide line, and the fabric to be ruffled along the red one.
Adjust the regulators.
Stitch to create the ruffles.
Press down seam allowance to the wrong side and stitch along the edge.

Joining the satin ribbon to the pleat
Place the main fabric along the green guide line, and the fabric to be ruffled along the red one.
Insert a narrow (up to 5 mm) satin ribbon into the foot, using the prong. Stitch.


These are just the highlights of what the Ruffler is capable of. Play around with it, creating your own variants.
Read what you can do with the Ruffler foot:
Original text by Yelena Kraftwork
Sewing accessories: a Ruffler foot
Pleats are cute! Ruffles, pleats, and frills are fashionable again. You can use the main fabric or decorative ribbons, and attach the ruffles to the garment or at the edge. The variety of textures in one garment is very popular this season. This article contains three short tutorials. You may choose the one you like for the embellishment of your apparel. Revamp a dress you grew tired of, replace old and dull sleeves with the puffed ones with the cute ruffled ribbon decoration.
Revamping an old dress: Materials
A dress A sewing machine Sewing threads The Ruffler foot 65 cm of chiffon fabric of the matching color Ribbons of varying width and texture, of the matching colors
Revamping an old dress: Ruffler foot
Attach the Ruffler foot and ruffle your ribbons. They will look as if made by a professional. Feeding the fabric to be ruffled into the foot with a steady hand at an even pace, you’ll finish the job quickly.
Adjust the depth screw. You may choose any value between 1 and 8. The higher the number, the deeper the pleat (more fabric is tucked into the foot). If you set it to 1 or 2, the attachment will create very narrow pleats. Set it to 8, and the pleats will be as deep as possible. Using the manual, replace your ordinary presser foot with a Ruffler foot.


Adjust the ruffle regulator. The lever can be put in one of the four possible positions: 1, 6, 12 and *. If set to 1, the ruffle will be made with every stitch. If set to 6, the ruffle will appear every 6 stitches, and if set to 12, every twelfth stitch. In case you need a straight stitch, set the lever to *. The stitch length also affects the distance between the ruffles. The lower it is, the closer together they will be.
Set your needle in the center position. Push a ribbon through the foot. Put one end of the ribbon in a piece of paper and push it between the ruffling blade and the fabric feed plate. After that, the paper can be removed.


Position the ribbon in such a way that the needle is exactly in the middle between its two edges. Sew at a low speed. Don’t forget to check: the row of stitches should run in the middle.  


Adjust the ruffle depth and the distance between the ruffles in accordance with the ribbon width. The narrower the ribbon, the lesser the pleat depth. 


Revamping an old dress: Decorating the sleeves
Prepare your sleeves for the decoration. Rip them out, unravel the seams and iron out the pieces. Now, you need to cut the identical pieces out of the chiffon.
Fold the chiffon in half, with its right side inside. Place the “real” sleeve on top and cut along the outline. To the newly-cut chiffon parts, fuse the interfacing material. It will strengthen the fabric and prevent it from shifting. 


Lay out the prepared ribbons on top. Alternate wide and narrow ones. Pin them and sew the straight stitch along the gathering line. You may cover the seam with a cord or a narrow satin ribbon. Attach the cord with a zigzag stitch.  


Once the ribbons are attached, remove the interfacing material from the wrong side.


Fold the hems, sew the sleeves and attach them to the arm-holes.

Wear happily! 


In the second part of our article, we are going to sew a summer jacket with basque and decorate it with a ruffled satin ribbon.
Summer jacket with basque. Materials
Fabric for the jacket (110 cm long and 140 cm wide) Jacket sewing pattern (to the waistline) A 20x90 cm piece of colored satin for the decoration A Ruffler foot A sewing machine Sewing threads Summer jacket with basque. Preparing the decoration
Adjust the depth screw. Set the depth screw to 8. Using the manual, replace your ordinary presser foot with a Ruffler foot. Set your needle in the center position. 


Set the ruffle regulator to 6, so that every 6 stitches you get a ruffle.
Cut the colored satin fabric into strips 6 cm wide and approximately 180–200 cm long. Fold the ribbon in half (lengthwise) and iron out all the way. Put one end of the ribbon in a piece of paper and push it between the ruffling blade and the fabric feed plate. After that, the paper can be removed. Place the needle above the ribbon 1 cm from its edge. Sew at a low speed. Check the position of the seam: it should run 1 cm from the edge.  


Press down the ruffles with an iron.


Summer jacket with basque. Sewing
Cut out the parts and sew the sides, shoulders, and darts. 


Pin the already ruffled satin ribbon to the right front part along the centerline, around the neckline and 15 cm under the neckline on the left front edge. Stitch close to the edge.


Sew the facing and the neckline facing together. On top of the decoration, pin the facing and the neckline facing to the right front part of your jacket on the right side, and stitch 1 cm from the edge.
Turn the facing the wrong side out and iron out. Using the edge stitch presser foot, finish the edge (stitch on the right side).
For the basque, prepare a piece of fabric approximately 160 cm long and 11 cm wide. Turn up the lower edge and stitch. 


Along the upper edge, attach the ruffles, 1 cm from the edge. 


Press down the ruffles on the basque with an iron. Pin the basque to the lower part of the jacket and sew.


Cover the seam with a satin ribbon 1.5 cm wide (in the ready state) and stitch on both sides. Prior to that, fold the hems and flatten them with an iron. 


Sew the sleeve, fold the hem and stitch. Attach the sleeve to the arm-hole. Attach the snap fasteners.


“One-click” cascade ruffles
All you need to sew a dress with cascade ruffles is a piece of fabric and a Ruffler foot. This tutorial will show you the possible variants of cascade ruffles, assembled at home.
“One-click” cascade ruffles Version 1
For this job, you’ll need: A sewing machine Sewing threads A Ruffler foot A piece of lace 15 cm wide and 600 cm long, for a three-tier skirt with a 60–65 cm waistline “One-click” cascade ruffles. Creating the ruffles
Prepare the lace for the skirt. Adjust the depth screw. Set the depth screw to 8.
Set the ruffle regulator to 6, so that every 6 stitches you get a ruffle. Set your needle in the center position. You can narrow the distance between the pleats by reducing the stitch length. Do the test sewing.


Push the lace through the foot. Position the needle above the lace 1 cm from the edge. Sew at a low speed. Check the position of the seam: it should run 1 cm from the edge. Ruffle the whole length of the lace piece. It will be used to create a three-tier skirt.


“One-click” cascade ruffles. Sewing the dress
Sew the bodice on the sides. Don’t touch the back seam. Starting from the center back, stitch the first tier of ruffles to the bodice along the waistline, right sides inside. Cut the excess lace. The seam at the back should remain open all the way.


Stitch the second tier of the ruffles to the first one. Hide the end of the ruffled lace under the first tier of ruffles. Sew the straight stitch on the right side. Cut the excess lace. Stitch the third tier to the second one. Sew the dress at the back, from the neck hole to the lower edge.  


Finish the neck hole and attach the sleeves.

“One-click” cascade ruffles Version 2
For this job, you’ll need:
A sewing machine Sewing threads A Ruffler foot A piece of lining 13 cm wide and equal to the lace in length. A piece of lace 15 cm wide and 500 cm long, for a three-tier skirt with a 55 cm waistline. “One-click” cascade ruffles. Preparing lace
Do steps 1 and 2 from Version 1. Cover the lining with the lace, align them together and push the whole into the foot. Place the needle above the ribbon 1 cm from the edge.
Sew at a low speed. Check the position of the seam: it should run 1 cm from the edge. You will ruffle two fabrics simultaneously.


Ruffle the whole length of the lace piece. It will be used to create a three-tier skirt.


“One-click” cascade ruffles. Sewing the dress
Sew the bodice on the sides. Don’t touch the back seam. Starting from the center back, stitch the first tier of ruffles to the bodice along the waistline, right sides inside. Cut the excess lace. The seam at the back should remain open all the way.


Stitch the second tier of ruffles to the lining of the first tier, using a straight stitch. Cut the excess lace.

Stitch the third tier to the lining of the second one. Sew skirt at the back in two stages. First, all lace tiers, with their right sides together. Then, all lining tiers with one seam.  


Finish the neck hole and attach the sleeves.

Original text by Olga Milovanova
Read also: 
 
 
Custom wedding invitation
I began preparing for my wedding with the making of the wedding invitations. The wedding is a pretty important occasion in the life of a woman, so I took the matter seriously.
Naturally, I wanted my invitations to be hand-made and original. In this, I succeeded.
Tools and materials
2 sheets of scrapbooking paper, size 30.5*30.5 cm (I used Fleur Design Romantic Vintage and Romantic Patterns) A satin ribbon 1.2 cm wide A heat gun Embossing powder Alphabet stamp (Russian letters “В” and “Д” in my case) An embossing ink pad An acrylic stamping block Talcum powder and sponge (for degreasing) A cutting mat Sticky foam pads Glue Double-sided adhesive tape (narrow) Scissors, ruler, pencil, design knife, a pair of tweezers A creasing tool A corner hole punch for the insertion of the photograph First, I created files for cutting in the Canvas Workspace and transferred the designs to the cutting machine via USB flash drive. I used the slightly sticky cutting mat and a standard knife. Before the work started, I adjusted the knife (the paper density is very important here) and did several test cuts. Only after that, I proceeded to the scanning and positioning.

I cut the following details: an envelope, an insert piece, and some decorative elements for the front part of my invitation (a carrier with two openings, a carved edge decoration, and an oval thing).

If the cutting machine has left something uncut, don't panic. You can easily remedy it with a design knife.


To get the neat-looking, I smoothed them out on all sides with a creasing tool and also made some folding creases on the envelope (center part and sides — let’s call them “wings”).


I stuck small strips of adhesive tape on both “wings” and glued the parts of the envelope together.

This resulted in a lot of workpieces.

Using my hole punch, I made several openings the insert piece so that I could put in the text sheet later (you may glue it or use Canvas Workspace instead).

I also decided to emboss the bride and bridegroom’s initials (you may just stamp them with ink or glue the word “Invitation” or something).
For embossing, you’ll need:
A heat gun Embossing powder An embossing ink pad “В” and “Д” stamps An acrylic stamping block Talcum powder and sponge (for degreasing)
First, I prepared the surface, using talcum powder and sponge (so that the small particles of the embossing powder only stuck to the parts I had applied my stamp to).

Then I used the pad to create the inscription, sprinkled the embossing powder, shook off the excess and heated the inscription. As the heat gun gets really hot, I recommend holding your paper with tweezers.


All is ready for the assembling of the invitation:

An envelope blank An insert piece Three decorative elements: The carrier with two openings, the decoration with carved edges and the oval thing with embossing A satin ribbon 1.2 mm wide Sticky foam pads Glue A ruler and scissors I held the ribbon to the envelope, measured the required length (it should be sufficient to go around the envelope), and cut. I could have singed the edge with a lighter, so as to prevent it from unraveling, but decided not to, for the ends were to be glued.

Then I passed the ribbon through the carrier and glued one end of it almost at the center (use any glue you like).


Then I pulled the ribbon tight, overlapped, and glued the second edge. I shifted the carrier toward the center so that it covered that spot.

I used glue to attach the decoration with the carved edges, but you may replace it with double-sided adhesive tape. Then, I stuck the oval thing with embossing (my inscription) to the sticky foam pads.
Our wedding invitation is ready.

All that’s left to do is to print the text with the vital details about the wedding and to attach it.

Original text by Valeria Balashova
A guide to sewing a freestyle backpack purse.
Beginning
Step 1. Let’s sew the straps. We have 4 of those.
If you use fabric, fold the pattern No13 right side inside, stitch the sides together, turn right side out and finish the edges with a topstitch.
If you use leather or artificial leather, trim allowance on the sides of the pattern No13. Glue the edges on the wrong side and fold them toward the center. Finish the edges with a topstitch.
Put the resulting leather/fabric/webbing piece through the metallic frame, thus getting a part of the future strap.

Step 2. Sew the straps to the pattern No5, in accordance with the plotted lines painted on it.
Step 3. Place the pattern No6 (the lower edge) on top of the pattern No5 (the edge with the straps), and stitch with seam allowance, right sides facing each other. Turn the piece right side out and add do a topstitch along the seam (the seam allowance should be facing the bottom, the straps should be facing the back).
Step 4. Now take resulting piece of Step 3, and match up the narrow part of the pattern No5 with the lower edge of the pattern No4, right sides facing each other.

Stitch with seam allowance, fold back to the right side and finish with a topstitch along the seam on the side of the pattern No5 (the seam allowance should be facing toward the bottom).
Step 5. To the resulting piece of Step 4, attach the edging, in accordance with the plotted lines on the pattern No6.
Step 6. Preparing a zipper. Put the parts of the pattern No11 together, their right sides facing each other, so that the short end of the assembly covers a 40 cm long zipper. Stitch with 1 cm seam allowance and then topstitch along the seam.

Step 7. Stitch the resulting pieces of Step 5 and Step 6 together, in accordance with the plotted lines. One flange of the zipper is now secured.

Step 8. Place two parts of the pattern No7 (canvas) on top of each other, right sides facing each other, and sew along the lower edge with seam allowance.
Flip both parts back.
Place the resulting piece of Step 7 on the canvas, right sides facing each other, in accordance with the plotted lines. Sew with seam allowance to the edge of the pattern No4 (the assembly with the zipper).
***The beginning and the end of the line of stitching should not overlap the second canvas piece.
Step 9. Turn the Pattern No8 right side out.
Transfer the center point over onto the zipper tape.
Cover it with the second piece of canvas, right sides facing each other, align the centers and the triangular bracings.
Baste and stitch with 0.5 seam allowance.
Step 10. Patch plate on the front.
If you decided to make your patch plate rectangular, fold the edges to the center and do a topstitch along the folding lines.
Sew the last pair of straps to the pattern No12. You may shorten these straps as much as possible.

Step 11. Sew the resulting piece of Step 10 to the pattern No3.
Step 12. Sew the resulting piece of Step 11 to the pattern No9, matching up the centers.
Step 13. Now we’re going to sew the short handles.
If you're using fabric, fold the parts of the pattern No10, right sides facing each other, and stitch with seam allowance.
Turn the whole thing right side out, press it with an iron and do a topstitch along the folding lines.
If you're using leather or artificial leather,
glue the long sides to a depth of 2 cm. Hem in the seam allowance, then gently tap the folds with a small hammer.
Fold the result in half and sew the folded hems together.
Add another line of stitching at the same distance, parallel to the first.
Round handle: an alternative.
To make a round handle, you’ll need a cord, preferably the one that has a core. The circumference of the handle will depend on the diameter of the cord. The point here is to match the diameter of the cord to the inner part of the future handle. The cord should be equal to the pattern No10 in length, minus 2 cm of seam allowance.
How to calculate the width of the pattern No10 (the round handle):
Measure the diameter of the cord, if unknown. Add 3–5 mm so that is moves freely, and 2 cm allowance on top of that. That will give you get the necessary width.
Fold the seam allowance to the wrong side. Glue (if you're using leather) or baste (if you’re using fabric). Match up the folded hems and sew.
Using whatever you have at hand, pass the cord through the pattern.
This is how I do it. First, I pick up a thick thread and a needle. Having cut 30 cm of the thread, I secure it at the end of the cord, winding it around several times with a needle. I also have a sturdy strand of wire. Folding it in half; I attach the free end of the thread to the bend.
Then I pass the wire through my future short handle and draw the end of the cord on the other side.
It will take some effort, because there is not too much room inside. It will be an easy journey from here.
We now have the straps.
Step 14. Sew the result of Step 13 (the short handles) to the short edges of the result of Step 12, right sides facing each other, at a distance of 1.5 cm from the corner.
Step 15. Now let’s add our zipper.
Fold the pattern No2 in half and put it on top of your main zipper, close to the teeth, but not too close.
Sew along the folding line at a distance of 3–5 mm from the edge. If the zipper tape is wide, you may add another line of stitching, parallel to the first. Repeat with the second flange.
Be sure to do the reversing to secure the end of the zipper so that it doesn’t pop open.

Step 16. Sew the resulting piece of Step 15 to the even edge of the pattern No1 (made of outer fabric), right sides together. Repeat with the second part of pattern No1.
 
Step 17. If you’re making a bag out of fabric, baste the resulting piece of the Step 14 to the resulting piece of the pattern 16, right sides together, at a distance of 1.5 cm from the upper edge of the pattern No1. Later this assembly will be stitched to the upper edge of the body of the bag.
In order to make a beautiful even seam, use the markings on the pattern No1 that correspond to the markings on the bottom part of the resulting piece of Step 14.
Do not sew the upper edges of the lining to the upper end of the body!

Stitch the basted edges with seam allowance.
Thus we get the future upper part of the backpack.
Step 18. Put the two parts of the pattern No8 together, right sides facing each other, and stitch along the upper and lower edges. Turn right side out through the open sides. If you decided to make two pockets, repeat this last step with the second part of the pattern No8.
Iron out the pocket edges.
Step 19. Sew the resulting piece of Step 18 to the pattern No6, in accordance with the plotted lines. Sew or baste the sides, fixing them in place. Stitch along bottom folding line, thus attaching the lower part of the pocket. Or, you may stitch the pocket in one go: first the right side, then the bottom, and then the left.
Step 20. Now, the lining for the body of your bag.
Align the resulting piece of Step 19 and the pattern No9, and sew with seam allowance along the shorter edge, right sides facing each other.
Press the seam allowance open.
Step 21. Sew the result of the Step 20 with the pattern N1 (the lining), at a distance of 1.5 cm from the upper corner of that pattern. Leave an opening for turning your backpack right side out.
Step 22. Unzip.
Align the upper edges of the result of Step 21 (right side) to the upper edges of the resulting piece of Step 17 (wrong side). Sew with seam allowance.
Step 23. Tuck the outer part of the bag into the lining. Do not turn the whole thing right side out yet.
Align the open side edges of the lining and the zipper. Make sure that the edges of the inside and outside parts of the bag align.
Sew with seam allowance.

Step 24. Turn the backpack right side out through the opening in the lining.
Tuck the lining into the backpack and check all of the seams for defects.
All good? Then stitch the opening in the lining with a blind stitch.
Step 25. Now let’s prepare the lower parts of the straps.
Use the technique from step 13. We sewed the short handles there.
Step 26. Slide on the strap adjusters.
Detachable straps.
Stitch the strap ends.
Non-detachable straps.
Pass the strap ends through the openings in the front part of the backpack and sew.
Pass the other ends through the openings on the back (the ones on the straps) and then once more through the strap length adjusters, so as to form a second lover loop.
Sewing the edge of the shoulder straps.
P.S. If you find any part of the tutorial difficult, feel free to write a comment, and we’ll try to help.
Please share the photos of your backpacks with us; we’ll be happy to add them to our Gallery!
We’ll be happy to see your creations!
Sewing tutorial: an eco-friendly bag with a Rooster
This is another one of the tutorials presented at the Mlyn exhibition in Minsk. In this tutorial, I’ll show you how to sew an eco-friendly bag with a reverse appliqué (Rooster). And not just a simple appliqué, but a quilted one, too.

Sewing a Rooster eco bag. Materials:
Unbleached linen fabric For the bag: 2 pieces, 30 x 35 cm each For the handles: 2 pieces, 7 x 60 cm each (or 1 piece, 7 x120 cm) For the lining: 2 pieces of calico, 32 x 30 cm plus 1 piece, 18 x 18 cm – for the pocket Colored strips of fabric 24 cm long for the appliqué (the width may vary: 2.5 or 3 or 3.5 cm) Sewing threads, erasable pen, zigzag scissors. Sewing a Rooster eco-friendly bag. The working process:
For the decoration, we’ll be using a raw edge reverse appliqué. You can use any outline drawing of a rooster size 20 x 20 cm. Print it and cut out the pattern.
Stitch the strips of fabric together to make a quilt: one after the other, alternating between different colors, until you get a piece 24 x 24 cm in size.


Place the front part of your bag on top of the quilt and secure it with pins.

Trace the design onto the fabric with an erasable pen. Make sure that the design isn’t bigger than the quilted area. Sew along the outline with a decorative stitch.


Using your zigzag scissors, make a hole in the outlined area and cut it close to the outline.


Use the resulting piece to create your eco-bag.

Original text by Olga Milovanova
Machine embroidery with subsequent coloring
Today, I want to share a very interesting project that involves machine embroidery and coloring. A ready-made child raincoat was used. In the course of making, a lining had to be ripped off, and sewn back again after the project was completed. I needed to do that to keep the inner side of the garment neat and clean. The idea was to embroider an outline and then to paint the inner areas with different colors, using color textile markers made specifically for such purposes.
For this project, I needed:
A child’s raincoat Tearaway stabilizer Black embroidery threads and lower (bobbin) thread Color textile markers (permanent) Brother embroidery or sewing and embroidery machine   Design creation and editing software Creation of the design
First, I created an embroidery design. Suitable vector images were found on the Internet. You can use bitmap images, too, if you like, but they usually take much more time and effort. Several fragments of the embroidery were thus converted and later aligned with each other during the embroidery.

Embroidery
In this particular case, it was convenient to use the largest hoop available. As the embroidery was conducted on Brother Innov-is V7 machine, it was practicable to use a 300 x180 cm frame that comes with the machine – it helped to reduce the number of rehoopings.
A rightly chosen stabilizer is a must if you want to get a high-quality embroidery. I used Filmoplast.

In order for the outline to look sharp and distinguished, it was digitized as a double stitch.

After the embroidery was completed, I removed all stabilizer leftovers from the wrong side.

The embroidery ran along the lower hem of the garment, and also around the sleeves (which were, too, unseamed in advance). The embroidery took quite a lengthy amount of time, but the result was worth it! The raincoat looks very original and exquisite!

Let’s proceed to the coloring.
For the last step, we required permanent textile markers. A happy owner of the future raincoat was invited to join the process; she readily employed all her skills to her heart’s content.


A few hours of pleasant collaboration – and an exclusive raincoat is ready! It’s certainly one and only! 

Original text and sewing project by Olga Milovanova

 
Circular embroidery attachment
Being an owner of a wonderful Brother Innov-is 950 sewing and embroidery machine, I constantly seek to add functionality to it. I’m able to do it with various accessories and attachments. Today, I want to tell you about a circular embroidery attachment which is not listed among the Brother machines accessories. I bought it on a trial basis, without being sure whether it is compatible or not. Now I am able to state with confidence that it is indeed compatible not only with my machine but also the whole number of other models.

Circular embroidery attachment. Materials
Dense fabric Circular embroidery attachment Sewing threads Scissors Embroidery or sewing and embroidery machine
Circular embroidery attachment. How to install and sew
I covered all the key aspects in my video. I want to additionally stress several, in my opinion, important points:
During the attachment installation, the long lever should hover over the screw that holds the needle in place. Only in that position the attachment will move in the proper way, forming a circular pattern.
 The upper thread should be above the attachment prior to the beginning of the embroidery. Make sure that is doesn’t get underneath. The lower side of the attachment is covered with a thick non-slippery material that allows moving the fabric in the right direction. If the thread gets under the attachment, the fabric will shift, and the embroidery will come out warped.
  If you’re going to use thin fabric, make sure to strengthen it with a machine embroidery stabilizer prior to the embroidery. A tearaway adhesive works fine, as it is easy to remove after the work is done.
 You may choose from a multitude of decorative stitches (including zigzag) in your circular embroidery. Before starting on the real thing, do not forget to do a test sew first.
 Turn off the feed dog before starting the embroidery. The attachment itself will feed the fabric.
With its help, you will be able to embroider circular designs of three different sizes: large, medium-sized and small. To change the size, you’ll need to loosen the screw, move the attachment to the “plus” or “minus” side and tighten the screw again.

Double needles, too, may be used for circular embroidery.
The attachment is also compatible with such Brother machines as: Boutique 27, Comfort 10, Comfort 15, Comfort 25, Comfort 25A, Comfort 35A, LS2125, LS3125, Prestige 100, Prestige 200, Prestige 300, Prestige 50, Universal 17, Universal 25, Universal 27S, Universal 37S, XL-2130, XL-2140, XL-2240, XL-2250, XL-2600, XL-3500, XL-2120, XL-2220, XL-2230, XL-5050, XL-5060, XL-5070, XL-5500, XL-5600, XL-5700.
Original text by Mary Stratan
Clothes repair: Changing a zipper in a jacket
If a zipper in your favorite jacket stopped working, don’t despair! Don’t be haste to chuck it. With a sewing machine at home, you’ll be able to repair it for a very small price. In this tutorial, I’ll show you how to change a zipper with a cord in a kids' jacket. The method used here is identical to the one in this article (link coming soon!).
Changing a zipper in a jacket. Preparations
To prepare for the job, you need to rip the seams open to remove the broken zipper, to buy a new one, preferably of the same length. Clear away the thread remnants.


Close to the teeth of the new zipper, baste the cord.


Changing a zipper in a jacket. Sewing
To sew a zipper, you’ll need two pressure feet: a standard zipper foot and a cording foot. Prepare your machine for cording. Choose a straight stitch, with the needle in the center position, and set the stitch length at 3 mm.


Place the zipper with the cording under the foot and stitch carefully.


After that, baste the zipper to the jacket, and fold the cording to the wrong side.


Likewise, fold the upper edge of the jacket to the wrong side and baste. Make sure that the two halves of the cording are equal in length. Now install the zipper foot, and position the needle at the right or at the left.
The side depends on which side of the zipper you’re going to attach first.


Sew the zipper to the jacket.
The work is done, and the jacket gets the second life.

Original text by Irina Lisitsa
Decorating a kitchen: an embroidered pot holder
Not only will an embroidered pot holder protect your hands from scalding but also make your kitchen look lovely. In the course of our collaborative projects, the participants are required to embroider any of the kitchen or table textiles of their choice. No need to do something complex, as one can always make a pot holder.
An embroidered pot holder. Materials
Sole-colored cotton, 2 pieces Printed cotton, 1 piece Tearaway adhesive stabilizer Upper thread Underthread Scissors Cotton lace Padding material
An embroidered pot holder. The making process
I used two sole-colored pieces of different fabrics for the embroidered part and for the back part of my pot holder, with a binding. I could have cut the front and the back parts out of the same fabric, as it would look more natural if the whole thing was white. But I didn't have the necessary amount of white fabric, and therefore, I supplemented it with beige one.
Let’s embroider a design first. Stabilize your fabric and hoop it. Select your threads (I do it beforehand, and sort them in the order of sewing), and start the embroidery. While the machine is going, you can make yourself a cup of coffee, pausing occasionally to change the thread.

Once the embroidery is ready, unhoop the fabric and do the cutting. Natural fabrics, being heat-resistant, are preferable. My pot holder was a simple square one, with no bells and whistles. As for the batting, felt, wadding or drape cloth are most common, but if you don't have any of those, and you only plan to use the pot holder for the decoration, you may use polyester batting instead.
Attention! Polyester batting is highly thermal conductive and has a low melting threshold.
You’ll need to cut two square pieces, one sole-colored and one printed. Don’t use vividly colored prints; the fabric should not distract attention from the embroidery. It would be better if one of the colors of the fabric will match one of the main colors in your design.
Out of the embroidered piece, cut out a pocket with seam allowance, so that the design is right at the center. Lay a piece of lace on top of it, facing into the right corner. Cut with allowance, in case it shifts during sewing, and you don’t want to rip it off.
Prepare the binding. It is usually cut on a bias, but if you don’t have enough material, you may use a simple rectangle instead.
First, I stitched the batting and the beige fabric for the back part of my pot holder. These are simple square pieces, no difficulties here. You may mark them for better alignment, but I did it by eye, and it came out fine.

Then I stitched the pocket and the lace to the front part. I ironed out the edging so that it would sew easier, pinned the corners and carefully stitched along the edge. Now be very careful and make sure that the stitch goes along the top edge of the binding in one go and doesn’t slide down the lower one. If you set your machine at a low speed and keep steadying it along the way, it will come out fine. Be extra careful at the corners (alas, I didn’t manage to achieve perfection here).

I don’t like basting and step-by-step stuff, all this dilly-dallying just doesn’t agree with me. But if you prefer to work that way, you can baste the thing first.
Cut your binding a little longer than the perimeter of the pot holder; we’ll make the surplus into an eyelet. Your pot holder is ready! You may insert your favorite recipe into the pocket.


Original text by Mary Stratan
Wardrobe revamping: a dress with ‘bat’ sleeves
A serger machine should not remain idle. Let’s use it to freshen up your old clothes and sew a knitted dress with ‘bat’ sleeves. In this tutorial, I’ll be employing simple dress sewing techniques: doing a blind hem on the serger and also attaching neckline facing. You’ll enjoy the work and the new dress will uplift your mood.
To do this job, you’ll need:
Fabric Sewing threads Serger and invisible stitch foot Adhesive sewing interfacing material for knits T-shirt or blouse pattern with 'bat' sleeves In order to buy the right amount of fabric, you need to know the length of your dress. Place the measuring tape at your shoulder and go all the way down (make sure that it is straight). Measure the desired length. The length of the piece of fabric will equal two lengths of the dress plus 20 cm.
Wash or soak the fabric in hot water for approximately an hour. You need to do this in order for the fabric to shrink before you cut it. Skipping this step, you risk getting a smaller dress after the first washing.
A dress with ‘bat’ sleeves. Cutting
Fold the fabric in half, with its right side inside. Fold the T-shirt in half and align its fold line with the fold line of the fabric. Trace the outline with a piece of chalk.
If you don’t have a blouse with ‘bat’ sleeves in your wardrobe, use a close-fitting T-shirt to find the key points, or a sewing pattern, changing the values to suit you.


Having traced the outline and taking all basic measurements — chest, waist, and hips circumference — cut the back part with a 0.7 cm seam allowance. Place the cutout on top of the second piece of fabric, folded in half, and cut out the front part, making the front neckline approximately 3 cm deeper.


Out of the remaining fabric, cut out a strip for the loops that will keep the belt in place. Sew, turn it right side out and press.


Place the front and the back parts together, their right sides together. Position the belt loops at a waistline, over the side seams. Pin the side and shoulder edges, stitch the parts together on your serger with a 4-thread stitch. Attach the belt loops to the side seams.


A dress with ‘bat’ sleeves. Facing
Transfer the back and front neckline to the tracing paper, move down 3–4 cm down and cut out your future facing pattern. Glue the sewing interfacing material for knits to the piece of fabric. Cut out your front and back facing, together with seam allowance.


Stitch the short sides together. Baste and finish the edge with a 3-thread stitch on your serger. Place the facing and the neckhole to each other, right sides together, and pin.


Stitch with your serger, pin, and press lightly. Sew the facing to the neckline with invisible stitches.


A dress with ‘bat’ sleeves. Hemming
Mark the hemline on the right side of the fabric. Do the blind hem on your overlocker. You’ll know how to do that from our Blind hem with your serger tutorial (Link will be here in the future).


Cut out the belt 11 cm wide (length should be equal to your waist circumference plus 3 cm). Attach the hooks, folding seam allowance inside.


Your dress is now ready! Get your hair done, add some bijou and show off your new garment!

Original text by Irina Lisitsa
P.S. Sewing pattern

Clothes repair: How to move a zipper to another side
While sewing a pair of shorts or pants, a beginner tailor might easily, in the heat of work, make a mistake of attaching a zipper on the ‘men’s’ side instead of ‘women’s’ and vice versa. These shorts with a zipper on the ‘women’s’ came to me as the result of a young man’s hasty shopping. An unusual order resulted in a tutorial, which I’m now sharing with you.
How to move a zipper to another side. Materials
Shorts A sewing machine A zipper foot A spare zipper (if necessary) Threads and needles, scissors, a seam ripper How to move a zipper to another side. The work order
This is how the shorts looked before I started working on them. I want to call your attention to the waistband; we’ll be making changes to it as well.


A ready garment is not that different from a semi-finished one when it comes to preparation. You’ll need to get rid of unnecessary stitches and deconstruct the unit. Pick up a seam ripper and carefully deconstruct the whole thing. Don’t touch the cording or edge finishing made with a serger.


Let’s proceed to the zipper. On the fly front guard there already is a line that will serve you as a guide for sewing a zipper. Baste the zipper to the wrong side. Install a zipper foot on your machine and stitch the zipper tape.
Baste or pin the front fly extension to the other side of the tape and stitch. In order to prevent the pieces from getting nipped in the course of sewing, you may fold them in half and pin.


On the right side of the garment, mark where the topstitch will run. Align the edge of the zipper unit with the edge of your garment. Stitch the parts together.


Fold the zipper unit to the wrong side and topstitch along the edge from the lower to the upper edge. Edge stitch foot is your little helper here.


Set the values according to your own taste. You can easily determine the stitch length by simply measuring it with a ruler on a ready item. Different embroidery machine models have different stitch settings; there is a lot written about them in the manual. It often has tables that help to quickly choose the right stitch and the values.


Topstitch the fly guard along the drafted line. After that, join the free edge of the zipper tape and the garment.


This is how my shorts looked like after I relocated the zipper. Stitch the lower part of the front seam under the topstitching line to the center point where the seams meet, one or two times. Join the parts with their wrong sides together, and topstitch on the right side (optional).


All that’s left is to sew a waistband. In order to do it evenly, join the waistband and the garment, beginning at the center back. Evenly distribute the waistband, paying attention to where the side seams meet. If there are the belt loops, use them as guides. Stitch the waistband to the garment, then fold the waistband lining to the wrong side and topstitch along the lower edge or do the shadow seam. This will help to lower the burden on the first seam, and also to join the inner side of the waistband to the outer one.


Sew the buttons back on.
Compare the two photos. On the left are the shorts how they came to me, on the right — the shorts after I repaired them. This tutorial uses an unusual way of sewing a zipper.


In the clothing repair shop where I saw it first, it was called ‘the quick one’ and was intended for speedy clothes repair.
Ways of creating a backpack sewing pattern
Backpacks remain in trend for a long time. Handmade backpacks, being unique, are valued most highly. A sewing pattern, suitable fabric, and decorations are all you need to create a stylish backpack at home. A creative approach and the enthusiasm of the seamstress also contribute to the success of the matter.
Preparations
In order to create a backpack by hand, you’ll need:
A needle Threads A thimble Scissors Fabric A piece of dry soap for drawing.
Best fabrics for a backpack:
Denim (without elastane); Cotton — it breathes, maintains shape and is agreeable to the touch, an important point as you will wear it on your back; Dense synthetic fabrics — they come in handsome patterns, bright and printed. Bags made of such fabric do not need additional decoration.
Make sure that the fabric doesn’t stretch too much under the strain and doesn’t crumble on bends. One disadvantage of synthetic fabrics is their ability to absorb smells. A synthetic backpack also feels unpleasant on the back in summer. Synthetic fabrics don’t breathe; they also hold water. You may use this to your advantage, making your bag double-layer to protect things in it from rain.
For the lining, the following fabrics are most common:
Satin — dense, reliable, and wear-resistant. Rayon — even more reliable than the satin. Cupro — similar to natural silk, soft, and stretchy. Polyester — durable and undemanding fabric, mud-resistant. Sateen — made of cotton and silk threads. Netting — has holes, breathes. Taffeta — a coarse fabric that maintains shape. Now, all that’s left is to decide how to sew a backpack without expensive garment accessories. You may create your own or take accessories off an old bag, coat, and other such things.
You may use these for decoration:
Belts, buckles, and other fasteners ripped off the old clothes. Leather or fabric fringe. A bunch of twisted colorful yarns (they will serve as strings). Curious-looking buttons, beads, and rhinestones. Ropes of various diameters and colors. Felt appliqué. Quilt, ribbon embroidery. Decorative zippers. Choosing decorations, you must keep in mind that they will be subjected to intense wear and tear and soil, too. So unpleasant when a ruined appliqué or a lost bead makes the whole garment unusable. Detachable garment accessories make washing much easier and allow you to revamp your old item in a simple way — by changing the color of a cord, for instance.

You can create a hand-made backpack in two different ways: using your embroidery machine or your own hands. The first way is quicker and easier.
Tools and materials:
Dense sewing fabric
title="Capro and polyester fabrics"
The lining: cupro and polyester

The lining: satin and rayon

The lining: taffeta, netting, tulle netting
Garment accessories
How to use a sewing pattern
If a newbie seamstress doesn't know how to sew a backpack with her own hands, a step-by-step guide and a sewing pattern is a must. They will help to bring her project to life. There are ready-made easy-to-transfer full-scale sewing patterns with measurements.
To draft your own pattern, you’ll require the following:
A sheet of paper (you may use tracing paper or a newspaper instead) A pencil A measuring tape A ruler A triangle ruler A French curve for rounding corners can be made by hand. Draw a circle on a piece of cardboard with an 18–20 cm radius and cut out one-third of it. With such a contrivance, you will be able to make symmetrically rounded corners.
To draft a simple backpack sewing pattern, you’ll only need two measurements:
shoulder width; center-back length from the natural neckline to the waist.

On paper, draw a rectangle, its width less than your shoulder width. An important point: the backpack should not go below waist level, it would be inconvenient to wear. After that, draw a vertical line through the center of the rectangle — the center axis. Now fold the paper along the axis and draw the preferred outline of your backpack. Cut along the outline to get a symmetrical pattern piece. If you plan to attach things like pockets or cover or a movable bottom, it would be easy to mark them on the basic pattern, adjusting the sizes.
In order to decipher the pattern, you need to learn the key notations:
The line with the arrow — lengthen. The line with small triangles — the joining line is here. Identical numbers in the inner area — these pieces match together. The crosses work as alignment marks. The arrow between the lines is a place for a ruffle. A crisscross is the place for a button. If you've decided to use a ready complex pattern, you’ll need to enlarge it. On the pattern, measurements are given in cm. In this case, it’d better to use a dense fabric instead of paper. The cutouts are placed on top of the fabric and traced with a piece of soap, sharpened on one end. Before cutting out parts of the pattern, make sure that seam allowance is included. More often, it isn't, and therefore, you’ll need to add 1–1.5 cm on all sides. Sometimes the enclosed seam is used — first, the fabric is folded the wrong side out and stitched, then turned right side out and stitched again. Seams executed in this fashion look neat and add support to the backpack. They require a larger seam allowance.


Making a sewing pattern according to the model
Sewing your own backpack allows you to choose any model you like. What you need to understand that copying the manufactured models may be futile, due to the lack of the frame and finishing (plastic edges, metallic corners, coarse bottom, etc.). Even if your pattern is accurate, the backpack might turn out quite different.
The advantage of homemade backpacks is the individual approach that makes them stand out. It improves the overall imagery, visible in decor and unusual joining seams.
Backpack for kids
Kids like backpacks shaped like animals. Bunny ears or button eyes are easy to attach, and will make a child happy.
On a basic pattern, the upper part must be narrowed. The backpack should resemble a triangle with its apex facing upward. The bottom is made according to the pattern. You can make it two-part, joining the pieces accordion-style and strengthening the edges with a cord.
The upper part will be gathered with a cord; to prevent the things from falling out, a flap cover may be added.  Pom poms look marvelous on kids’ backpacks.
If the kid will wear it to school, you may add the compartments with fasteners for books and exercise-books. Use thin fabric that doesn't soil easily. A detachable lining will be easier to wash.

Sewing a pineapple-shaped backpack
Cut four rectangular pieces, two out of your main fabric, two out of the lining fabric.

Cut and stitch the future rings for the cord.

Stitch the rings to the main part of the backpack.

Cut and edge finish two rectangles.

Join the main part to the rectangular pieces and stitch the base.

Align the openings, pin, and stitch.

Prepare the four rectangular pieces, draw the lines and stitch.

Cut out the pineapple crown.

Join the lining to the main part.

Join the lining to the main part.

Insert the cord (a ready one or made by you).

Draw the cord through the rings and fix them with a clamp.

Drawstring bag
The most convenient shape for a hand-made backpack is a drawstring bag. It is a godsend for creative people. A simple structure leaves room for creating images, from dreamy and romantic to ascetic ones.
A drawstring bag is a sack with strings on top and shoulder-straps. A well-known, traditional shape. A sewing pattern for such a bag is rectangular. The bottom edges may be rounded or left as is. The size depends on the maker’s wish.
The upper part is not narrowed down, as it is gathered with the strings. The fabric should be soft, that ruffles beautifully — in that case, the upper part, folded like a hand fan, will be a decoration in itself.
Romantic drawstring bags are ideal for slim young girls. You may decorate them with pleated straps, and to attach a fringe with beads to the edges. For a mature woman, a backpack bag may be made into a carry-all. The color of the bag should harmonize with the dress, and a brightly colored neck handkerchief may be wrapped around her neck and shoulders. A khaki drawstring bag is fine for men who prefer casual style. A drawstring bag made of thick water-repellent fabric will be indispensable while hunting, fishing, or just hiking. Thick ropes may be used instead of straps. You don't even need to sew them. Colorful ropes for women and restrained sole-colors for men. You may adjust the strap length simply by tying up the two ends where the knot will not rub sore. Straps like that make the backpack look stylish.
A shoe bag made of an old pair of jeans:

The necessary materials

Shape and sew the bottom.

Shape and sew a pass-through for the string.

Sew the ring for the ribbon.

Stitch the ribbon at the bottom. They will serve as straps.

Backpack made from an old pair of jeans:

Many people ask how to make a backpack without a sewing pattern. If you don’t have a ready sewing pattern, you can draft it yourself or find a tutorial that shows approximately what you want and take the pattern from there.
The easiest way is to make your backpack bottomless. In such cases, a front part of the backpack is enlarged to serve as the bottom as well as the front. The following measurements are approximate, you’ll need to make some changes to them in order to suit the pattern to your tastes and needs.
The back part, slightly narrowed down — 26 cm wide. You may add about 3 cm on each side in the middle. The front part is cut as a semicircle with a 38 cm radius. The flap cover is rounded. It should be one part with the back. It should drape freely and elegantly onto the gathered top. The straps are made of denim. If you don't have a sufficient amount of material, you may substitute denim for a decorative cord. If wished, a hanger is attached, so that the backpack is easy to pick up. The center of the semicircle and the lower edge of the back part are aligned along the vertical centerline of the pattern. The edges of the semicircle are stitched to the back part. The upper part of the backpack is gathered with strings and covered with a flap. The straps are stitched to the upper and the lower edges of the back part.
For this model, you’ll need a very wide piece of fabric. If you don’t have a sufficiently wide piece, you may sew it from pieces, because this type of backpack may be quilted.
A backpack from an old pair of jeans
Draw the parts of the future backpack.

Cut out the pattern.

Sew the bottom, the parts, and the flap.

Attach the denim straps.

Sew the handles, if necessary.

The fabric should not be threadbare.

Patchwork backpack
Being skillful at patchwork allows you to create beautiful garments out of scraps. You can join the fabric pieces haphazardly or create a particular pattern.
It is not rational to cut the existing length of fabric to pieces, better to use the trimmings and leftovers already accumulated. For this reason, don’t try to make a facsimile of a backpack you’ve seen somewhere. Instead, find the backpack you like, alter it to suit your needs.
A patchwork backpack without a bottom may be decorated according to your tastes. For example, a flap can be rendered as a divergent beam of light or a cluster of petals. The straps might be made of horizontal strips or pleated. The front part may be sole-colored or contain vertical insets that look beautiful between the pleats.
Before sewing a new backpack, you should make a sewing pattern. Just draw the shape of the future item on paper, then cut and trace the pattern to the fabric. Don’t be afraid to spoil the materials in case something goes wrong. Failure helps you to master the necessary skill.
Stitching the scraps of fabric into one piece.

Cut the fabric according to the simple pattern.

Out of the patchwork piece, prepare the flap with the clamp.

Make the slash pockets with zippers on the front part.

Slash pockets from inside:

The front and the back parts remain sole-colored.

Sew the hanger, the flap, and the straps.

The back part and the lower part:

Join the front part to the back.

Draft the pattern of the bottom.

Sew the bottom as pictured on the pattern.

Sew the bottom to the front.

Prepare the lining.

Sew parts of the lining.

Sew the base and attach the upper flap.

Stitch the edging.

A ready model should be supplemented with a cord.

Make the openings for the grommets and draw the cord through them.

A ready patchwork bag:

Original text by sumki.guru
title="Owl backpack"


Machine  Embroidery is a timeless art that has evolved from hand stitching to modern machine embroidery. Digitizing embroidery designs, the process of converting an image or artwork into a digital embroidery design, is an important step in producing high-quality embroidered items. However, with so many options available, it can be overwhelming to choose the right digitizing software. In this guide, we'll share some essential considerations to help you make an informed decision.
Choosing the Right Digitizing Software
When selecting digitizing software, you need to determine the features that meet your needs. Here are some important factors to consider:
File Formats: Check whether the program creates and saves the file formats that your embroidery machine can read. It is critical to ensure compatibility between your software and machine. Pricing: Digitizing software prices can vary significantly, from a few hundred dollars to more than $15,000 for professional-grade software. Consider your budget and requirements before investing in a program. Add-ons and Ad-vanced Versions: Most machiine embroidery digitizing software comes with basic features and add-ons or advanced versions that provide additional capabilities. Decide whether you need these extras or not.
Support and Training: Look for programs that provide adequate support, training, and updates. User-friendly software with excellent customer support can save you time, money, and frustration. Auto Digitizing Function: Some software comes with an "auto digitize" function that automatically converts artwork to embroidery design. However, this feature may not work well for complex designs, and you may need to tweak the settings manually. Conversion to Multiple Formats: If you plan to sell your embroidery designs, it's important to convert them to multiple file formats. Not all programs can meet this requirement, so verify before investing. Density and Other Adjustments: A good digitizing program should provide easy-to-use density, pull compensation, underlay, and other adjustment tools to help you produce high-quality designs. Undo Steps: Digitizing requires attention to detail, and sometimes, you may need to undo a few steps. Consider a program that provides a sufficient number of "undo" steps or allows you to save designs at different stages. Fonts: Determine the number and types of fonts available in the software. Check whether you can use TrueType fonts and whether they can be digitized automatically. Brick and Mortar Sales: Finally, if you plan to purchase software from a physical store, be aware that salespeople may pressure you into buying a product that may not suit your needs. Do your research, and go in prepared. In Conclusion
Digitizing embroidery is an essential process that can help you produce beautiful embroidered items. When selecting software, make sure to consider the factors we've discussed in this article. The right software can help you create stunning embroidery designs that stand out from the crowd.
Pull Compensation - options for different fabrics
When the needle penetrates the fabric and the top embroidery thread connects and wraps around the bobbin embroidery thread it locks and creates a pulling in effect. Most fabrics require that Pull Compensation be added in order to compensate for this push and pull effect brought about when you stitch an embroidery design into the fabric. When stitches are applied to fabric some degree of pull or push may occur. The stitches can either pull the fabric in on the sides or push the fabric out on the ends, adding a small amount of extra stitches in the direction of the angle of the fill or column. Stitch length (long stitches as satin generate more problems), stitch type, density, underlay, fabric type and even type and amount of stabilizers (tear-away, cut-away, water.. etc.) used are factors that can account for the amount of pull or push you might experience. A very simple description is that pull compensation makes an adjustment to the width of the satin or fill stitch area that in appearance seems to not be wide enough. Compensation for pulling is used in 99% of machine embroidery designs. In this case, we used a multi-layer complex design from our collection Teddy Bears Machine Embroidery Designs.
Best compensation value for Wilcom ES 2 drills, cotton - 0.20 T-shirt - 0.35 fleece, jumper - 0.40 lettering - 0.2-0 In other words, a gap may be forming between an outline stitch and a fill stitch area which may result in poor registration of the embroidery design. Pull compensation broadens the rows of stitches to adjust for this. You will not always see this problem when digitizing the embroidery design and viewing it on your embroidery software screen (example Tajima Pulse Maestro 13), but when embroidering the design, gaps will appear between fill areas or fill areas and outlines.

Satin or Fill stitches
Tips: All types of stitches create the push-pull effect, but it is most prominent when you are using Satin stitches or fill (tatami or complex fill) stitches. This push-pull effect is more prominent in large areas of your design such as your complex or tatami fill areas. You do not add push or pull compensation to the run stitches that you are using for a border. If your borders do not stay in registration with your fill area, it is best to make adjustments to the fill area of your machine embroidery design.
Pull compensation is only added to two edges of the embroidery design, relative to the angle of the fill (complex fill) area. Visualizing a square object, if the angle of the square is set to either 0 or 180 degrees (for any embroidery software probably any value - Punto Softeamweb -45 degrees), the pull compensation will be added to the horizontal edges of the design; if the angle of the stitching is set to either 90 or -90 degrees, the pull compensation will be added to the vertical edges of the design. Evaluation of your design before the final sew-out is an absolute must. There is a tendency with fill stitches to pull and push the fabric in opposite directions, causing the design to appear distorted. Often, compensation can be made when the embroidery design is digitized (on embroidery software), taking into consideration the fact that there will need to be some pull compensation added to design sections, making adjustments by varying the stitch direction, amount of underlay and the stitch density. An example of when you may need to add pull compensation is when a circle containing fill stitches is outlined with a satin stitch or straight stitch. The two areas may not meet, causing a gap between the outline and the fill stitch. If the circle tends to flatten out on one or two sides, an adjustment can be made during the digitizing of the design. What happens in this instance is that the fabric is being pushed in one direction by the actual stitching. By adding pull compensation to the fill stitch of the circle and/or changing the fill direction this can be corrected. If you are not the digitizer, you may be able to make your own adjustments by using editing software such as Embird Editor, adjusting the pull compensation slightly. You may not find the correct amount of pull compensation to add the first time, so it is critical that test sew-outs of the design be made after every change. Certain types of stitches do not allow for pull compensation. A fill or satin stitch has width to it as part of its design, so pull compensation can be added. Outline stitches such as a straight stitch, motif outline stitch or manual stitch outlines are used to define a shape or outline an embroidery design and do not have width to them, so pull compensation cannot be added to this type of stitch. If you did wish to add pull compensation to an outline, changing the outline to a satin stitch would be one way of overcoming this problem. One disadvantage to changing a straight stitch to a satin stitch is that it increases the final stitch count. If a stitch count is a consideration and the increase is too significant, try adding the pull compensation to the fill shape to meet the outline stitch. The actual stitch length of the fill stitch may also be altered along with the pull compensation and only slightly affect the overall stitch count.
Pull compensation for text embroidery
Tips: Text also needs compensation. Some letters have horizontal columns, while others have vertical columns. When the threads run horizontally, they lie nicely, but the density will push the threads apart and make the letters slightly taller. The pull is sideways and is not very visible to the eye. With vertical columns, however, the density pulls the fabric together and can make a particular letter appear shorter than the others. Good text will not appear even when viewed on a computer screen. Pull compensation will be worked into the text so that the letters will appear the same height when they are sewn onto the garment.
Pull compensation will not solve puckering. If you are having puckering problems, one of the following may be the problem:
Embroidery design may be too dense for the material on which it is being stitched. Reduce the stitch density of your embroidery design or portions of your embroidery design that are causing you problems. One of the keys to successful embroidery is to keep the density as low as possible and still get the look you want. If you think an area of fill needs more thread, many times you will be better off leaving the top thread stitch density alone and increasing the stitch density of the underlay stitches. As a starting guide, set the density for column (satin) stitches at 3.5 mm to 4.0 mm and fill stitches at 4.0 mm to 5.0 mm, adjusting as necessary after doing a test sew-out.
Too many fills at 45 or 90. Change the fill to a direction other than 45 o or 90 o, even by only 5 or less and the machine embroidery design won't pucker so much.

Hooping and stabilizer
The fabric may not be hooped properly and is moving during stitching. Whenever possible, always use the smallest hoop possible for the embroidery design that you are stitching. A small embroidery design in an overly large hoop leaves more room for fabric movement. When hooped, your material should be tight but not overly stretched you should be able to run your little finger (with very slight pressure) in a circle over the hooped material and not push any material. If you are using the sticky paper method of hooping, be sure there are basting stitches around the outer perimeter of the design for embroidery.
The stabilizer may be providing insufficient support for the embroidered design. Whenever possible, a good quality cut-away stabilizer should be used. Cut-away stabilizers not only provide the best support during stitching but also continue to support the embroidery design throughout the life of the garment. Using a cut-away stabilizer such as a light polymesh stabilizer gives you the strength of a cut-away (1 or 2) and the ability to layer (layers) the stabilizer by adding more layers if necessary.
Improper thread tension. Check the tension of both the upper thread and the bobbin thread. An ideal tension is that the reverse of your stitching will show 1/3 top stitch on each of the outer edges and 1/3 bobbin stitch in the center.
If you're a modern embroiderer, you know that choosing the right fabric for your designs machine embroidery can be a daunting task. With so many types of fabric out there, it's easy to get overwhelmed and not know where to start. But fear not, this article is here to help you understand the three main categories of fabric used in machine embroidery and which fabrics work best with your embroidery designs.
Nonwoven Fabrics: Felt the Way to Go Nonwoven fabrics, such as felt, are made by layering and bonding fibers together mechanically, chemically, or with heat. This creates a thick and dense fabric with no spaces between fibers, making it ideal for embroidery.

Felt works well for embroidery because of its thickness and density, but it lacks drape and may pill, depending on the fiber used. While felt's uses in embroidery are limited, it's an excellent choice for creating patches and appliques.
Woven Fabrics: Finding Stability Woven fabrics, such as cotton, linen, silk, wool, rayon, and polyester, are made by spinning fibers into yarn and weaving them together on a loom. The way the yarns are woven determines the fabric's weave, with the most common being the plain and twill weave.

Woven fabrics have many variables, such as the fibers used, the weave used, and the thickness of the yarns. These factors change how much movement there is in the fabric, with looser weaves having more movement.
To stabilize woven fabrics, use spray starch and lightweight interfacing to make them more stable for embroidery. And always use the right stabilizer for your project, as shown in the photos above, using the correct stabilizer can make a BIG difference in how your project turns out.
Knitted Fabrics: Stretching Your Limits Knitted fabrics, such as French terry cloth, are formed by interloping one yarn and have a lot of stretch and movement, making them the least stable of the three fabric categories.

To stabilize knitted fabrics for embroidery, use an iron-on stabilizer for where the embroidery will be placed. Hooping the fabric is also highly recommended as it reduces fabric movement while being embroidered on.
Choosing the Right Fabric for Your Embroidery Designs Choosing the right fabric for your embroidery designs is crucial to creating something visually beautiful and functional. Understanding the properties of nonwoven, woven, and knitted fabrics will help you choose the right fabric for your projects.
The Fabric Assist Tool: Your New Best Friend One of the greatest innovations available to modern embroiderers is the Fabric Assist Tool found in Hatch embroidery software. This tool allows you to change the dimensions of an designs machine embroidery at the click of a button to best suit the fabric type you're embroidering on.
The Fabric Assist Tool is essential because different fabric types require different density and underlay settings for clean looking embroidery. Learning how to digitize your own embroidery designs or using intelligent software like Hatch can help you create the perfect design for your chosen fabric.
In conclusion, choosing the right fabric for your embroidery designs is essential to create something both visually beautiful and functional. Understanding the properties of nonwoven, woven, and knitted fabrics, using the right stabilizer, and using the Fabric Assist Tool in Hatch embroidery software will help you take your embroidery to the next level. So, go ahead and experiment with different fabrics and techniques, and have fun creating unique and stunning designs machine embroidery !
Are you looking to add some fun and creativity to your embroidery designs? Look no further than applique machine embroidery! Not only are these designs fun to create, but they also look and feel great. If you're new to the world of applique, don't worry - it's easier than it seems. In this beginner's guide, we'll show you how to create beautiful and fun designs using applique from our embroidery library .

Funny dog applique free embroidery design
What is Applique Embroidery design?
In its simplest form, applique embroidery is a technique where smaller pieces of fabric are attached and sewn within the design. This creates a unique and textured look that's perfect for adding personality to any project.
Why Choose Applique Embroidery?
One of the main reasons why applique embroidery is so popular is its versatility. With this technique, you can choose from a variety of fabric types and patterns to create a design that's uniquely yours. Additionally, applique embroidery is a great way to reduce the total stitch count in a design. By replacing larger fill areas with a simple sheet of fabric, you'll have less run time on your machine without sacrificing the overall look of the design.

How to Create Applique Embroidery Designs
Now that you know the basics, it's time to get started! Here's a step-by-step guide to creating your first applique embroidery design:
Rooster kitchen potholder free embroidery design
Choose your fabric. Select the fabric you want to use for the applique design. Make sure it's a good quality fabric that will hold up well through the embroidery process. Hoop your fabric. Once you have your fabric selected, it's time to hoop it up. Make sure the fabric is stretched taut and secured tightly in the hoop. Digitize your design. Using embroidery software, create your design and digitize it for the applique technique. Keep in mind that you'll need to create a separate file for the fabric piece that will be appliqued. Stitch the placement line. The first step in the embroidery process is to stitch the placement line for the fabric piece. This line will help you properly align the fabric in the design. Place your fabric. Once the placement line is stitched, it's time to place your fabric. Simply lay the fabric piece over the placement line and secure it in place. Stitch the tack-down stitch. The next step is to stitch the tack-down stitch, which will secure the fabric in place. Trim the excess fabric. After the tack-down stitch is complete, trim the excess fabric from around the edges of the design. Stitch the finishing stitch. Finally, stitch the finishing stitch to complete your applique embroidery design. In conclusion, if you're looking to add some creativity and fun to your embroidery designs, applique machine embroidery is a great option. With a little bit of practice and patience, anyone can create beautiful and unique designs using this technique. So why not give it a try? We guarantee you won't be disappointed!
Embroidery is an art form that requires patience, skill, and the right materials to achieve beautiful results. One crucial component that every experienced embroiderer knows is stabilizer. The use of stabilizer helps to support your fabric and thread, ensuring that your design is aligned, and your fabric doesn't distort or pucker. In this article, we'll answer some of the most common questions about stabilizers and provide you with a machine embroidery stabilizer guide to help you get professional results.
What Brand Of Stabilizer Should You Use?
When it comes to choosing the right brand of stabilizer, we recommend buying from a reliable embroidery source online or supporting your local dealer and using the brand they sell. In most cases, we shop for stabilizers based on price point rather than who they're made by because most stabilizers are created by a handful of main manufacturers and then white-labeled by different embroidery brands. However, avoid purchasing stabilizers from "big box stores" such as Walmart or Michaels. While you may save a few bucks, the quality of the stabilizer is usually subpar, and you won't get a consistent stitch.
Why Is Stabilizer So Important?
Stabilizer is the foundation of your embroidery, and it's essential to use the proper stabilizer for the best results. Without it, the registration of the design may be off, and you might experience puckering or distortion of the fabric. Think of stabilizer as the glue that holds everything together. Your choice of stabilizer can "make or break" your stitch out, and a poorly stabilized fabric can cause your design to look unprofessional.
The Main Types of Embroidery Stabilizers and When to Use Them
There are three types of embroidery stabilizers: tear away, wash away, and cut away. Each of these stabilizers is also available as fusible or tacky. The type of stabilizer you should use depends on the fabric you're using.

Use Cut Away stabilizer if the fabric has any stretch – t-shirts, sweatshirts, knits, etc. Use Tear Away stabilizer if the fabric is stable woven. Use Wash Away if using a sheer fabric or freestanding lace design such as our Vintage Lace, 3D Flowers, 3D Butterflies, or 3D Leaves, etc. In addition to the three types of stabilizers, most brands also have specialty products to use in your embroidery designs . These include fabric preps that help stabilize fabrics that unravel, distort, or pucker. They add stitch counts to your fabric, so it's ideal to use with a heavy stitch count design. There are also products that add varying textures. They add a firm shape or a soft foam shape, which help with applique without adding any bulk and cover the stitches so they won't irritate your skin. These products do not replace stabilizer but can be used with tear away or cut away stabilizers.
In conclusion, if you're looking to achieve professional results with your embroidery, it's crucial to understand stabilizers and the different types available. Using the right stabilizer for your fabric type will ensure that your designs machine embroidery looks its best, without any puckering or distortion. By following this machine embroidery stabilizer guide, you'll be on your way to creating beautiful, high-quality embroidery that stands out from the rest. And always remember, a well-stabilized fabric is the key to a successful embroidery project.
Embroidery is a fantastic way to give your items a fashionable touch. From T-shirts to baseball caps, embroidery has been a favored decorative option for ages due to its aesthetic appeal and longevity. But not all materials are created equal when it comes to achieving the ideal stitch.
Numerous factors must be taken into consideration when selecting a fabric for custom embroidery. Although most apparel items can be embroidered, selecting the right fabric can make all the difference.
Here's a simple guide to help you choose the best fabric for embroidery.
Why is Fabric Selection So Crucial? Embroidery, even when done by embroidery machine, is a delicate process. The designs can appear different on various fabrics, which is why embroiderers consider more than just the look and feel of a material. The material's construction is also considered when selecting the perfect fabric for an embroidery project.

Windy morning embroidery design
Most fabrics, including cotton, silk, linen, and wool, are woven, but their durability is determined by how tightly the material is woven. The tightness of a fabric's weave is referred to as its thread count. Non-woven fabrics such as felt are very robust and do not stretch much at all.
Challenging Fabrics Embroidery can be challenging if the weave of a particular material is not tight enough. Fabric that is not robust enough to support the weight of the design can become puckered or even tear. As a result, knits and other lightweight fabrics can be challenging fabrics for the embroidery process.
Don't despair if you encounter such fabrics. Many embroiderers use a stabilizer, an additional piece of material that helps support designs on flimsy fabrics. Stabilizers are often used to embroider knit T-shirts without puckering or other issues. However, some dense stitching designs can still be too heavy for knit fabrics, even with stabilizers.

Wild cheetah embroidery design
Durable Fabrics So, which fabrics are the go-to choices for embroidery? Cotton, linen, silk, and wool are all popular options because they are tightly woven fabrics. This creates a stable surface, which is perfect for embroidery. These fabrics can support denser and more complex patterns than lightly woven fabrics.
Cotton is frequently used to embroider handkerchiefs, T-shirts, and aprons. Jersey fabric is a bit stretchier but is usually made from a combination of cotton, wool, and synthetic fabrics, making it another excellent choice for embroidery designs (especially with the aid of a stabilizer). Cotton/polyester blends are another fantastic T-shirt option that offers greater breathability than cotton.
Other Factors to Consider When selecting a fabric for an embroidered item, there are several things to keep in mind, in addition to the fabric itself. You should also consider the color contrast between the thread and fabric of your item. Low-contrast color combinations may render delicate embroidery difficult to see.
It's also essential to consider the size of your design on the item. A tiny embroidered logo may look fantastic on a baseball cap, but it may get lost in the fabric of a T-shirt or jacket.
Embroidery designs is a delicate art that requires expertise to achieve the best possible results. The experienced team at Full Press Apparel is here to assist you in selecting the ideal fabric for your custom items, as well as the colors, design, and desired appearance.
Are you new to the world of machine embroidery? One of the first terms you'll hear is "backing" or "stabilizer." Embroidery backings are essential for creating stability when machine embroidering on any fabric, particularly stretchy knits and polyester performance shirts. When it comes to starting an embroidery project, choosing the right stabilizer is one of the most important decisions you'll make. Proper stabilization is the foundation of excellent embroidery, and choosing the wrong stabilizer can lead to poor results. In this article, we'll take a closer look at embroidery stabilizers and help you make informed decisions when starting your next embroidery project.

Fashion teddy bear embroidery design
What is an Embroidery Stabilizer?
If you've ever worn an embroidered shirt, you've probably seen embroidery backing before. It's the fabric that sits behind the stitches, providing support during the embroidery process. Embroidery backings are typically wet-laid nonwovens, which means they're made up of random fibers held together by a binder. The non-directional nature of nonwoven backings makes them strong and stable for use as embroidery stabilizers. However, it's important to use nonwovens specifically designed for machine embroidery. Some people advocate using things like coffee filters, newspaper, or paper towels as backing, but these products can break up during embroidery, causing excessive lint in your bobbin cases and machine parts.
What are the Different Types of Embroidery Backing?
There are three major types of embroidery stabilizers: Cut Away, Tear Away, and Water Soluble. Most backings come in different weights, usually advertised as ounces per square yard. The heavier the backing, the more stability it usually provides. A good backing supplier will sell many different weights, types, and sizes of stabilizer in both pre-cut sheets and on rolls.

Mosaic horse embroidery design
Cut Away Backings
Cut Away backings provide the most stability and remain on the garment, keeping it stable after being embroidered. With a Cut Away backing, after you finish embroidering, you cut away the excess backing close to the design, and the rest stays on the fabric. For beginner embroiderers, we always recommend using a cutaway with most unstable fabrics and anything you're going to wear. Cut Aways are inherently more stable and will be more forgiving with some of the mistakes you make when you're new to machine embroidery. They're a great choice for stretchy knits and polyester performance shirts because they prevent embroidered designs from stretching with repeat wearing and washing.
Tear Away Backings
Tear Away backings are removed, or torn away, from the fabric after embroidery. They're generally less stable than cutaways and are used for light support, on less stretchy fabrics, and items where the back may be visible, like towels and linens. With Tear Away stabilizers, you just tear away the backing when you finish embroidering. For large commercial shops, this can speed up the entire embroidery process when encountering large jobs. Tear Away can also be used in conjunction with a Cut Away to provide additional support during embroidery without adding additional bulk to the finished garment.
Water Soluble Stabilizers
Water Soluble Stabilizers dissolve when immersed in water. There are two types of Water Soluble Stabilizers (WSS) – a film type called Badgemaster and a nonwoven fabric type called Vilene. Both work the same way, and it's personal preference which one you use. WSS should mostly be used for free-standing lace (FSL) type applications, where you need the backing to 100% disappear. Remember, this backing dissolves in water, so if you use it as a regular stabilizer, you'll lose stabilization under the
Are you a newbie in the exciting world of machine embroidery? Don't worry, we've got your back! Learning the ropes can be a little intimidating, but with a little bit of guidance and some practice, you'll be stitching like a pro in no time. Here are six tips that will help you master this craft and create stunning designs.

American military boot embroidery design
Invest in High-Quality Supplies
Before you start embroidering, make sure you have the right tools. The essential supplies you need are thread, bobbins, backing (also called stabilizer), needles, and good quality scissors. Invest in high-quality supplies designed for machine embroidery that are compatible with your machine. It's crucial to purchase from a reputable source, like Embroideres studio library.
Read Your Machine Manual
Your machine manual is your ultimate guide to understanding how your embroidery machine works. It provides valuable information on how to thread your machine, change needles or bobbins, use stabilizers, and access different types of stitches and embroidery patterns. By familiarizing yourself with your machine's features and functions, you'll be able to create designs with ease and confidence.

Christmas modern ball embroidery design
Learn How to Hoop Correctly
Hooping is the process of securing the fabric in the embroidery hoop to ensure that it stays in place while you stitch. Learning how to hoop correctly is essential to producing high-quality embroidery. Make sure you choose the right size hoop for the job, and use a stabilizer that's large enough to fit your hoop. Remember, you want your fabric to be taut, but not stretched, to prevent distortion and puckering.
Don't Digitize - Buy Quality Designs
Digitizing is a complex process that requires specialized skills and software. Instead of trying to digitize designs yourself, focus on mastering the operation of your machine. There are plenty of websites that sell high-quality digitized designs that you can use. Make sure to purchase from reputable sites, and avoid designs that violate copyright and trademark laws.
Practice Makes Perfect
The more you practice, the better you'll get at embroidery. Start with simple projects and work your way up to more complex designs. Experiment with different fabrics, backings, and threads to see what works best for you. Don't be afraid to make mistakes - it's all part of the learning process. The key is to keep practicing and learning from your mistakes.

Dandelion embroidery design 3
Join an Embroidery Group
Joining an embroidery group or forum is an excellent way to connect with other embroiderers and learn new tips and tricks. You can share your work, ask for advice, and get inspiration from other members. Facebook groups are an excellent place to start, but there are also many other online communities you can join.
In conclusion, mastering the art of machine embroidery takes time and practice. By following these six essential tips, you'll be on your way to creating beautiful designs that will impress everyone. Remember to invest in high-quality supplies, read your machine manual, hoop correctly, buy quality designs, practice, and join an embroidery group. Good luck and happy stitching!
Puckering [also known as cupping] is the gathering of material in an embroidery design which results in noticeable mounds of fabric and/or curled designs. This is undesirable in quality stitching and when it occurs, the cause of the problem should be determined and corrected. There are a number of factors which can contribute to puckering and they include:
Embroidery design
Often design stitch densities are simply too high and editing is required to reduce this density. A quality digitized design will produce a stitchout which compliments and flows with the garment .... not protect it, like a layer of armor.
Insufficient or improper underlay stitching can also lead to puckering. Underlay stitches serve a number of purposes and one of them is to attach the material being stitched to the stabilizer before the actual top stitching begins. This helps to control some of the “push - pull” effect which will occur during stitching. Long stitch lengths tend to apply more “pull” to the material being stitched than short ones. Sometimes puckering  can be reduced or eliminated by using shorter stitch lengths. For example, reduce 6 mm long stitches to 3 or 4 mm. Stitch direction can contribute to puckering. Designs having the majority of fill stitches running in the same direction or those that do not take into account the bias of the material being stitched, can produce puckering. If possible, direction of stitching should vary from one fill area to another and should run at an angle to the bias of the material. Improper pathing can also cause puckering. Stitching the outside areas of the design first and working towards the inside can result in the material being “pushed up” in the center. Generally, it is best to have a design stitch from the center - out [as much as possible].

Little Feet In Hands embroidery design
Stabilization
Stitching without sufficient, proper stabilization can produce puckering [especially in lighter and/or problem materials]. As a general rule in embroidery, consider using a quality 2 - 3 oz. cut-away for most jobs because not only does the cut-away offer the best support during stitching, it also continues this support for the life of the garment. Switch to specialty stabilizers [tear-aways, mesh, water solubles, etc.] only when the job warrants it. 
Hooping
Using a large hoop for a small design can lead to excessive movement and shifting of material .... which in turn can result in puckering. In order to limit material movement and reduce the chance of puckering, always use the smallest hoop possible and when hooping, the material / stabilizer should be taunt [but not stretched] in the hoop.
Thread tensions
An embroidery machine with excessively high thread tensions can cause unnecessary “pull” on the material beingstitched, which in turn can contribute to puckering. Properly tensioned, smooth, consistent running top and bobbin threads go a long way in creating a quality stitchout and help reduce problems like puckering.
Materials being stitched
Some materials [like nylon, silk, and light knits spandex and jersey materiasl] simply tend to be more prone to puckering than heavier, more stable ones [denim, fleece, heavy cotton, etc.] and when working with these more problematic materials, the embroiderer will have to do all that they can to eliminate the potential for puckering. Proper editing of designs, good stabilization , good hooping practices and avoiding overly tight thread tensions all contribute to reduced puckering problems. Use the above information on puckering as a guide. However as with most things in embroidery, each job will offer  its own variables and challenges which often need to be dealt with on an individual basis.
Embroidery Digitizing for Chenille
Unlike in every day embroidery  design for Chenille your will want to make sure your artwork is formed properly, this means you should review the artwork tools in previous blogs these Tools as its vital that you have a good understanding on how to reduce nodes, split anchors, join anchors and edit nodes.The artwork converting process is also very demanding on your computer some computers even new ones can cash when converting complex embroidery designs.
Computer Recommendations for Chenille Digitizers
Its very important to have a well tuned digitizing computer, I recommend a Pentium 4 or equivalent Quad core computer with Windows 7 or Windows 8 64 Bit with 8 to 16 GB of ram. I also recommend the fastest chip and at least a 64 MB video card for working on Chenille. If your computer is not fast enough you will have a lot of idle time when converting your large file.
When you have a vector file to convert check that all shapes are closed. Not doing this can sometimes cause undesirable results. Somes times it easier to convert them in sections versus the whole design.
Chenille Basic Example
Here is an image file and a Chenille Stitch file.

Most Chenille digitizers choose to use the option of creating the art work first and convert it to chenille, I have found that most people who use chenille do the art of the design and convert each section on its own. 

Chenille Basic Example
Step 1 Load the artwork into Tajima Image … Load
Step 2 Trace the red outline Using the artwork tool trace the red make a duplicate of this for later
Step 3 Convert the art work to Chenille Right click ..go to .. Convert segment too choose chenille
Step 4 Turn off all but the Chain Walk See Below 

You should now have a chain walk of the image.

Chenille Basic Example  
Step 5 Highlight the artwork , right click , goto transform , Choose offset, Copy offset ,
specify distance should be -.03 to -.05 

Step 6 Manually add a color Change,
Step 7 Convert the art work to Chenille Right click Go to Convert segment too choose chenille
Step 8 Turn off all but the Chain Walk See FIG 4 previously for example

Step 9 Add the Spiro Moss Fills of the areas indicate in white,
again using the artwork Tool to draw with and convert it to Spiral Chenille

Step 10 Make Sure you have 1 Chain and the Moss Fill should be Spiro

Step 11 Now you need to trace the B with the artwork tool so the design looks like Below

Setting should be similar 

Now you should be able to make a wide range of Chenille, Spiro Chenill and Mixed embroidery design with chenille depending on your machine. 
Mastering the Art of Terry Cloth Embroidery: Needles and Threads
The composition and properties of terry cloth
Fabric involves a looped pile, commonly employed in the production of towels, beach robes, bath slippers, bedding, and children's linens, as well as children's toys and even bar accessories.

Regarding the composition of terry cloth, it is primarily manufactured from cotton, linen, and less frequently, bamboo. The fabric exhibits excellent moisture absorption and does not stretch. The range of applications and the enumerated properties of terry cloth make it attractive for machine embroidery in both hobbyist and industrial contexts.
Recently, there have been instances of incorporating synthetic fibers into the fabric composition. This slightly diminishes the quality, but does not impact the embroidery outcome when used as a base material. There are also benefits. Terry cloth with the addition of synthetic fibers is employed in crafting items such as baby bibs, resulting in soft products that can be easily laundered following breakfast and lunchtime incidents.

Machine embroidery on terry cloth fabric requires consideration of density, thread twist, and loop height. These are the primary properties to focus on when mastering the technology of machine embroidery. The higher the loop, the greater the probability that stitches will sink into the fabric structure or will peek through the stitch coverage of the design. The thicker the material, the more likely it is that you will encounter problems when framing it, as securing the material in the embroidery hoop properly may be challenging. It is feasible but difficult; is it necessary? Let us proceed further.
Selecting the Perfect Needle for Your Project
When it comes to embroidering terry cloth, there's no need to stress over needle selection. The fabric can be beautifully embroidered using standard embroidery needles. However, if you do encounter issues, consider these specialized needles:
For embroidery on loose terry fabrics, opt for needles with a rounded tip, like those designed for jersey embroidery. This type of needle gently separates the material without damaging its structure.

When working with dense terry cloth featuring a high loop pile and a significant amount of synthetic fibers, utilize a sharp-pointed needle, such as a topstitching needle. This needle effortlessly pierces the material, preventing skipped stitches.
Navigating Thread Choices for a Dazzling Finish
If you've decided to embroider with metallic thread, use a needle specifically designed for this thread, as metallic threads can be finicky. When passing through the small eye of an improperly chosen needle, the thread may wear and lose its sheen, or worse, continually break.
When embroidering on terry cloth, feel free to use any threads (cotton, polyester, wool, etc.). The primary goal is to ensure the threads are durable and wear-resistant. Viscose and metallic threads may be less tolerant of frequent washing and poorly compatible with bleach and other chemicals used in laundering.

Advice on selecting the bobbin thread might not be groundbreaking. Use a standard bobbin thread (either black or white, depending on the color scheme of the design). The thickness of the bobbin thread depends less on the properties of the chosen material and more on the idiosyncrasies of your embroidery machine. Some machines, for instance, have been observed to be incompatible with very thin bobbin threads (No. 200).
When embroidering on terry towels, consider using a bobbin thread that matches the color of the embroidered layer. In this case, the reverse side will appear more elegant. Keep in mind that this approach will result in denser embroidery.
Guide to Mastering Fur Stitch Technique in Machine Embroidery
Unleashing Creativity with Fur Stitch: A Key Technique in Embroidery Digitizing
In DGML by Pulse there is an option which also come standard to allow you to make a stitch called a fur stitch. However I like the manual way which is available in many other levels. I will illustrate both in this document. Why should you use a fur stitch ? Well a fur stitch can be used as a layer to add depth to a design, here are a few examples where the design has a fur stitch as the base layer or as an accent.
Machine embroidery is a distinctive art form that demands mastery of specific techniques to yield remarkable designs. One such technique that can dramatically enhance your creations is the Fur Stitch. By understanding and perfecting this technique, you can revolutionize your approach to machine embroidery digitizing and transform your work into highly textured, realistic designs.
The Essence of Machine Embroidery
Machine embroidery thrives on precision and technique, translating intricate designs into a tangible reality. The real magic unfolds when a meticulously designed pattern gets transferred to fabric through the digitizing process, laying the groundwork for an awe-inspiring, embroidered masterpiece.

Example 1

Example 2 
So what are the two methods ?  Well in DGML by Pulse if you have Maestro level you will have the option to make a stitch called a fur stitch. 

This tool has some presets built into it . and here is what the tool stitch looks like. 

Here is what the satin tool option looks like both are very similar. Lower density is often associated with the fur stitch as its their to add texture.

When your using this technique your going to want to add a few layers of top stitches.  Here are the next several layers. 

These layers are made up of similar color palettes to allow blending on the colors using various patterns, densities and  stitch types will allow you to make detailed designs.  In this case the design used the fur stitch technique for all these layers, but at a lower density of 28 spi. 

In the above layers they used run stitches, and regular satin stitches to add the detail.  
After you pull all the data together you get one awesome design. 

Embracing the Fur Stitch Technique
The fur stitch technique holds immense potential for embroiderers looking to bring lifelike texture and depth to their designs. The "fur stitch" is a digitizing technique that involves varying stitch directions and lengths to mimic the look of animal fur or fluffy textures. When used adeptly, this technique can provide stunning realism to animal-themed designs, or add an extra dimension of texture to any piece.
How to Master the Fur Stitch Technique?
Understand the Concept: Begin by understanding that the fur stitch is all about playing with stitch lengths and directions. The goal is to create a look that resembles fur by layering stitches over each other and varying their direction. Analyze Real Fur: Before you embark on your digitizing journey, spend time analyzing real fur, if you can. Look at the direction, length, and density of the fur. This understanding will guide you as you map out your design. Digital Implementation: Start by laying the base layer of stitches, keeping them slightly longer than normal. After that, add shorter stitches, layering them to create depth and dimension. Stitch Direction: The stitches' direction must be varied and irregular to emulate real fur. The more random the stitches are, the more natural the fur will look. Practice Makes Perfect: Don’t be disheartened if your first few attempts don’t turn out as expected. The fur stitch technique requires patience and practice to master. Keep experimenting with different stitch lengths, directions, and densities. Expanding Your Embroidery Horizons with the Fur Stitch
Once you have honed the fur stitch technique, you’ll be amazed at how it adds depth and lifelikeness to your designs. Whether you are creating adorable stuffed animals, designing realistic wildlife scenes, or simply adding texture to an otherwise flat design, the fur stitch can elevate your work to new heights.
Conclusion
Embroidery is a skill, an art that evolves with every stitch you make. The fur stitch technique is a valuable tool in your machine embroidery digitizing arsenal, capable of transforming your designs into highly realistic and textured works of art. So, keep practicing, keep experimenting, and watch your designs come alive with the fur stitch technique.
Embrace this technique today and revolutionize your machine embroidery designs. The world of creativity awaits!

Recently Browsing 0

  • No registered users viewing this page.