Inspired by reading the websites
Footwear manufacture, whether of sport, casual or indoor variety, always has been and always will be a promising business. The customers may deny themselves food but won't go to work barefoot. Because it is hard to imagine the embroidery without connecting it to the item (except for chevrons), footwear manufacturing is a good way of expanding your embroidery services... Buy many questions arise when the embroiderer decides to begin decorating footwear. With what to embroider? On what to embroider? And what designs to choose? And if the answer to the first question lies within the area of knowledge of the equipment and materials used in machine embroidery, the answers to the other two relate more to the business acumen and understanding of the current fashion trends.
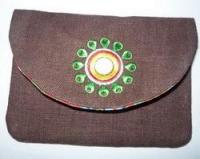
Embroidery on footwear: Slippers
Embroidery on slippers may be considered the easiest. Slippers are always in demand because they are not durable, so an average person buys three pairs a year; and besides, the are designed in such a way that you may hoop them without any trouble. One of the advantages of embroidery on slippers is a small embroidery area, which allows you to quickly complete a big order.
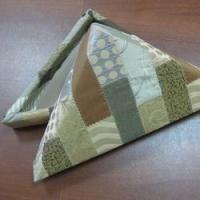
Embroidery on footwear: Felt boots (valenki)
Recently the demand for felt boots increased due to the cold and snowy winter. Many people wear both the Russian valenki and the European-style felt boots with good-looking soles, modern design, an embroidered top and sometimes a zipper on the side, all of which makes them much more like fashionable high boots than the ethnic footwear and makes one wonder: can I do something like that? One should not forget the high boots. Embroidery on high boots will make them more valuable and special and simultaneously will give the others the opportunity to make some cash.
Embroidery on footwear: Hoops
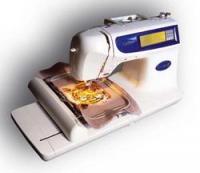
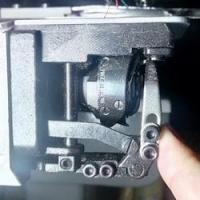
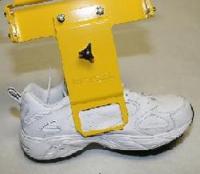
Embroidery machines manufacturers, aiming at increasing the demand for their products and make them more significant than the rival analogs, produce various devices that allow making the machine embroidery of the complex items simpler. Shoe Clamp, manufactured by EMS/Hoop Tech for Tajima embroidery machines, may be named as an example.
Hoop manufacturers supposed that the embroidery would in most cases be of a small size and would be positioned on the right side of the item.
Nowadays machine embroidery hoop size for embroidery on footwear is 2.54x6 cm, and the price is a bit too high for a small-scale embroiderer, but maybe sometime in the future...
I haven't figured out for what embroidery machines these hoops are intended hope you'll be so kinds as to help me with that.
If you don't own any modern commercial embroidery equipment, but I've managed to kindle your interest in embroidery on footwear, I recommend you to get acquainted with professionals. Among my Russian-speaking peers, there is quite a number of experts that embroider on high boots, felt boots and slippers, and I'm sure there is as much among out Western colleagues. If you are interested in how and where to use embroidery on footwear, welcome to our forum.
- Read more...
-
- 1 comment
- 3,253 views