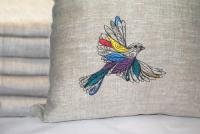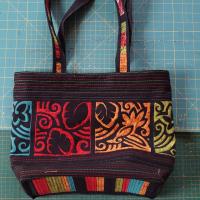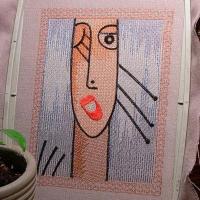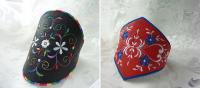
Where do you keep your bijou jewelry, beads, memory sticks, buttons, and other knickknacks? Boxes and tins aren’t good–the heart yearns for the beautiful. These cross stitch designs imitate the famous Florentine embroidery known as Bargello.
Below I explain how to actually sew and embroider an etui.
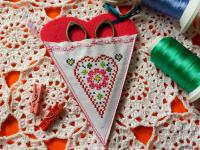
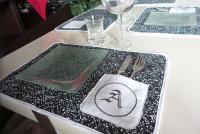
A textile etui with cross stitch embroidery. Materials
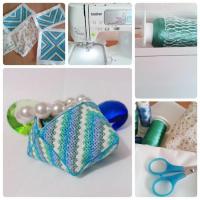
Printed cotton fabric Sole-colored cotton fabric Tearaway adhesive stabilizer Upper thread Underthread Scissors Machine embroidery design The sewing order (the image below)
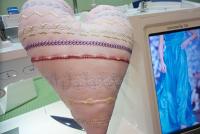
A textile etui with cross stitch embroidery. The making process
You can buy the design or create it yourself. For those who don't know how, there will be tutorials in future.
Prepare the design and working materials. I like doing it before the work starts, thus eliminating the possibility of missing something in the crucial moment.
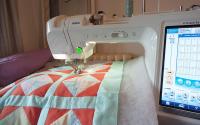
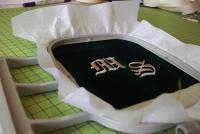
We’ll be using a sole-colored fabric. Attach the adhesive stabilizer to the wrong side. Hoop the fabric together with the stabilizer. Tighten the screw. After that, do the upper and lower threading and attach the hoop.
Hit the start button. The embroidery consists of three parts, two rectangular and one square. You need to embroider two rectangular parts and one square part, which will make the basis for your etui.
I recommend following the color chart that comes with the design so that to avoid gaudiness.
If you’ve decided to create your etui out of felt, you may forego the lining. In the course of embroidery, even cotton fabric becomes thicker, but I decided to leave the stabilizer and to add lining. In order to do that, embroider only the outer stitch on a sole-colored or printed fabric. As it comes last in the embroidery order, you need go to the editing menu of the design and skip the steps you don’t want to embroider.
Having embroidered one square and two sides for both inner and outer sides of the etui, cut out the details, leaving 0.5–1 cm for seam allowance. Remove the stabilizer from the seam allowance, it will be superfluous there. Sew first the outer sides, and then inner sides together (see the scheme). Insert the lining into the etui and stitch the two sides together. I sewed by hand, catching the back stitches.
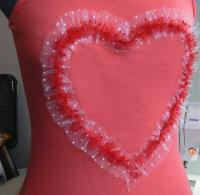
You can additionally decorate the item with beads, ribbons, tassels or charms, whichever suits your taste best.
In the end, you’ll get a nice textile etui where you can put your sundry. Such an etui may also be used as a box for a small present. Happy embroidery!
P.S. Explore other embroidery techniques here!
Original text by Mary Stratan
Free machine embroidery designs made in this technique can be found here.
- Read more...
-
- 3 comments
- 4,060 views